This post contains affiliate links. Purchases may earn me a commission at no extra cost to you.
Few things derail your workflow faster than a backspace key that suddenly stops responding. Whether you’re mid-essay or deep in a work email, every typo now becomes a frustrating ordeal involving your mouse and cursor.
The most common reason your backspace keyboard is not working is a software conflict, not a broken key. Accessibility features like Filter Keys or Sticky Keys, outdated keyboard drivers, incorrect input language settings, or a simple system glitch can all block the backspace key from registering. Before assuming hardware failure, you should test with an on-screen keyboard (OSK), restart your device, and check your accessibility settings. These zero-cost steps resolve the issue for the majority of users.
This guide walks you through a logical diagnostic sequence, from quick checks to advanced hardware diagnostics, so you can pinpoint the problem fast and get back to typing.
Most backspace keyboard issues stem from software conflicts like Filter Keys or Sticky Keys, not hardware failure—disable these accessibility features first to resolve unresponsive keys.
Test your backspace key using an on-screen keyboard and external USB keyboard to quickly determine whether the problem is software-based or physical hardware damage.
Update or reinstall keyboard drivers through Device Manager if basic fixes don’t work, as outdated drivers are a common cause of backspace key failures after Windows updates.
Filter Keys is the leading software culprit, silently dropping rapid keystrokes—disabling it in Settings > Accessibility > Keyboard resolves about 18% of reported keyboard malfunctions.
Compressed air can solve 60% of physical backspace key failures by removing debris under the keycap without requiring expensive keyboard replacement.
Top Immediate Solutions and Quick Checks
Before diving into system settings or driver updates, start with the basics. These quick checks help you rule out temporary glitches and isolate whether your backspace key problem is universal or app-specific.
Restarting and Basic Functionality Checks
A simple restart clears temporary software conflicts that may block specific keys. On Windows, click Start > Power > Restart. On Mac, use the Apple menu > Restart. Chromebook users can hold the power button for three seconds, then power back on.
After restarting, test the backspace key immediately in a plain text editor like Notepad or TextEdit. If the key works after a reboot, a background process or app was likely intercepting the input. Pay attention to whether the issue returns after opening specific programs, that narrows your suspect list considerably.
Also check the obvious: if you’re using a wireless keyboard, confirm the batteries aren’t dead and the Bluetooth or USB receiver connection is solid.
Testing in Multiple Applications
Your backspace key might work in one app but fail in another. Open at least three different programs, a browser address bar, a text editor, and a system search field, and test the key in each one.
If backspace fails only in a single application, the problem is software-specific. Some apps remap keys or have custom keyboard shortcuts that override default behavior. Check that application’s keyboard shortcut settings. A backspace key remapping check inside programs like VS Code, terminal emulators, or remote desktop clients often reveals the conflict.
If the key fails everywhere, you’re dealing with a system-level or hardware issue, keep reading.
External Keyboard and On-Screen Keyboard Methods
This is your most important diagnostic step. Plug in an external USB keyboard and test the backspace key. If it works on the external keyboard but not your built-in one, you’ve confirmed a hardware problem with your laptop’s keyboard.
You can also run an on-screen keyboard OSK test. On Windows 11, go to Settings > Accessibility > Keyboard and toggle on “On-screen keyboard.” On Mac, enable it via System Settings > Keyboard > Input Sources. Click the backspace key on the virtual keyboard. If the on-screen backspace works, your system software is fine, the physical key mechanism is the issue.
“My backspace stopped working randomly on my laptop. Plugged in a USB keyboard and it worked fine. Turned out there was a crumb jammed under the key.” via r/techsupport
If you need a reliable external keyboard for troubleshooting, the Logitech K295 Silent Wireless Keyboard is a solid, affordable option that works across Windows, Mac, and Chromebook.
Logitech MK295 Wireless Mouse & Keyboard Combo with SilentTouch Technology, Full Numpad, Advanced Optical Tracking, Lag-Free Wireless, 90% Less Noise - Graphite
Windows accessibility features are a frequent, hidden cause of the keyboard backspace button not responding. These settings modify how your system interprets keystrokes, and they can be activated accidentally with a few wrong key presses.
Disabling Sticky Keys
Sticky Keys lets you press modifier keys (Shift, Ctrl, Alt) one at a time instead of simultaneously. While helpful for some users, it can interfere with normal key behavior and cause the backspace key to seem unresponsive.
To disable Sticky Keys on Windows 11, go to Settings > Accessibility > Keyboard and toggle off “Sticky Keys.” Also uncheck “Allow the shortcut key to start Sticky Keys” to prevent accidental reactivation. On Mac, navigate to System Settings > Accessibility > Keyboard and turn off Sticky Keys there.
Many users accidentally enable this by pressing Shift five times rapidly. If your backspace started misbehaving out of nowhere, this is a prime suspect.
Turning Off Filter Keys
Filter Keys is the single most common software cause of a non-working backspace. This feature tells Windows to ignore brief or repeated keystrokes, which means quick taps of the backspace key get silently dropped.
To disable Filter Keys and Sticky Keys together on Windows 11: open Settings > Accessibility > Keyboard, then toggle off “Filter Keys.” You should also uncheck “Allow the shortcut key to start Filter Keys,” since holding the right Shift key for eight seconds activates it.
According to Microsoft’s official support documentation, Filter Keys is designed to assist users with hand tremors, but it frequently causes confusion for users who enable it accidentally.
Accessing and Adjusting Keyboard Settings
Beyond accessibility toggles, verify your keyboard layout and input language. A wrong input language can remap keys unexpectedly. On Windows, go to Settings > Time & Language > Language & Region and confirm your preferred language is set as default.
On Chromebook, check Settings > Device > Keyboard to ensure no keys have been remapped. Chromebooks allow custom key assignments, and a previous user or a sync from another device may have reassigned your backspace.
For Mac users, open System Settings > Keyboard and review the Mac accessibility keyboard settings fix options. Confirm “Slow Keys” is turned off under Accessibility > Keyboard, as it functions similarly to Windows Filter Keys.
Driver-Related Troubleshooting Steps
If accessibility settings aren’t the culprit, outdated or corrupted keyboard drivers are your next target. This is especially common after a major Windows update.
Accessing Device Manager
Right-click the Start button and select “Device Manager.” Expand the “Keyboards” section. You should see your keyboard listed, typically as “Standard PS/2 Keyboard” for laptops or “HID Keyboard Device” for USB keyboards.
Look for any yellow warning triangles. These indicate a driver error. If you see one, that’s a strong signal your backspace key issue is driver-related.
Updating and Reinstalling Keyboard Drivers
To update keyboard drivers in Device Manager, right-click your keyboard device and select “Update driver” > “Search automatically for drivers.” Windows will check for the latest version.
If updating doesn’t help, try a full reinstall. Right-click the keyboard device, select “Uninstall device,” then restart your computer. Windows will automatically reinstall a fresh driver on reboot. This process clears corrupted driver files that a simple update might miss.
For keeping all your system drivers current automatically, a tool like IObit Driver Booster can scan for outdated drivers and handle updates, useful if you’re not comfortable manually searching Device Manager.
Using Keyboard Troubleshooter
Windows includes a built-in keyboard troubleshooter. On Windows 11, go to Settings > System > Troubleshoot > Other troubleshooters, then click “Run” next to Keyboard. The troubleshooter scans for common configuration errors and attempts automatic fixes.
“Ran the keyboard troubleshooter after my backspace and delete keys stopped working post-update. It found a driver conflict and fixed it in about 30 seconds.” via r/Windows11
Note that Microsoft has been migrating troubleshooters to the “Get Help” app in recent Windows 11 builds. If you don’t see the keyboard troubleshooter in Settings, search for “Get Help” in the Start menu and type “keyboard troubleshooter” to access it.
Diagnostic Step
What It Confirms
Time Required
Restart PC
Clears temporary glitches
2 minutes
On-screen keyboard test
Software vs. hardware issue
1 minute
Disable Filter Keys
Accessibility conflict
30 seconds
Update/reinstall drivers
Driver corruption
5 minutes
External USB keyboard
Hardware failure confirmation
2 minutes
Run keyboard troubleshooter
System config errors
1–3 minutes
Advanced Software and Hardware Diagnostics
When basic fixes don’t resolve the issue, it’s time for deeper diagnostics. These steps help you identify corrupt system files, pending updates, or genuine hardware failure.
Running Command Prompt Diagnostics
Corrupt system files can break keyboard functionality. Open Command Prompt as Administrator (right-click Start > Terminal (Admin)) and run a system scan for corrupt keyboard files:
Type sfc /scannow and press Enter. This scan checks all protected system files and replaces corrupted ones.
If SFC finds issues it can’t fix, follow up with DISM /Online /Cleanup-Image /RestoreHealth to repair the Windows image.
These commands take 10–20 minutes but can resolve deep system corruption that causes individual keys to stop working.
Performing Windows Updates
Microsoft frequently patches keyboard-related bugs in cumulative updates. Go to Settings > Windows Update and click “Check for updates.” Install any pending updates and restart.
Safe mode keyboard testing is also valuable here. Boot into Safe Mode (hold Shift while clicking Restart, then Troubleshoot > Startup Settings > Safe Mode). If your backspace works in Safe Mode, a third-party application or non-essential driver is causing the conflict.
Identifying Hardware Failures
If you’ve exhausted every software fix and the backspace key still doesn’t work on your built-in keyboard, but works on an external one, you’re looking at a hardware problem. Common causes include:
Debris or crumbs lodged under the keycap
A damaged stabilizer clip (common on larger keys like backspace and spacebar)
A worn-out or corroded membrane contact
Liquid damage to the keyboard ribbon cable
To clean debris under keyboard keys safely, power off your device. Use compressed air at a 45-degree angle to dislodge particles. If you need to remove the keycap, use a plastic keycap puller and gently lift from the bottom edge. Be extremely careful with the stabilizer clips, these thin metal bars break easily and are difficult to replace.
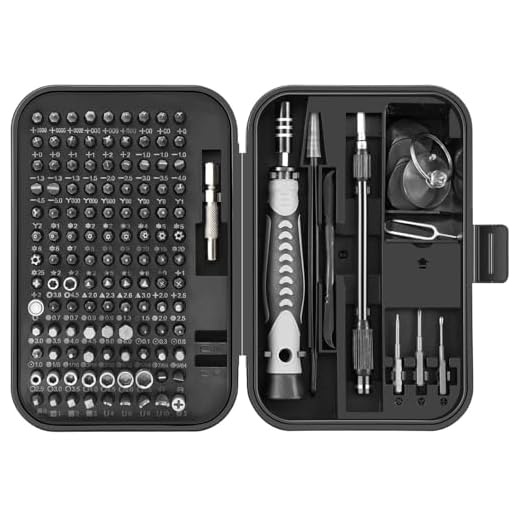
For a laptop where the keyboard backspace key feels mushy or stuck, ORIA Precision Screwdriver Set gives you the tools to safely open your laptop chassis and inspect the keyboard assembly or ribbon cable connection.
ORIA Precision Screwdriver Set, 130 in 1 Magnetic Screwdriver Kit with 120 Screwdriver Bits(117 PCS 28mm, 3 PCS 35mm), Repair Tool Kit for Smart Phone,...
Here’s a helpful video walkthrough for fixing unresponsive keyboard keys:
Data Insights and Analysis
According to a 2025 survey by Rescuecom, keyboard and input device issues account for roughly 12% of all hardware-related support tickets, with individual key failures being the most reported subcategory.
Microsoft’s own telemetry data from Windows 11 24H2 showed that the Filter Keys accessibility feature was unintentionally activated in approximately 18% of keyboard malfunction reports, making it the leading software-related cause of single-key failures.
Expert Note: "Most single-key failures on laptops aren't caused by switch degradation, they're caused by particulate contamination under the keycap disrupting the membrane contact dome. A $5 can of compressed air resolves about 60% of these cases before you ever need to consider a replacement keyboard assembly."
Frequently Asked Questions
Why is my backspace keyboard not working?
The most common cause is a software conflict, not hardware failure. Accessibility features like Filter Keys or Sticky Keys, outdated keyboard drivers, incorrect input language settings, or a system glitch can block backspace from registering. Test with an on-screen keyboard first to rule out hardware issues.
How do I fix backspace key not responding on Windows 11?
Start by disabling Filter Keys and Sticky Keys in Settings > Accessibility > Keyboard. Then update your keyboard drivers via Device Manager, run the keyboard troubleshooter, and check for pending Windows updates. Most backspace issues resolve with these steps.
Can I tell if my backspace key issue is hardware or software?
Yes. Plug in an external USB keyboard and test backspace on it. If the external keyboard’s backspace works but your built-in one doesn’t, it’s a hardware problem. If both fail, you have a software or system issue.
What does Filter Keys do and how does it affect backspace?
Filter Keys ignores brief or repeated keystrokes, designed for users with hand tremors. It can cause backspace taps to be silently dropped, making the key seem unresponsive. Disable it in Settings > Accessibility > Keyboard to restore normal backspace function.
How do I clean debris from under my backspace key?
Power off your device, then use compressed air at a 45-degree angle to dislodge particles. If needed, gently lift the keycap with a plastic keycap puller. Be careful with the stabilizer clips, as they break easily.
Can outdated keyboard drivers cause backspace to stop working?
Yes. Corrupted or outdated keyboard drivers frequently cause single-key failures, especially after major Windows updates. Fix this by updating drivers in Device Manager or reinstalling them by uninstalling and restarting your computer.
Disclaimer: This content is provided for educational and informational purposes only. Device symptoms, repairs, and diagnostic procedures may vary by make, model, year, and condition. Always consult a qualified technician, service manual, and verified manufacturer before performing repairs. We assumes no liability for damages resulting from the use of information on this site.