
Your Lenovo keyboard works perfectly, except for one frustrating problem: the Enter key won’t respond. You can type emails, search Google, and navigate documents, but the moment you need to submit a form or create a new line, nothing happens. That single dead key stops your entire workflow.
Most Lenovo Enter key failures stem from physical debris lodged under the keycap, outdated or corrupted keyboard drivers, enabled Windows accessibility features like Sticky Keys or Filter Keys, or a damaged scissor-switch mechanism. In many cases, a simple cleaning, driver reinstallation, or settings adjustment fixes the issue within minutes.
This guide shows you exactly how to diagnose and repair a non-responsive Enter key on ThinkPad, IdeaPad, Yoga, and Legion laptops running Windows 10 or Windows 11. You’ll learn which fixes work for software glitches, when cleaning solves the problem, and how to recognize true hardware failure requiring keyboard replacement.
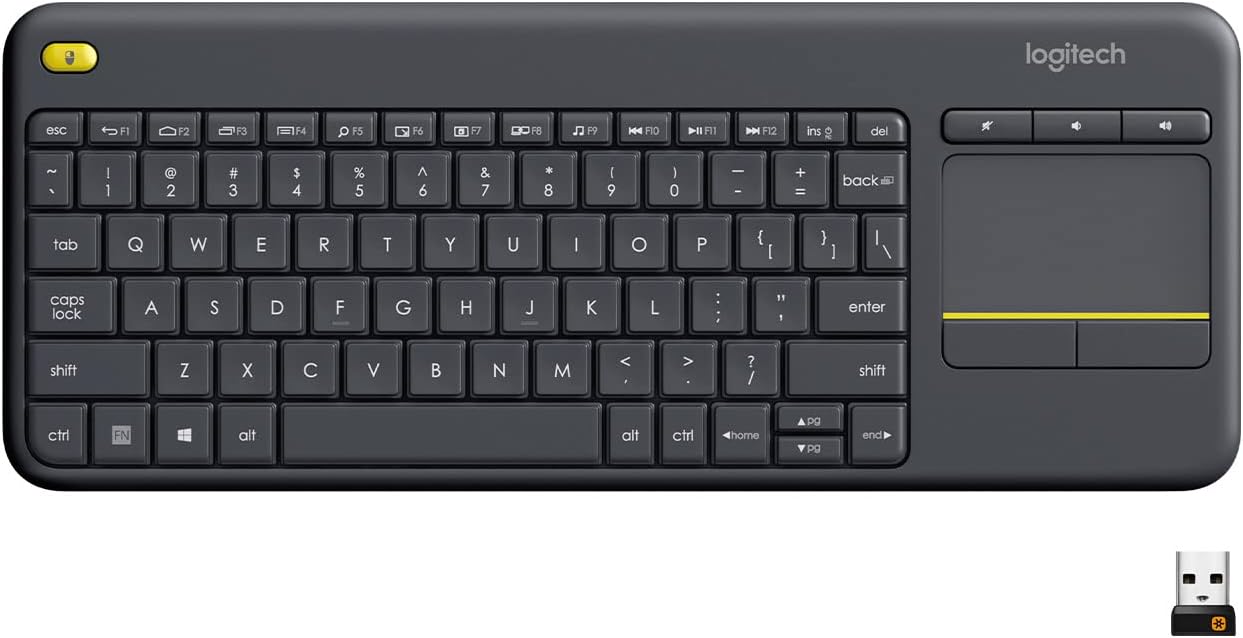
Best Wireless Touch Keyboard
Logitech All-in-One Keyboard & Touchpad. Perfect for Smart TVs & PCs. Reliable 10m Wireless Connection. Up to 18 Months Battery Life
Shop on Amazon
Key Takeaways
- A Lenovo keyboard Enter key issue is typically caused by physical debris, outdated drivers, Windows accessibility features like Sticky Keys, or a damaged scissor-switch mechanism—most of which can be fixed within minutes.
- Test whether the Enter key problem is hardware or software by using Windows On-Screen Keyboard or an online keyboard tester tool before attempting repairs.
- Reinstall or update your keyboard driver through Device Manager, or download the latest driver from Lenovo Support using your laptop model number.
- Disable accessibility features like Sticky Keys and Filter Keys in Windows Settings under Accessibility, as these can mimic a broken Lenovo keyboard Enter key.
- Clean debris under the keycap using a plastic keycap puller and isopropyl alcohol, then test an external USB keyboard to confirm whether the internal keyboard has failed.
- If troubleshooting fails, keyboard replacement typically costs $30-80 for the part, plus $50-100 for professional installation—though Lenovo may replace it free if your laptop is still under warranty.
Core Reasons the Enter Key Stops Working
Physical Damage and Sticky Keys
Dust, crumbs, and liquid residue are the most common culprits behind unresponsive Enter keys on Lenovo laptops. The Enter key sits in a high-traffic area of your keyboard, making it prone to accumulating debris under the scissor-switch mechanism. Even a tiny particle can block the key’s travel distance, preventing the membrane contact from registering your press.
Physical damage also plays a role. Dropping your laptop, spilling coffee, or pressing the Enter key too hard over time can crack the plastic stabilizer bars or dislodge the rubber dome underneath. If your Enter key feels loose, wobbly, or sits higher than surrounding keys, you’re likely dealing with mechanical failure rather than software.
Windows accessibility features like Sticky Keys and Filter Keys can mimic hardware failure. Sticky Keys lets you press modifier keys one at a time instead of simultaneously, while Filter Keys ignores repeated keypresses. If enabled accidentally, these features can make your Enter key appear dead or unresponsive, even though the hardware works fine.
“My T14 Enter key stopped working after I spilled tea. Pulled the keycap, cleaned with isopropyl alcohol, and it’s perfect now.” via r/thinkpad
Corrupted Device Drivers and Software Conflicts
Your keyboard communicates with Windows through device drivers. When these drivers become outdated, corrupted, or conflict with recent Windows updates, specific keys (including Enter) can stop responding while the rest of the keyboard functions normally. Lenovo laptops often use specialized keyboard drivers that enhance functionality for ThinkPad TrackPoint devices or Legion gaming macros.
A corrupted driver installation can map your Enter key incorrectly or disable it entirely. This happens most often after major Windows feature updates, BIOS firmware changes, or third-party software installations that modify keyboard behavior. If your Enter key stopped working immediately after a system update, driver corruption is the likely cause.
Software conflicts from keyboard remapping tools, gaming utilities, or accessibility programs can override your Enter key’s default function. Applications like AutoHotkey, gaming macro software, or language input method editors (IMEs) sometimes reassign the Enter key without your knowledge, making it appear broken when it’s actually mapped to a different action.
Issues with Accessibility and Typing Settings
Windows includes several accessibility features designed to help users with motor disabilities, but these settings can accidentally disable or delay your Enter key response. Filter Keys adds a delay before accepting repeated keypresses, which can make your Enter key feel sluggish or completely unresponsive if configured with aggressive thresholds.
Keyboard layout and language settings also cause Enter key problems. If your system switches to an incompatible keyboard layout or regional format, the physical Enter key might be mapped to a different function or character. This is especially common on multilingual Lenovo systems used in corporate environments where users toggle between English, Chinese, Japanese, or European keyboard layouts.
Some Lenovo models ship with Lenovo Vantage or Lenovo Settings software that includes custom keyboard profiles for different usage scenarios (typing mode, gaming mode, quiet mode). If these profiles become corrupted or misconfigured, they can disable specific keys including Enter. Resetting these profiles through Lenovo Vantage usually restores normal function.
Step-by-Step Troubleshooting for Lenovo Keyboards
Using the On-Screen Keyboard and Keyboard Tester Tools
Before opening Device Manager or removing keycaps, confirm whether your Enter key issue is hardware or software. Launch the Windows On-Screen Keyboard by pressing Windows + Ctrl + O or searching “On-Screen Keyboard” in the Start menu. Click the virtual Enter key with your mouse. If it works, your physical key or driver has failed. If it doesn’t work, you’re dealing with a system-wide software issue.
Use an online keyboard tester tool to isolate the problem. Press every key on your Lenovo keyboard and watch which ones light up on screen. If the Enter key doesn’t register at all, you’ve confirmed hardware or driver failure. If it registers intermittently, you likely have debris under the keycap or a worn membrane contact.
Lenovo Diagnostics provides built-in hardware tests. Press Fn + F12 during boot (or access Lenovo Diagnostics from Windows) and run the keyboard test. This utility checks every key individually and logs failures, helping you determine if the Enter key’s circuit has physically failed or if Windows settings are blocking it.
Driver Reinstallation and Updates
Open Device Manager by pressing Windows + X and selecting “Device Manager.” Expand “Keyboards” and locate your Lenovo keyboard (often labeled “Standard PS/2 Keyboard” or “Lenovo Keyboard”). Right-click and select “Uninstall device.” Check the box to delete driver software, then restart your laptop. Windows will automatically reinstall the default keyboard driver on reboot.
If the default driver doesn’t fix your Enter key, download the latest keyboard driver from Lenovo Support. Enter your laptop’s serial number or model (ThinkPad T14, IdeaPad 3, Yoga 7i, Legion 5 Pro, etc.) and navigate to “Drivers & Software.” Install any available keyboard, chipset, or hotkey driver updates, then restart.
Some users report success after rolling back to an older driver version. In Device Manager, right-click your keyboard, select “Properties,” navigate to the “Driver” tab, and click “Roll Back Driver” if available. This reverses recent driver updates that may have broken Enter key functionality after a Windows feature update.
Power Reset and Hardware Checks
Perform a hard power drain to reset all hardware connections. Shut down your Lenovo laptop completely, disconnect the AC adapter, and remove the battery (if removable). Press and hold the power button for 30 seconds to discharge residual power from the capacitors. Reconnect the battery and power adapter, then boot normally. This process resets the keyboard controller and can restore non-responsive keys.
If you suspect debris under the Enter key, carefully remove the keycap using a plastic keycap puller or a flat tool like a guitar pick. Lenovo’s scissor-switch mechanism is fragile, so lift gently from one corner. Once removed, use compressed air to blow out dust and crumbs. Clean the exposed mechanism with a cotton swab dipped in 70% isopropyl alcohol, let it dry for five minutes, then snap the keycap back into place.
Test an external USB keyboard to rule out motherboard or BIOS issues. If the external keyboard’s Enter key works fine, your laptop’s internal keyboard has failed and needs replacement. If the external Enter key also doesn’t work, you’re facing a deeper Windows or BIOS configuration problem rather than hardware damage.
Adjusting Accessibility Settings
Disable Sticky Keys and Filter Keys to eliminate software interference. Press Windows + I to open Settings, navigate to “Accessibility” (Windows 11) or “Ease of Access” (Windows 10), then select “Keyboard.” Turn off Sticky Keys, Filter Keys, and Toggle Keys. Restart your laptop and test the Enter key again.
Some Lenovo laptops include dedicated keyboard shortcuts that accidentally enable accessibility features. If pressing Shift five times or holding Shift for eight seconds triggers Sticky Keys, disable these shortcuts in the same Accessibility settings menu. Uncheck “Allow the shortcut key to start Sticky Keys” to prevent accidental activation.
Verify your keyboard layout matches your physical keyboard. Go to Settings > Time & Language > Language & Region (Windows 11) or Settings > Time & Language > Language (Windows 10). Click your language, select “Options,” and confirm the keyboard layout is set to “US” or your correct regional format. Remove any extra keyboard layouts you don’t use to prevent accidental switching.
Advanced Solutions for Persistent Keyboard Issues
Diagnosing Hardware Failures
If cleaning, driver updates, and accessibility adjustments don’t fix your Enter key, the scissor-switch mechanism or membrane circuit has likely failed. Lenovo’s keyboard membranes consist of thin plastic layers with conductive traces. Physical wear, liquid damage, or manufacturing defects can break these traces, permanently disabling the Enter key.
Remove the keycap and inspect the scissor mechanism. Look for broken plastic arms, missing rubber domes, or visible corrosion on the metal contacts. If you see green or white residue (corrosion from liquid spills), clean it carefully with isopropyl alcohol and a toothbrush. Severe corrosion requires professional repair or keyboard replacement.
Lenovo ThinkPad and IdeaPad models use integrated keyboards that connect to the motherboard via a ribbon cable. If your Enter key and nearby keys (like Right Shift or Backslash) all fail simultaneously, the keyboard ribbon cable may have loosened or damaged. Opening the laptop to reseat this cable requires technical skill: consult Lenovo’s hardware maintenance manual for your specific model.
Resolving Registry and Software Problems
Corrupted Windows registry entries can disable specific keyboard functions. Press Windows + R, type regedit, and navigate to:
HKEY_LOCAL_MACHINE\SYSTEM\CurrentControlSet\Control\Keyboard Layout
Look for a value named “Scancode Map.” If present, this entry remaps keys at the system level. Right-click “Scancode Map,” select “Delete,” and restart. This removes any custom key remappings that might have disabled your Enter key.
Third-party keyboard software like SharpKeys, KeyTweak, or gaming utilities (Corsair iCUE, Razer Synapse, Logitech G Hub) can override Windows keyboard settings. Uninstall these programs temporarily, restart, and test your Enter key. If it works after removal, reconfigure or update the software to restore normal function.
Some Lenovo models include Lenovo Vantage software with keyboard customization features. Open Lenovo Vantage, navigate to “Input & Accessories,” and check for any custom key assignments or profiles. Reset to default settings and disable any gaming or productivity modes that might be interfering with the Enter key.
Dealing with External Devices and Peripheral Conflicts
External USB keyboards, docking stations, and KVM switches can conflict with your laptop’s internal keyboard. Disconnect all USB peripherals, including mice, external keyboards, hubs, and dongles. Restart your laptop and test the Enter key. If it works after disconnecting devices, one of your peripherals was sending conflicting signals to Windows.
Bluetooth keyboards and wireless adapters sometimes interfere with internal keyboard drivers. Open Settings > Bluetooth & Devices, remove all paired keyboards, and disable Bluetooth entirely. Restart and test. If the Enter key works, re-pair your Bluetooth devices one at a time to identify the conflicting device.
Docking stations can disable laptop keyboards when configured incorrectly. Some Lenovo ThinkPad docks include BIOS settings that switch between internal and external keyboards. Press F1 during boot to enter BIOS setup, navigate to “Config” > “Keyboard/Mouse,” and verify the internal keyboard is enabled. Save changes and exit.
Best Practices for Lenovo Keyboard Care and Maintenance
Routine Cleaning and Dust Prevention
Prevent future Enter key failures by cleaning your Lenovo keyboard monthly. Use compressed air held at a 45-degree angle to blow dust and crumbs out from between keys. Spray in short bursts to avoid moisture buildup. Focus on high-use areas like Enter, Space, and Shift keys where debris accumulates fastest.
Wipe keys weekly with a microfiber cloth dampened with 70% isopropyl alcohol. Avoid soaking the cloth: it should be barely moist. Gently wipe each keycap surface and let the keyboard air dry for two minutes. Never use household cleaners, bleach, or acetone, as these chemicals can dissolve keycap legends and damage plastic mechanisms.
Consider using a keyboard cover for IdeaPad and Yoga models if you frequently eat or drink near your laptop. Silicone keyboard covers ($10-15 on Amazon) protect against spills and dust while maintaining tactile feedback. Remove and wash the cover weekly to prevent buildup underneath.
Using a Keycap Puller and Maintenance Tools
Invest in a plastic keycap puller tool (available for under $10 on Amazon) to safely remove Lenovo keycaps without damaging scissor-switch mechanisms. Metal tools can scratch keycaps or break plastic stabilizer bars. Insert the puller’s wire loops under opposite edges of the keycap and pull straight up with even pressure.
After removing a keycap, photograph the scissor mechanism with your phone before cleaning. This reference image helps you reassemble the mechanism correctly if the plastic arms pop out. Lenovo’s scissor switches include two crossed plastic bars that hook into the keycap and baseplate: both must align properly for the key to function.
Clean under the keycap with a cotton swab dipped in isopropyl alcohol. Let the area dry completely (5-10 minutes) before reattaching the keycap. Align the keycap over the scissor mechanism and press firmly but gently in the center until you hear a soft click. Test the key’s travel and response before moving to the next one.
When to Seek Professional Repair or Replacement
If your Enter key still doesn’t work after trying all troubleshooting steps, the keyboard membrane or circuit has failed beyond DIY repair. Lenovo laptop keyboards are integrated units that require partial or full disassembly to replace. Attempting keyboard replacement without experience risks damaging the motherboard, display cable, or other components.
Lenovo replacement keyboards for ThinkPad, IdeaPad, and Yoga models cost $30-80 depending on the model and whether you choose OEM or aftermarket parts. Labor for professional installation typically adds $50-100. Check Lenovo’s official warranty status first: if your laptop is still covered, Lenovo will replace the keyboard free of charge.
For ThinkPad users, consider upgrading to an external mechanical keyboard like the Lenovo ThinkPad TrackPoint Keyboard II as a permanent workaround. This Bluetooth keyboard includes the iconic TrackPoint nub and costs less than internal keyboard replacement while offering superior typing feel and durability for desktop use.
Frequently Asked Questions
Why is my Lenovo keyboard Enter key not working?
The most common causes are physical debris under the keycap, corrupted keyboard drivers, enabled Windows accessibility features like Sticky Keys, or damaged scissor-switch mechanisms. Start by testing the on-screen keyboard to determine if it’s a hardware or software issue.
How do I fix a non-responsive Enter key on my Lenovo laptop?
First, disable Sticky Keys and Filter Keys in Windows Accessibility settings. Then reinstall keyboard drivers through Device Manager. If those don’t work, clean under the keycap with compressed air and isopropyl alcohol, or perform a hard power drain by removing the battery for 30 seconds.
Can I clean my Lenovo keyboard Enter key myself?
Yes. Carefully remove the keycap using a plastic puller tool, blow out debris with compressed air at a 45-degree angle, and clean with a cotton swab dipped in 70% isopropyl alcohol. Let it dry 5-10 minutes, then reattach the keycap by pressing firmly until it clicks.
What should I do if cleaning and driver updates don’t fix my Enter key?
Test an external USB keyboard to rule out motherboard issues. If the external Enter key works, your internal keyboard has failed and needs professional replacement. If both fail, check registry entries like Scancode Map or uninstall third-party keyboard software causing conflicts.
How much does it cost to replace a Lenovo keyboard?
Replacement keyboards typically cost $30-80 depending on your model (ThinkPad, IdeaPad, Yoga, Legion). Professional installation adds $50-100. If your laptop is under warranty, Lenovo replaces the keyboard free of charge.
Can Windows accessibility features disable my Enter key?
Yes. Sticky Keys, Filter Keys, and Toggle Keys can make your Enter key appear broken while the hardware works fine. Disable these in Settings > Accessibility > Keyboard (Windows 11) or Ease of Access > Keyboard (Windows 10) and restart.
Read More:
- Lenovo Keyboard Backlight Not Working? Quick Fixes Inside
- Lenovo Keyboard Certain Keys Not Working (Proven Fixes that Works)
- Lenovo Keyboard Error (Common Causes and Inside is How to Fix It)
- Numbers on Keyboard Not Working? Here’s the 7 Proven Fixes
- Letters Keyboard Not Working? 7 Proven Fixes to Get You Typing Again
- Laptop Keyboard Not Working (Complete Fix Guide for All Brands)