
If you’re typing an email and suddenly half your keys refuse to register, you’re not alone. Lenovo laptop keyboards, from ThinkPad to IdeaPad, Yoga, and Legion series, can stop responding without warning, leaving you stuck and frustrated.
When your Lenovo keyboard keys stop working, the culprit is usually trapped debris under keycaps, a corrupted or outdated keyboard driver, accidentally enabled Filter Keys or Sticky Keys in Windows settings, or a hardware failure such as a disconnected ribbon cable or damaged keyboard matrix. Most issues can be fixed with a hard reset, driver reinstall via Device Manager, accessibility setting check, or gentle compressed-air cleaning. If those fail, hardware replacement or professional repair may be necessary.
This guide walks you through every step, software checks, driver updates, physical cleaning, and diagnostics, so you can pinpoint the cause and restore full typing function fast.
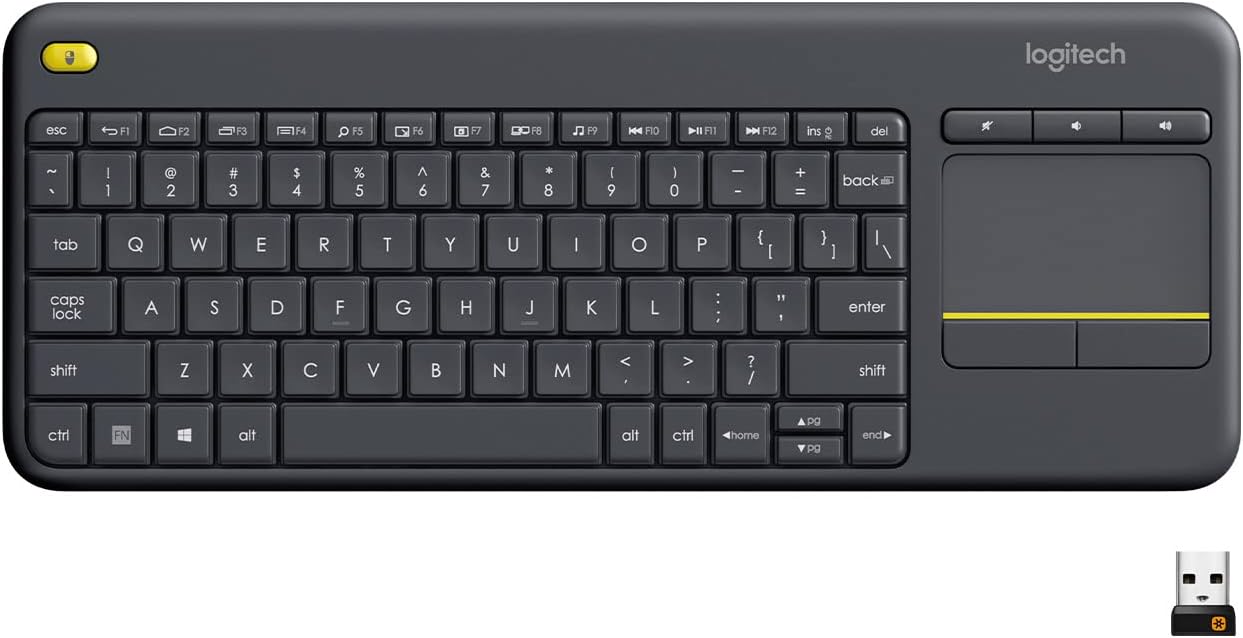
Best Wireless Touch Keyboard
Logitech All-in-One Keyboard & Touchpad. Perfect for Smart TVs & PCs. Reliable 10m Wireless Connection. Up to 18 Months Battery Life
Shop on Amazon
Key Takeaways
- Lenovo keyboard keys not working are usually caused by trapped debris, corrupted drivers, enabled accessibility features, or hardware damage—most fixable with a hard reset, driver reinstall, or compressed-air cleaning.
- Test with the Windows On-Screen Keyboard to quickly determine whether your issue is hardware (physical keyboard failure) or software (driver/settings problem) in under one minute.
- Corrupted or outdated keyboard drivers are the #1 software culprit; reinstall via Device Manager or download the latest driver from Lenovo’s support site for your specific model.
- Accidentally enabled accessibility features like Filter Keys or Sticky Keys can block normal typing—disable them in Settings → Accessibility → Keyboard and restart to restore function.
- If troubleshooting fails, check your warranty status at Lenovo’s warranty lookup page for free repairs, or contact a professional repair shop for hardware replacement like ribbon cable or keyboard matrix fixes.
- Prevent future keyboard failures by cleaning your Lenovo laptop every 2–3 months with compressed air, avoiding excessive key pressure, and keeping food and liquids away from your workspace.
Common Causes of Lenovo Laptop Keyboard Issues
Hardware Faults and Physical Damage
Physical trauma is a leading cause of unresponsive keys. Dropped laptops, spilled liquids, or impacts can damage the scissor-switch mechanism, sever the keyboard ribbon cable, or crack the keyboard matrix layer. If only one row or column of keys fails, you’re likely looking at a matrix failure.
You can test for hardware failure by pressing keys firmly and listening for a mechanical click. No click? The switch may be broken. Check for visible cracks, warped keycaps, or sticky residue. Liquid damage often causes multiple keys to fail simultaneously, especially on IdeaPad and Yoga models with shallow travel.
A disconnected or loose keyboard ribbon cable inside the chassis is another common issue. This typically happens after a RAM upgrade, battery replacement, or any internal servicing. If your entire keyboard (or large sections) stops working after you opened the laptop, the ribbon may need reseating.
Software Conflicts and Corrupted Drivers
Windows updates sometimes corrupt or replace Lenovo’s original keyboard drivers with generic PS/2 or HID drivers. When this happens, specific function keys, numeric keypads, or entire rows may stop responding. Driver conflicts are especially common after major Windows 11 feature updates.
You can spot driver issues in Device Manager. Open it by pressing Win + X and selecting Device Manager. Expand “Keyboards” and look for a yellow exclamation mark or the label “Standard PS/2 Keyboard” instead of “Lenovo Keyboard.” If present, your driver is incorrect or corrupted.
Third-party keyboard software (like gaming macro tools or accessibility utilities) can also interfere. Uninstall any recent keyboard-related apps and test again. A clean driver reinstall via Lenovo’s official support site often resolves the issue immediately.
Incorrect Keyboard Settings and Layout
Windows accessibility features like Filter Keys, Sticky Keys, and Toggle Keys can block normal typing. Filter Keys, for example, ignores repeated keystrokes, making it seem like keys aren’t working. Sticky Keys modifies how modifier keys (Shift, Ctrl, Alt) behave, causing unexpected input.
You might have activated these accidentally by pressing Shift five times rapidly or holding down a key too long. To check, go to Settings → Accessibility → Keyboard and turn off all toggle options. Restart and test your keyboard.
Incorrect keyboard layout or language settings can also cause confusion. If your physical keys don’t match the input language (e.g., you’re set to UK English but have a US keyboard), some keys will produce wrong characters or appear unresponsive. Verify your layout under Settings → Time & Language → Language & Region.
Dirt, Debris, and Unresponsive Keys
Dust, crumbs, pet hair, and skin oils accumulate under keycaps over time. This is especially problematic on ThinkPad keyboards with tight scissor mechanisms. Even a tiny particle can block the switch from making contact, rendering the key “dead.”
You’ll notice this if only one or two keys fail, or if keys work intermittently when pressed harder. Turn off your laptop, tilt it at an angle, and gently shake it. You’d be surprised how much debris falls out.
For deeper cleaning, use compressed air (hold the can upright to avoid liquid propellant). Spray short bursts under and around the unresponsive keys. If you’re comfortable, you can carefully pop off keycaps with a plastic spudger, but only on models with removable caps. Lenovo Yoga and some Legion models use fragile scissor mechanisms that break easily.
“My ThinkPad E15 had three keys stop working after a coffee spill. I dried it out, popped the caps, cleaned with isopropyl alcohol, and all three came back to life.” via r/thinkpad
Essential Troubleshooting Steps
Restarting and Hard Reset
A simple restart clears temporary software glitches and reloads drivers. Press Ctrl + Alt + Delete, select “Restart,” and test your keyboard immediately after boot. If keys still don’t work, perform a hard reset to drain residual power (also called a flea power reset).
Shut down your Lenovo laptop completely. Unplug the AC adapter and remove the battery (if removable). Press and hold the power button for 15–20 seconds to discharge all capacitors. Reinsert the battery, plug in the charger, and power on. This step resolves many intermittent keyboard issues on IdeaPad and Legion models.
For desktops or laptops with non-removable batteries, shut down, unplug, and hold the power button for 30 seconds. Plug back in and start. This forces a hardware reset and often restores unresponsive keys without further troubleshooting.
Testing With the On-Screen Keyboard
The Windows On-Screen Keyboard helps you determine whether the problem is hardware or software. Press Win + Ctrl + O (or search “On-Screen Keyboard” in the Start menu) to launch it.
If the on-screen keys work perfectly and you can type without issue, your physical keyboard has a hardware problem (stuck keys, ribbon cable, or matrix failure). If the on-screen keyboard also shows the same missing characters or refuses input, the issue is software-based, likely a driver or Windows setting.
This test isolates the cause in under one minute. It’s especially useful when multiple keys in different areas fail simultaneously, which usually points to driver corruption rather than physical damage.
Disconnecting External Devices
USB peripherals, especially external keyboards, mice, and docking stations, can conflict with your laptop’s built-in keyboard. Disconnect all USB devices, Bluetooth accessories, and docking stations. Restart your laptop and test the keyboard.
If keys suddenly work after unplugging, one of those devices was causing a driver conflict. Reconnect them one at a time to identify the culprit. Update the firmware or drivers for the conflicting device, or stop using it.
This is a common issue on ThinkPad docking stations running outdated firmware. Visit Lenovo’s driver download page and update your docking station firmware if applicable.
Using External Keyboard for Diagnosis
Plug in a USB or Bluetooth keyboard and test it. If the external keyboard works flawlessly, your laptop’s keyboard is faulty. This confirms a hardware issue, either the keyboard itself, the ribbon cable, or the motherboard connector.
If the external keyboard shows the same problems (missing keys, delayed input, wrong characters), the issue is software or OS-level. Focus on drivers, Windows settings, and BIOS updates rather than hardware repair.
This step is crucial before ordering replacement parts or paying for repair. It saves you time and money by confirming whether you need a keyboard swap or just a driver fix.
Advanced Diagnostics and Practical Fixes
Reinstalling or Updating Keyboard Drivers
Corrupted or outdated drivers are the #1 software cause of unresponsive keys. Open Device Manager (Win + X → Device Manager). Expand “Keyboards,” right-click your keyboard entry, and select “Uninstall device.” Check “Delete the driver software for this device” if prompted.
Restart your laptop. Windows will automatically reinstall the default driver. If that doesn’t work, visit Lenovo’s support site, enter your model number, and download the latest keyboard driver. Install it manually and reboot.
For ThinkPad users, ensure you have the Lenovo Hotkey driver installed. This manages function keys (F1–F12) and special keys. Missing hotkey drivers often cause Fn keys and media controls to fail. You can find it under “Chipset” or “Keyboard” on Lenovo’s driver page.
Rolling Back or Restoring System
If keys stopped working after a Windows update, roll back the update or use System Restore. Go to Settings → Windows Update → Update history → Uninstall updates. Remove the most recent update and restart.
For System Restore, search “Create a restore point” in the Start menu, click “System Restore,” and choose a restore point dated before the keyboard issue began. This reverts drivers, settings, and updates to a working state without deleting personal files.
System Restore is especially effective if your keyboard worked perfectly last week and suddenly failed after a Windows patch. According to Microsoft’s support documentation, driver-related issues account for a significant percentage of post-update hardware failures.
Checking Accessibility Settings
Filter Keys, Sticky Keys, and Toggle Keys are hidden culprits. Go to Settings → Accessibility → Keyboard and turn off:
- Sticky Keys (prevents modifier keys from behaving normally)
- Filter Keys (ignores brief or repeated keystrokes)
- Toggle Keys (plays a sound when pressing Caps Lock, Num Lock, etc.)
Also disable “Use the On-Screen Keyboard” if enabled accidentally. Restart and test. Many users don’t realize they’ve activated these features by holding keys during gaming or fast typing.
“Turned out Filter Keys was on. Disabled it and my Yoga keyboard came back instantly. Never knew that setting existed.” via Lenovo Support Forums
If you’re running Windows 10, the path is Settings → Ease of Access → Keyboard. The options are identical.
Updating System BIOS and Settings
Outdated BIOS firmware can cause keyboard initialization failures, especially on newer models like the Legion 5 Pro or ThinkPad X1 Carbon Gen 11. Check your current BIOS version by typing msinfo32 in the Start menu and noting the “BIOS Version/Date.”
Visit Lenovo’s driver page, enter your serial number, and download the latest BIOS update. Follow the instructions carefully, BIOS updates require AC power and should never be interrupted. After updating, restart and test.
In rare cases, a BIOS setting called “USB Legacy Support” or “Internal Keyboard Support” may be disabled. Restart, press F1 or F2 during boot to enter BIOS, and verify the keyboard is enabled under “Devices” or “Advanced.” Save and exit.
Maintenance and Prevention Tips
Regular Cleaning Practices
Prevent future failures by cleaning your keyboard every 2–3 months. Use compressed air like the Falcon Dust-Off Compressed Gas to blow out debris. Hold the can upright and spray in short bursts between keys.

For deeper cleaning, dampen a microfiber cloth with 70% isopropyl alcohol and wipe keycap surfaces. Never pour liquid directly onto the keyboard. Remove stuck-on grime with a soft brush or cotton swab.
Consider a silicone keyboard cover for your Lenovo laptop, especially if you eat or drink near it. Covers prevent crumbs, liquids, and dust from reaching the switches. They’re inexpensive and can extend your keyboard’s lifespan significantly.
Avoid Accidental Activation of Accessibility Features
Disable the shortcut that activates Filter Keys and Sticky Keys. Go to Settings → Accessibility → Keyboard and turn off “Allow the shortcut key to start Filter Keys” and “Allow the shortcut key to start Sticky Keys.” This prevents accidental activation when pressing Shift multiple times.
If you use these features intentionally, leave them on. But for most users, disabling the shortcuts eliminates a common source of confusion and keyboard “failure.”
Proper Keyboard Usage and Handling
Avoid pressing keys with excessive force. ThinkPad keyboards are durable, but repeated hard strikes can damage scissor mechanisms or crack the matrix layer. Type with a light, consistent touch.
Never close your laptop with objects (pens, USB drives, headphones) on the keyboard. This can crack the screen or damage keys. Keep food, drinks, and liquids away from your workspace. According to a 2026 laptop repair industry report, liquid damage is the second-leading cause of keyboard failure, after physical drops.
If you’re a heavy user (programmer, writer, gamer), consider upgrading to an external mechanical keyboard like the Keychron K8 Pro for your desk setup. This reduces wear on your laptop’s built-in keyboard and provides a better typing experience for long sessions.

When to Seek Professional Support
If you’ve tried all troubleshooting steps, driver reinstalls, hard resets, accessibility checks, BIOS updates, and cleaning, and keys still don’t work, you likely have a hardware failure. Common hardware issues include a severed ribbon cable, damaged keyboard matrix, or faulty motherboard connector.
Lenovo’s official warranty covers keyboard defects for 1–3 years depending on your model. Check your warranty status at Lenovo’s warranty lookup page. If you’re under warranty, contact Lenovo support for a free repair or replacement.
For out-of-warranty repairs, local repair shops can replace Lenovo keyboards for a reasonable fee. Keyboard assemblies (including the ribbon cable and frame) are available from third-party suppliers. If you’re comfortable with DIY, YouTube channels like LaptopMD offer step-by-step keyboard replacement tutorials for most Lenovo models.
Don’t ignore persistent keyboard issues. Continuing to use a faulty keyboard can cause frustration, data loss (unsaved work), and even repetitive strain injuries from awkward typing positions. Act quickly to restore full functionality.
Frequently Asked Questions
Why are my Lenovo keyboard keys not working?
Common causes include trapped debris under keycaps, corrupted keyboard drivers, accidentally enabled accessibility features like Filter Keys, hardware damage from drops or liquid spills, or a disconnected ribbon cable. Most issues resolve with driver reinstallation, hard reset, or gentle compressed-air cleaning.
How do I fix unresponsive Lenovo keyboard keys?
First, try a hard reset by unplugging your laptop and holding the power button for 15–20 seconds. Then reinstall keyboard drivers via Device Manager, check accessibility settings for Filter Keys or Sticky Keys, and use compressed air to remove debris. Test with an external keyboard to confirm if it’s hardware or software.
Can Windows updates cause Lenovo keyboard problems?
Yes. Major Windows updates can corrupt or replace Lenovo’s original keyboard drivers with generic PS/2 drivers. If your keyboard stopped working after an update, use System Restore to revert to an earlier point, or manually download and install the latest keyboard driver from Lenovo’s support site.
What should I do if only certain keys on my Lenovo keyboard don’t work?
Check Device Manager for driver issues (yellow exclamation marks). Clean under the affected keycaps with compressed air or a soft brush. If it’s multiple keys in a row or column, you may have a keyboard matrix failure requiring hardware replacement. An external keyboard test confirms whether it’s hardware or software.
How do I know if my Lenovo keyboard has hardware damage?
Press keys firmly and listen for a mechanical click. No click suggests a broken switch. Look for visible cracks, warped keycaps, or sticky residue. Use Windows On-Screen Keyboard (Win + Ctrl + O) — if it works perfectly while your physical keyboard fails, your hardware is faulty and needs professional repair or replacement.
Is liquid damage to a Lenovo keyboard repairable?
Sometimes. If only a few keys fail after liquid exposure, dry the laptop completely and clean affected keys with isopropyl alcohol. However, if multiple keys or the entire keyboard fails, the keyboard matrix or ribbon cable may be damaged. Check your warranty status at Lenovo’s warranty lookup page for coverage, or contact a repair shop for hardware replacement.
Read More:
- Lenovo Keyboard Backlight Not Working? Quick Fixes Inside
- Lenovo Keyboard Certain Keys Not Working (Proven Fixes that Works)
- Lenovo Keyboard Error (Common Causes and Inside is How to Fix It)
- Lenovo Keyboard Enter Key Not Working? Fix It Fast With this Proven Ways
- Lenovo Keyboard G and H Not Working (Here’s How to Fix It Fast)