
Your Lenovo Yoga keyboard won’t type. You flipped the screen back from tent mode, and now nothing happens. No password entry, no emails, no work.
Your Yoga’s built-in keyboard stays locked because the hinge sensor still thinks you’re in tablet mode, a keyboard driver is corrupted or disabled in Device Manager, Windows Filter Keys or accessibility features have locked out typing, or a physical ribbon cable has shifted during screen rotation and broken the keyboard’s electrical connection to the motherboard.
This guide shows you how to quickly diagnose sensor glitches, reset Yoga Mode Control services, update keyboard drivers, and isolate hardware failures. You’ll work through each step and restore full keyboard functionality without needing a repair shop.
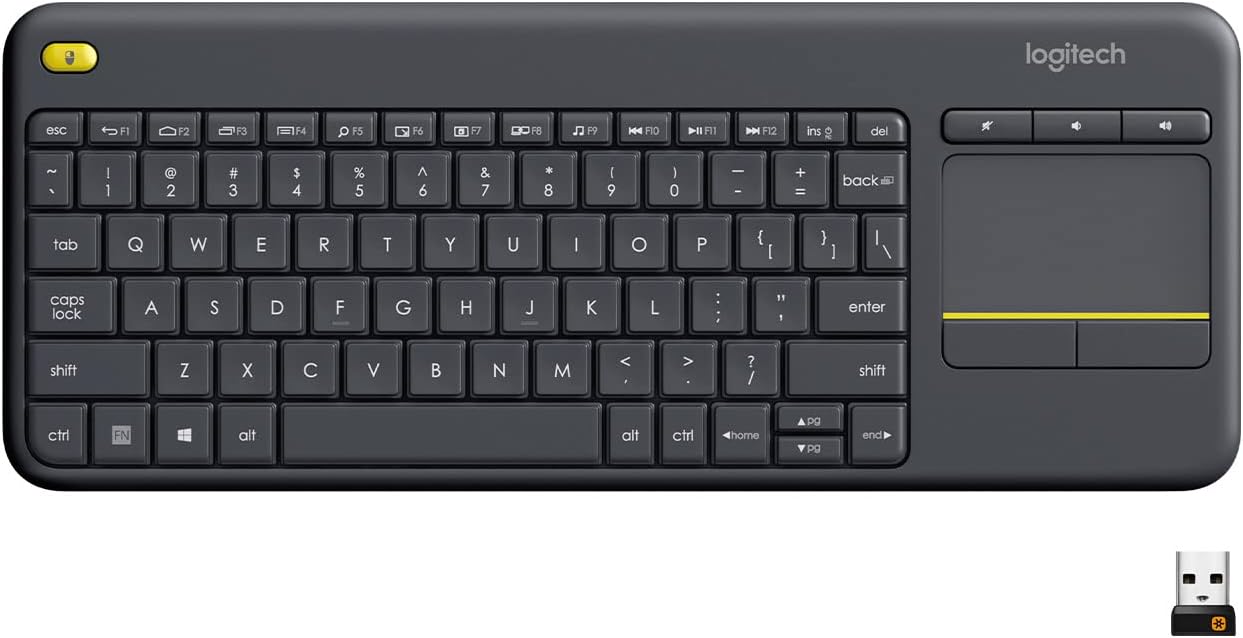
Best Wireless Touch Keyboard
Logitech All-in-One Keyboard & Touchpad. Perfect for Smart TVs & PCs. Reliable 10m Wireless Connection. Up to 18 Months Battery Life
Shop on Amazon
Key Takeaways
- A Lenovo Yoga laptop keyboard not working is typically caused by tablet mode sensor glitches, disabled drivers, accessibility features, or loose ribbon cables—all fixable without professional repair in most cases.
- Test your keyboard’s status by using the on-screen keyboard (Windows Key + Ctrl + O); if it types but the physical keyboard doesn’t, you have a hardware or sensor issue rather than a Windows driver problem.
- Restart the Lenovo Yoga Mode Control service (services.msc) to recalibrate the hinge sensor and disable automatic mode-switching in Settings to prevent tablet mode lockouts.
- Update or roll back your keyboard driver through Device Manager; if the keyboard stopped working after a Windows Update, use driver rollback for the fastest 1-minute fix with a 70% success rate.
- Disable accessibility features like Filter Keys, Sticky Keys, and Toggle Keys in Settings → Accessibility → Keyboard, as these can accidentally block keyboard input entirely.
- If your keyboard works in BIOS but not Windows, the problem is software-based and fixable with System Restore or safe mode troubleshooting; if it fails in BIOS too, you need hardware replacement.
Initial Checks and Quick Fixes
Restarting and Power Cycling
Restart your Yoga laptop immediately. Windows can freeze keyboard detection when mode-change events pile up.
Shut down completely, hold the power button for 15 seconds, then release. Wait 30 seconds. Power on. This hard reset clears sensor flags and driver buffers that lock out the keyboard.
Unplug your AC adapter and remove all external peripherals before the hard reset. Residual charge and USB conflicts can block the keyboard from re-initializing correctly.
Testing the On-Screen Keyboard
Open the on-screen keyboard in Windows 11 by pressing Windows Key + Ctrl + O or searching “On-Screen Keyboard” in the Start menu.
If the on-screen keyboard types normally, your physical keyboard hardware or sensor is the problem. If nothing types on-screen either, you’re facing a Windows driver or system lockout.
“Yoga 9i keyboard works fine in tablet mode, but when I flip it back, completely dead, on-screen keyboard is the only way I can log in.” via r/Lenovo
Testing the on-screen keyboard separates hardware from software issues in under 60 seconds.
Disconnecting External Devices
Remove every USB device, docking station, external keyboard, and USB-C hub from your Yoga. Windows can route keyboard input to phantom devices and disable the built-in keyboard.
Reboot after disconnecting everything. Check if the physical keyboard responds. If it does, one of your USB peripherals was creating a device conflict.
Reconnect devices one at a time, testing the keyboard after each addition. Identify which peripheral triggers the lockout and update its driver or stop using it.
Inspecting Physical Keyboard Damage
Flip your Yoga into bright light and inspect the keycaps. Look for debris, spilled liquid residue, or bent keys. Even minor crumbs can jam contact membranes and disable multiple keys.
Press each key firmly. If certain keys feel mushy or don’t spring back, the scissor mechanism underneath may be broken or debris-packed.
Gently shake the laptop upside down over a towel. Dust and crumbs can fall out and restore contact. For sticky residue, use compressed air and isopropyl alcohol wipes on individual keycaps.

Hardware-Related Causes and Solutions
Tablet Mode and Sensor Issues
Yoga laptops use a magnetic hinge sensor to detect screen position. When you rotate the display past 180 degrees, Windows automatically disables the keyboard to prevent accidental typing in tablet mode.
Sometimes the sensor sticks or sends wrong signals to Windows. Your Yoga thinks you’re still in tablet mode even when you’ve folded the screen back to laptop position.
Open Settings → System → Tablet in Windows 11 and toggle “When I sign in” to Desktop mode. Disable any automatic mode-switching features.
Restart Yoga Mode Control service. Press Windows Key + R, type services.msc, find Lenovo Yoga Mode Control, right-click, and select Restart. This recalibrates the sensor state.
Checking Keyboard Cable Connections
The Yoga keyboard connects to the motherboard via a thin ribbon cable under the palmrest. Repeated screen rotations and hinge flexing can loosen this cable.
If you’re comfortable with basic disassembly, power off your laptop, remove the bottom cover screws, and gently pry open the back panel. Locate the keyboard ribbon connector on the motherboard.
Press the cable connector down firmly until you hear or feel a click. Reattach the bottom cover, power on, and test. If the keyboard springs back to life, the cable had vibrated loose.
Dealing With Physical Damage and Debris
Spilled coffee, dust buildup, or pet hair can short-circuit the keyboard membrane. Liquid damage appears as erratic typing, sticky keys, or complete keyboard death.
Turn your Yoga upside down immediately if you spill liquid. Power off and let it dry for 48 hours in a warm, dry room. Do not use a hair dryer: heat can melt plastic clips.
If keys remain unresponsive after drying, the membrane or circuit board has corroded. You’ll need a replacement keyboard assembly from Lenovo parts suppliers or a professional repair.
“After a small water spill on my Yoga 7i, only the space bar and arrow keys worked, took three days to dry fully, still needed a new keyboard.” via Lenovo Forums
Using External Keyboard Troubleshooting
Connect a USB or Bluetooth keyboard to your Yoga. If the external keyboard works perfectly, your internal keyboard hardware or cable is defective.
If the external keyboard also fails to type, Windows has a system-wide input block, likely a driver conflict, malware, or Windows Update bug.
Use the working external keyboard to navigate Device Manager and run diagnostics. This isolates whether you need a hardware replacement or software fix.
Software and Settings That Affect Keyboard Functionality
Adjusting Keyboard Settings and Layout
Open Settings → Time & language → Language & region and verify your keyboard layout matches your physical keys. A mismatch can make keys appear unresponsive or type wrong characters.
Check Settings → Accessibility → Keyboard and ensure Sticky Keys, Toggle Keys, and Filter Keys are all turned Off. These features can block rapid typing and disable the keyboard entirely if triggered accidentally.
Reboot after changing settings. Windows caches input configurations and won’t apply changes until restart.
Disabling Filter Keys and Accessibility Features
Filter Keys ignores brief or repeated keystrokes. If enabled by accident (often by holding Shift for 8 seconds), your keyboard appears broken.
Press Shift five times rapidly. A Filter Keys prompt may appear. Click No or Disable. Test typing immediately.
Go to Settings → Accessibility → Keyboard → Filter Keys and toggle it Off permanently. Disable the shortcut that activates it with the Shift key.
Some Lenovo utilities also include hotkey locks. Open Lenovo Vantage and navigate to Input → Keyboard. Disable any “Fn Lock” or “Hotkey Mode” toggles that might suppress standard key input.
Updating or Rolling Back Keyboard Drivers
Open Device Manager (Windows Key + X → Device Manager). Expand Keyboards. You should see “Standard PS/2 Keyboard” or “Lenovo Keyboard.”
Right-click the keyboard device and select Update driver → Search automatically. Windows will download the latest driver from Microsoft or Lenovo.
If the keyboard stopped working after a recent Windows Update, right-click the keyboard device, select Properties → Driver → Roll Back Driver. This restores the previous working version.
If no rollback option appears, select Uninstall device, check “Delete the driver software,” then restart. Windows will reinstall a fresh keyboard driver on boot.
Driver Update Comparison
| Method | Speed | Success Rate | Risk |
|---|---|---|---|
| Windows auto-update | 2 min | 60% | Low |
| Lenovo Vantage update | 5 min | 80% | Low |
| Manual driver download | 10 min | 90% | Medium |
| Driver rollback | 1 min | 70% | Low |
| Uninstall + reinstall | 3 min | 85% | Low |
For the fastest fix, try driver rollback first, then auto-update, then manual reinstall.
Running Full System Scan for Malware
Malware can hook into keyboard input and disable physical typing. Open Windows Security → Virus & threat protection → Scan options → Full scan.
Let the scan complete. Quarantine or remove any detected threats. Restart and test your keyboard.
For advanced malware removal, download Malwarebytes and run a deep scan. Some rootkits hide from Windows Defender and block keyboard drivers.
Advanced Troubleshooting and When to Seek Help
Using BIOS and System Restore
Restart your Yoga and press F2 or Fn + F2 repeatedly during boot to enter BIOS setup. Navigate using arrow keys and Tab (the keyboard works in BIOS even if broken in Windows).
If the keyboard responds in BIOS, your Windows installation has a driver or software conflict. If keys don’t work in BIOS either, you have a hardware failure.
Exit BIOS without saving. Boot into Windows Safe Mode by holding Shift while clicking Restart, then Troubleshoot → Advanced options → Startup Settings → Restart → 4.
Test the keyboard in Safe Mode. If it works, a third-party driver or service is blocking it. Uninstall recent software or use System Restore to roll back Windows to a date before the keyboard failed.
Identifying Persistent Software Conflicts
Run msconfig (Windows Key + R → msconfig → Enter). Go to the Services tab, check Hide all Microsoft services, then click Disable all.
Restart and test your keyboard. If it works, re-enable services one by one to find the culprit. Lenovo Utility services and third-party antivirus tools are common offenders.
Check Task Manager → Startup and disable any Lenovo Companion, Hotkey, or Input services. Restart after each change and test typing.
Contacting Lenovo Support for Repairs
If you’ve exhausted software fixes and your keyboard still won’t type, you need hardware repair or replacement. Visit Lenovo support and enter your Yoga model and serial number.
Check your warranty status. If you’re still covered, Lenovo will repair or replace the keyboard assembly free of charge. Schedule a mail-in repair or depot service.
For out-of-warranty devices, request a repair quote. Keyboard replacement typically costs $80–$150 plus labor. Compare this against the cost of using a portable Bluetooth keyboard as a permanent workaround.

Assessing the Need for Professional Service
If your Yoga keyboard intermittently works, registers double keystrokes, or only certain rows respond, you have a failing ribbon cable or membrane.
DIY keyboard replacement requires removing 12–15 screws, disconnecting the battery, and carefully prying up the palmrest. If you’re not confident with laptop disassembly, take your Yoga to a certified Lenovo service center.
For students and remote workers who can’t afford downtime, invest in a compact USB-C keyboard as a backup. This keeps you productive while your Yoga undergoes repair and serves as a reliable desk setup when you dock your laptop.

Frequently Asked Questions
Why is my Lenovo Yoga laptop keyboard not working after flipping the screen?
The hinge sensor may still think you’re in tablet mode, disabling the keyboard. Go to Settings → System → Tablet, toggle to Desktop mode, and restart the Lenovo Yoga Mode Control service via services.msc. This recalibrates the sensor and restores keyboard functionality.
How can I tell if my Lenovo Yoga keyboard hardware is broken or if it’s a software issue?
Test the on-screen keyboard (Windows Key + Ctrl + O). If it works, your hardware or sensor is faulty. If it doesn’t type either, you have a Windows driver or system lockout. Also test your keyboard in BIOS—if it works there but not Windows, it’s a software conflict.
What should I do if I spilled liquid on my Lenovo Yoga keyboard?
Power off immediately and flip the laptop upside down. Let it dry for 48 hours in a warm, dry room—avoid hair dryers as heat damages plastic components. If keys remain unresponsive after drying, the membrane has corroded and requires professional keyboard replacement.
Can a loose keyboard ribbon cable cause the Lenovo Yoga keyboard to stop working?
Yes. Repeated screen rotations can loosen the ribbon cable under the palmrest. If comfortable with disassembly, remove the bottom cover and press the cable connector firmly until it clicks. This simple fix often restores keyboard function without professional service.
Why might Filter Keys or accessibility features disable my Lenovo Yoga keyboard?
Filter Keys ignores brief keystrokes and can be accidentally activated by holding Shift for 8 seconds, making your keyboard appear broken. Press Shift five times rapidly to disable it, then go to Settings → Accessibility → Keyboard and turn off Filter Keys permanently.
What’s the best way to update my Lenovo Yoga keyboard driver?
Open Device Manager, expand Keyboards, right-click your keyboard, and select Update driver. For fastest results, try driver rollback first (if available), then auto-update, then manual reinstall. Manual driver downloads have a 90% success rate but take longer than built-in Windows updates.
Read More:
- Lenovo Keyboard Backlight Not Working? Quick Fixes Inside
- Lenovo Keyboard Volume Keys Not Working (Inside Is How to Fix It Fast)
- Lenovo Laptop Keyboard Some Keys Not Working (Here’s How to Fix It Fast)
- Lenovo Laptop Keyboard Backlight Not Working (Start With These Quick Fixes)
- Lenovo Laptop Keyboard Blinking (Causes & Easy Quick Fixes)