
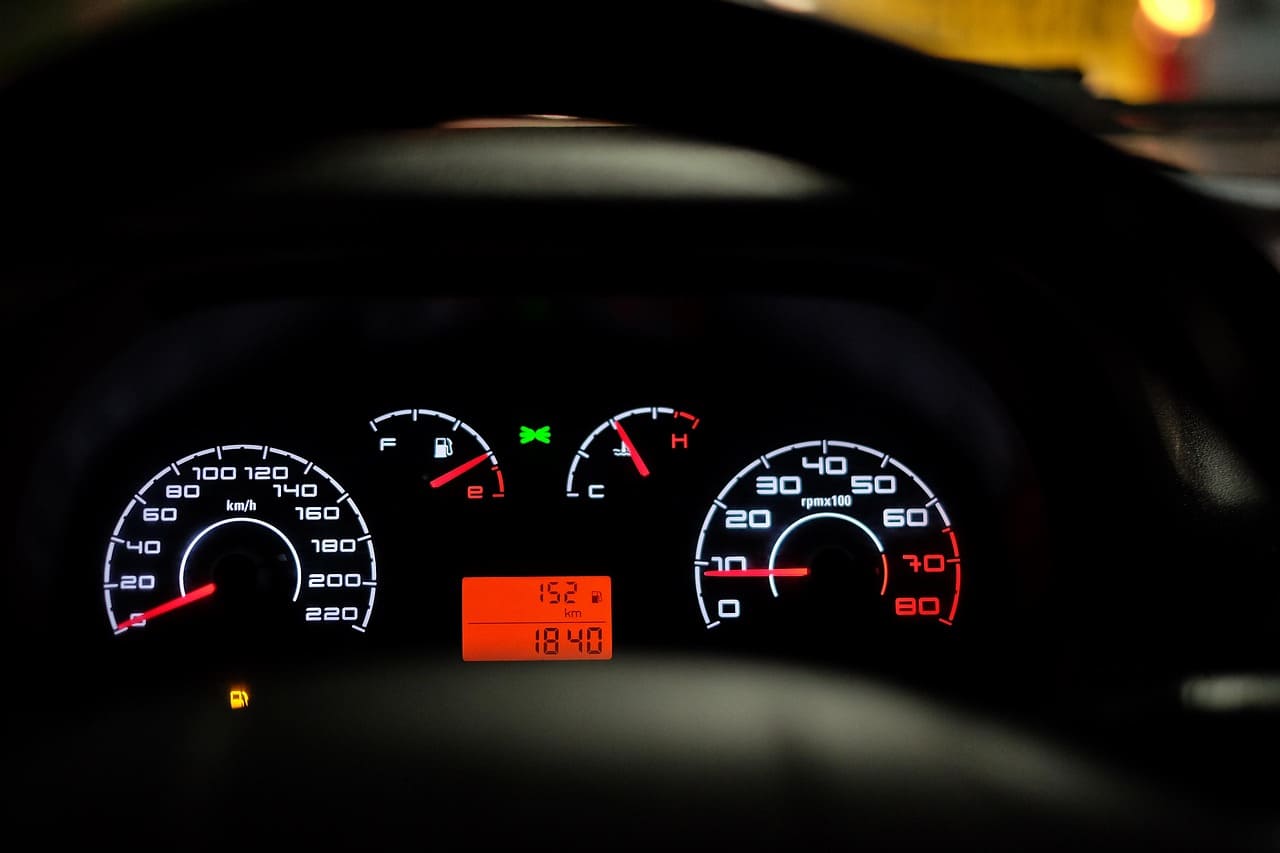
The ABS (Anti-Lock Braking System) warning light on your dashboard indicates potential issues with your vehicle’s brake safety system that requires immediate attention and proper diagnostic procedures.
You can reset your ABS light through several proven methods: disconnecting the car battery for 30 seconds to clear temporary codes, using an OBD-II scanner to read and clear diagnostic trouble codes, performing a manual brake pedal reset procedure, or addressing underlying mechanical issues like faulty wheel speed sensors or damaged wiring. The most effective approach depends on whether the light indicates a temporary glitch or an actual system malfunction. Simply resetting the light without fixing underlying problems will cause it to return, so proper diagnosis is essential before attempting any reset procedures.

ABS Warning Systems
The ABS light serves as your vehicle’s primary communication method for brake system malfunctions, illuminating when the onboard computer detects irregularities in wheel speed sensors, hydraulic pressure, or electronic control modules that affect safe braking performance.
Modern vehicles use sophisticated monitoring systems that continuously check ABS component functionality during driving. When these systems detect discrepancies between expected and actual performance parameters, they trigger warning lights to alert drivers of potential safety issues requiring attention.
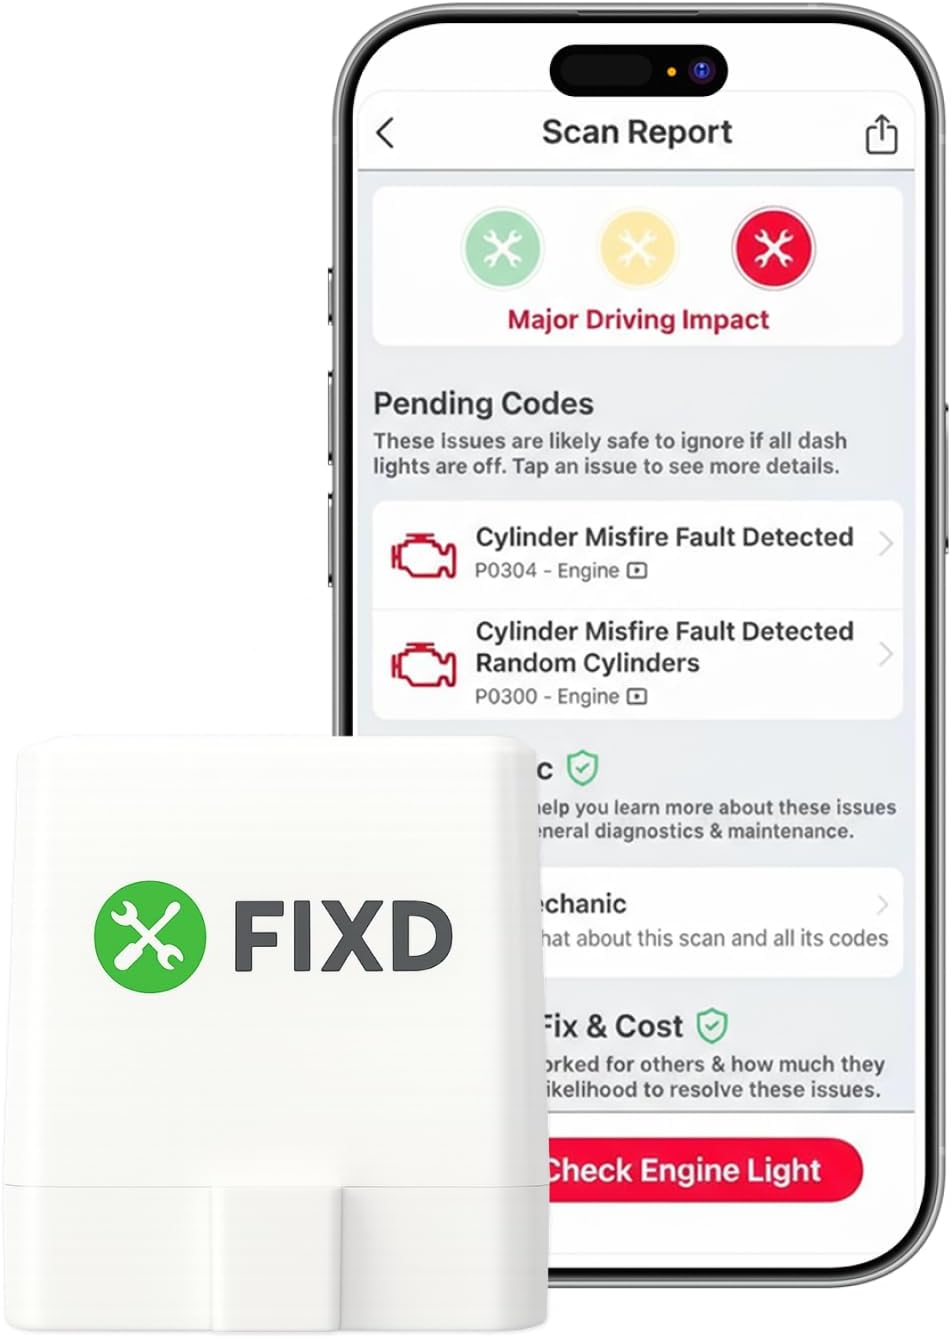
Best Bluetooth OBD2 Scanner
Detect 39,000+ Issues With Enhanced Codes. Save $1000s on car repairs & buying used vehicles by diagnosing problems yourself.
Shop on AmazonThe warning light can indicate various problems ranging from simple sensor contamination to serious hydraulic failures, making proper diagnosis essential before attempting any reset procedures that might mask underlying safety issues.
Battery Disconnect Reset Method
The simplest ABS light reset approach involves temporarily removing power from your vehicle’s electrical system, allowing the onboard computer to clear temporary error codes and reinitialize system parameters.
Step-by-Step Battery Reset:
- Turn off your vehicle and remove the keys from ignition
- Open the hood and locate your car’s battery
- Use appropriate wrenches to disconnect the negative battery terminal first
- Disconnect the positive battery terminal second for complete power isolation
- Wait exactly 30 seconds for all electrical systems to fully discharge
- Press and hold the brake pedal for 10 seconds to drain residual power
- Reconnect the positive terminal first, then negative terminal
- Start your vehicle and check if the ABS light remains off
- Test drive at low speeds to verify the system functions properly
This method works by forcing the ABS control module to restart and recheck all system components during the initialization process.
OBD-II Scanner Reset Procedure
Professional-grade ABS light diagnosis and reset requires an OBD-II scanner capable of accessing your vehicle’s brake system diagnostic codes, providing specific information about detected malfunctions.
Step-by-Step Scanner Reset:
- Locate your vehicle’s OBD-II diagnostic port (usually under dashboard)
- Connect your OBD-II scanner to the diagnostic port firmly
- Turn on your vehicle’s ignition without starting the engine
- Power on the scanner and select your vehicle’s make/model/year
- Navigate to “ABS” or “Brake System” in the scanner menu
- Select “Read Codes” to identify specific error codes present
- Record all diagnostic codes for future reference
- Choose “Clear Codes” or “Erase Codes” from the menu options
- Confirm the code clearing operation when prompted
- Turn off ignition, disconnect scanner, and restart vehicle
This method provides the most comprehensive reset capability while preserving diagnostic information for proper troubleshooting.
Manual Brake System Reset
Some vehicles support manual ABS reset procedures that use specific brake pedal sequences to clear minor system faults without requiring external diagnostic equipment.
Step-by-Step Manual Reset:
- Park on level ground with parking brake engaged securely
- Turn off engine and remove keys from ignition completely
- Turn steering wheel to center/neutral position
- Press brake pedal firmly and hold for 10 seconds continuously
- Release brake pedal completely for 3 seconds
- Repeat firm brake application 5 times with 3-second intervals
- Turn ignition to “ON” position without starting engine
- Observe dashboard for ABS light status during initialization
- Start engine and test brake pedal feel and responsiveness
This procedure works on vehicles equipped with self-diagnostic capabilities that can recognize manual reset sequences.
“ABS warning lights should never be ignored or simply reset without proper diagnosis, as they indicate potential brake system malfunctions that directly impact vehicle safety,” Automotive Safety Engineer, Robert Martinez.
Wheel Speed Sensor Cleaning
Contaminated wheel speed sensors frequently trigger ABS warning lights, and cleaning these components often resolves the issue without requiring expensive replacements or professional service.
Step-by-Step Sensor Cleaning:
- Locate wheel speed sensors near each wheel’s brake assembly
- Disconnect the electrical connector from the sensor carefully
- Remove sensor mounting bolts using appropriate socket tools
- Extract sensor from hub assembly without forcing or damage
- Clean sensor tip with brake cleaner and soft brush thoroughly
- Inspect wiring harness for damage, cuts, or corrosion
- Clean sensor mounting area in hub of debris and rust
- Apply thin layer of anti-seize compound to sensor threads
- Reinstall sensor with proper torque specifications
- Reconnect electrical connector ensuring secure connection
Clean sensors provide accurate wheel speed data essential for proper ABS operation and warning light functionality.
Fuse and Relay Inspection
ABS system malfunctions sometimes result from blown fuses or faulty relays rather than expensive component failures, making electrical system inspection a cost-effective troubleshooting step.
Check your vehicle’s fuse box for ABS-related fuses, typically labeled as “ABS,” “ESP,” or “Brake System.” Replace any blown fuses with identical amperage ratings and inspect relay connections for corrosion or looseness.
Faulty ABS relays can cause intermittent system operation and persistent warning lights. Swap ABS relays with identical relays from other systems to test functionality, or use a multimeter to verify proper relay operation.
Brake Fluid Level Check
Low brake fluid levels can trigger ABS warning lights as the system detects insufficient hydraulic pressure for proper anti-lock operation, requiring immediate attention for safety reasons.
Step-by-Step Fluid Inspection:
- Park vehicle on level surface and engage parking brake
- Open hood and locate brake fluid reservoir near firewall
- Clean reservoir cap and surrounding area before opening
- Remove cap carefully and inspect fluid level markings
- Check fluid color and consistency for contamination signs
- Add appropriate brake fluid type if level is below minimum
- Inspect brake lines and components for leaks or damage
- Replace reservoir cap securely to prevent contamination
- Test drive vehicle to verify ABS light status
Maintain proper brake fluid levels and quality to ensure optimal ABS system performance and safety.
Professional Diagnostic Considerations
Complex ABS issues may require professional diagnosis using specialized equipment that can perform advanced system tests, component activation, and comprehensive troubleshooting beyond basic reset procedures.
Professional technicians have access to manufacturer-specific diagnostic tools, technical service bulletins, and repair procedures that ensure proper ABS system restoration while maintaining vehicle safety standards.
“Modern ABS systems integrate with multiple vehicle safety systems, requiring comprehensive diagnostic approaches that consider interactions between brake, stability control, and traction management systems,” Automotive Diagnostics Specialist, Jennifer Walsh.
Consider professional service when multiple warning lights appear simultaneously, when reset procedures fail to resolve the issue, or when you lack confidence in performing brake system work.
Safety Precautions and Warnings
Never attempt to drive with an illuminated ABS warning light without understanding the underlying cause, as this indicates potential brake system malfunctions that could compromise vehicle stopping ability during emergency situations.
ABS reset procedures should only be performed after addressing underlying mechanical issues that caused the warning light activation. Simply clearing codes without fixing problems creates safety risks and typically results in recurring warning lights.
Always test brake system functionality at low speeds in safe environments after performing any reset procedures, ensuring proper pedal feel, stopping distance, and absence of unusual noises or vibrations.
When Reset Attempts Fail
Persistent ABS warning lights after multiple reset attempts typically indicate serious system malfunctions requiring component replacement, professional diagnosis, or comprehensive brake system service rather than continued reset procedures.
Common causes of reset-resistant ABS lights include failed ABS control modules, damaged wiring harnesses, faulty hydraulic components, or multiple simultaneous system failures that require systematic troubleshooting approaches.
“Repeated ABS light illumination after reset procedures usually indicates hardware failures that require component replacement rather than software-based solutions,” Brake System Technician, Michael Chang.
Document all reset attempts, diagnostic codes, and symptoms to provide comprehensive information for professional technicians if self-service procedures fail to resolve the issue.
Video Credit: Dashboard warning lights / YouTube
Frequently Asked Questions
Will disconnecting the battery always reset my ABS light?
Battery disconnection can reset ABS lights caused by temporary electrical glitches or minor sensor errors, but it won’t resolve underlying mechanical problems like faulty wheel speed sensors, damaged wiring, or failed ABS modules. The light will typically return within a few driving cycles if the original problem persists.
The effectiveness of battery reset depends on the root cause of the warning light. Intermittent electrical issues, computer glitches, or temporary sensor contamination often resolve with power cycling, while hardware failures require actual component repair or replacement before the light will stay off permanently.
Always perform a test drive after battery reset to verify the ABS system functions properly and the warning light remains off. If the light returns quickly, focus on diagnosing and fixing the underlying mechanical issue rather than repeatedly attempting reset procedures.
Can I drive safely with the ABS light on?
You can drive with an illuminated ABS light, but your vehicle loses anti-lock braking capability, meaning wheels may lock during hard braking and increase stopping distances, particularly on wet or slippery surfaces. Normal braking function typically remains available, but emergency stopping performance is compromised.
The ABS light indicates system malfunction, not complete brake failure, so basic braking remains functional in most cases. However, you should adjust your driving style to account for reduced braking performance, maintain greater following distances, and avoid aggressive braking maneuvers until the system is repaired.
Some vehicles disable traction control and stability management systems when ABS malfunctions are detected, further reducing vehicle safety margins during adverse driving conditions. Address ABS issues promptly to restore full brake system functionality and safety features.
How much does professional ABS light diagnosis cost?
Professional ABS diagnosis typically costs $100-200 for comprehensive system testing using specialized diagnostic equipment, though prices vary based on location, vehicle complexity, and shop rates. This investment often saves money by identifying specific problems rather than replacing multiple components unnecessarily.
Diagnostic fees are usually applied toward repair costs if you choose to have the same facility perform the work. Complex ABS issues may require multiple diagnostic sessions or specialized equipment access, potentially increasing total diagnostic costs for difficult-to-identify problems.
Compare diagnostic costs with potential component replacement expenses, as professional diagnosis often prevents expensive trial-and-error repairs and ensures proper system restoration while maintaining safety standards and manufacturer warranty compliance.
What tools do I need to properly reset ABS lights?
Basic ABS reset attempts require standard automotive tools including wrenches for battery disconnection, possibly a basic OBD-II scanner for code reading and clearing, and standard hand tools for sensor cleaning or fuse replacement. Professional-grade diagnosis requires specialized ABS scanners with advanced capabilities.
Entry-level OBD-II scanners ($30-100) can read and clear basic ABS codes, while professional scanners ($200-2000) provide comprehensive system testing, component activation, and advanced diagnostic functions necessary for complex troubleshooting and proper repair verification.
Consider tool investment costs against potential professional service fees and the complexity of your specific ABS issue. Simple reset procedures require minimal tools, while comprehensive diagnosis and repair may justify professional service to ensure proper system restoration.
Why does my ABS light keep coming back after reset?
Recurring ABS lights indicate underlying mechanical problems that reset procedures cannot fix, such as faulty wheel speed sensors, damaged wiring harnesses, contaminated brake fluid, or failing ABS control modules. The system continues detecting the same malfunction that originally triggered the warning.
Intermittent problems like loose electrical connections, corroded sensor contacts, or failing components may cause the light to appear randomly or under specific driving conditions. These issues require systematic diagnosis to identify and correct the root cause rather than repeated reset attempts.
Temperature changes, moisture intrusion, or component wear can cause progressive failures that manifest as recurring warning lights. Address these underlying issues through proper diagnosis and component replacement to achieve permanent ABS light resolution and restore full system functionality.
Sources: