
When a key on your mechanical keyboard stops responding, the frustration cuts deep for enthusiasts who invested in premium switches and boards. Whether you’re gaming competitively, coding professionally, or typing extensively, non-functional keys disrupt workflows immediately.
Your mechanical keyboard key isn’t working due to switch failure, debris contamination, loose connections, or software conflicts. Most cases involve stuck switch mechanisms, accumulated dust particles, disconnected solder joints, or remapping software that disables specific key functions.

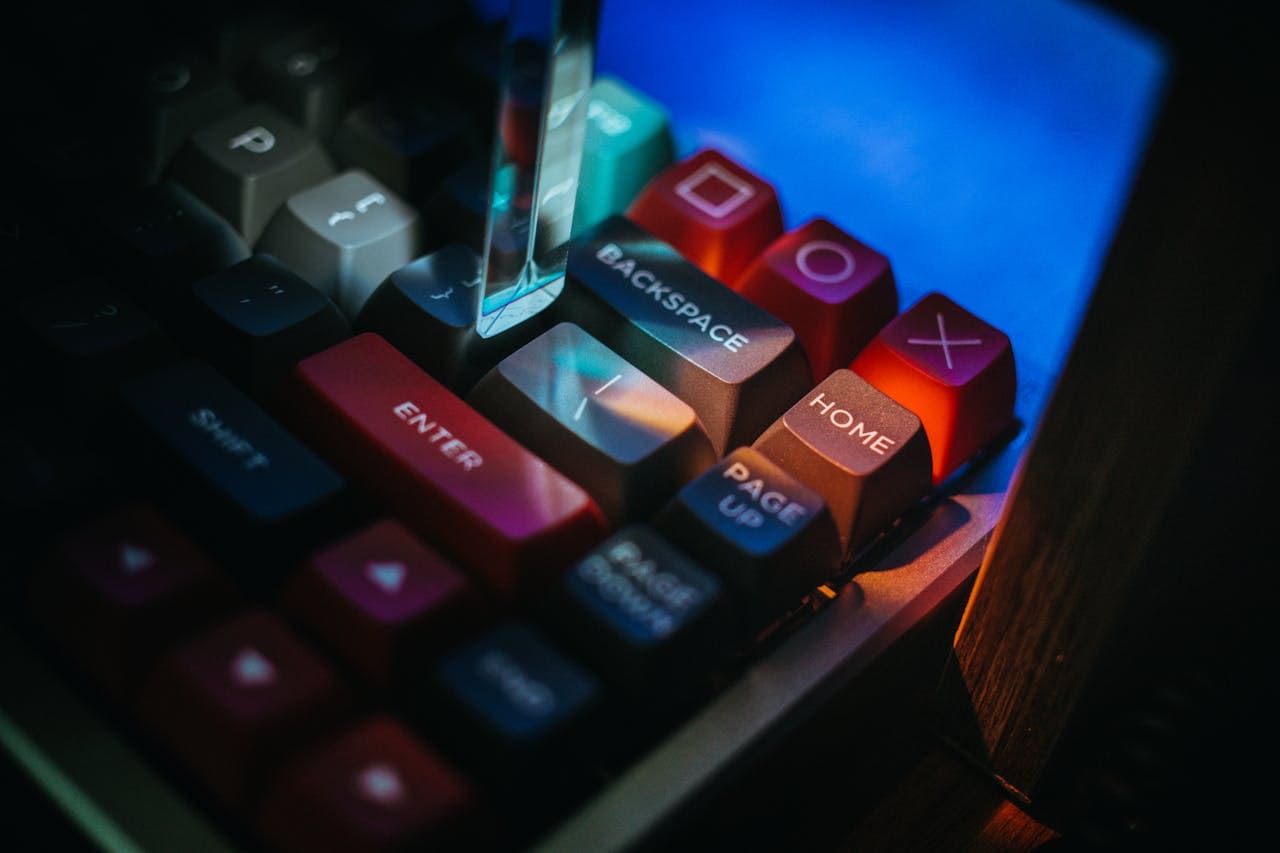
Mechanical Switch Fundamentals
Mechanical keyboards utilize individual switches beneath each key that contain moving parts including springs, contact points, and actuator mechanisms designed for millions of keypress cycles. Understanding these components helps identify failure modes specific to mechanical systems versus membrane alternatives.
Unlike rubber dome keyboards, mechanical switches feature complex internal mechanisms with metal contact points that complete electrical circuits when pressed. These contacts can oxidize over time, accumulate debris, or lose proper alignment, causing intermittent responses or complete key failure.
Switch types significantly influence failure patterns, with tactile switches like Cherry MX Blue experiencing different problems compared to linear switches like Cherry MX Red. Clicky switches contain additional components for audible feedback that can malfunction independently from basic switching functions.
Hotswappable keyboards allow switch replacement without soldering, making repairs more accessible for users with basic technical skills. However, traditional soldered keyboards require advanced repair techniques or professional service when individual switches fail mechanically.
Quality differences between premium switches (Cherry MX, Gateron) and budget alternatives affect longevity and repairability significantly. Premium switches often feature replaceable components and better construction tolerances that enable successful cleaning and maintenance procedures.
“Mechanical keyboard switch failures typically involve mechanical wear or contamination rather than electrical failures, making most issues repairable through proper cleaning techniques.” Alex Thompson
Immediate Diagnosis Steps
Begin troubleshooting by isolating whether the problem affects hardware switches or software configuration through systematic testing that eliminates variables and narrows potential causes effectively.
Test the problematic key using online keyboard testers or built-in Windows utilities to confirm the key isn’t registering input signals properly. Visit keyboard testing websites that display real-time key press detection to verify whether the switch produces any electrical signals when actuated.
Try the non-functional key in different applications including text editors, games, and system utilities to determine if the problem affects all software or specific applications. Application-specific failures suggest software conflicts rather than hardware switch problems.
Check key remapping software including manufacturer utilities, gaming software, or third-party applications that might have reassigned or disabled the problematic key function. Popular remapping tools like AutoHotkey, manufacturer software, or gaming profiles can override default key behaviors.
Examine the physical switch by removing the keycap carefully using a keycap puller or improvised tools like paperclips bent into removal hooks. Most keycaps attach through simple friction fits that release with gentle upward pressure applied evenly.
Inspect the exposed switch for obvious debris, liquid damage, or mechanical problems including bent actuator stems, damaged housing, or visible corrosion on metal contacts. Document any visible problems with photos before attempting cleaning procedures.
Test switch actuation manually by pressing the switch stem directly without the keycap attached, feeling for proper movement, tactile feedback, and return action. Compare the problematic switch’s feel and sound to adjacent working switches for reference.
Use a multimeter to test electrical continuity across switch contacts if you have basic electronics knowledge, measuring resistance changes when the switch activates and deactivates to verify proper electrical function independent of mechanical issues.
Switch Cleaning Methods
Most mechanical switch problems stem from debris accumulation, liquid contamination, or oxidized contacts that respond effectively to proper cleaning techniques using appropriate tools and cleaning agents.
Remove the keycap completely and examine debris around the switch housing, paying attention to hair, dust, food particles, or dried liquid residues that commonly cause switch malfunctions in daily-use keyboards.
Use compressed air to blow debris from switch housing areas, directing airflow from multiple angles to dislodge particles lodged between moving components. Hold the keyboard at various orientations while applying compressed air to maximize debris removal effectiveness.
Apply isopropyl alcohol (70% or higher concentration) using cotton swabs or precision applicators to clean switch housing exteriors and visible contact areas. Avoid excessive liquid application that might seep into switch internals and cause additional problems.
For switches with removable tops (like many Cherry MX variants), carefully separate the switch housing using appropriate tools to access internal components for thorough cleaning. This advanced technique requires steady hands and proper tool selection to avoid damaging plastic clips.
Clean internal switch components using high-concentration isopropyl alcohol applied with precision tools like toothpicks wrapped in cotton or specialized cleaning swabs designed for electronics work. Focus on contact areas where electrical connections occur during key activation.
Lubricate switch components using appropriate mechanical keyboard lubricants like Krytox GPL 205 Grade 0 or Tribosys 3203, applying minimal quantities to contact points and moving surfaces. Proper lubrication reduces friction and prevents future debris accumulation.
Allow switches to dry completely before reassembly, typically requiring 30-60 minutes depending on ambient humidity and cleaning agent used. Incomplete drying can cause electrical shorts or corrosion that creates new problems worse than original issues.
For persistent contamination, consider ultrasonic cleaning using jewelry cleaners filled with isopropyl alcohol, though this advanced technique requires complete switch disassembly and careful reassembly procedures.
Hardware Connection Issues
Mechanical keyboards utilize various connection methods including soldered switches, hotswappable sockets, and PCB-mounted components that can develop connection problems causing individual key failures.
Examine hotswappable switch sockets for proper switch insertion, ensuring switch pins align correctly with socket contacts and seat fully without gaps or misalignment. Improper installation commonly causes intermittent connections that manifest as key failures.
Check switch pin integrity for bent, broken, or corroded pins that prevent proper electrical contact with PCB sockets or solder joints. Switch pins should appear straight, clean, and free from oxidation or physical damage that impedes electrical continuivity.
Inspect PCB solder joints around problematic switches using magnification tools or smartphone cameras with macro capabilities to identify cracked solder joints, cold solder connections, or lifted traces that break electrical pathways.
Test adjacent switches to determine if multiple keys in the same matrix row or column exhibit problems, which indicates PCB trace damage or controller chip issues rather than individual switch failures.
Reseat hotswappable switches by removing them completely and reinstalling with proper alignment and firm pressure to ensure full engagement with socket contacts. Clean socket contacts using isopropyl alcohol if oxidation or debris appears visible.
For soldered keyboards, professional repair services can address solder joint problems, lifted traces, or component-level failures that require specialized equipment and expertise beyond typical user capabilities.
Consider firmware issues that might affect specific keys through corrupted key matrices or controller programming problems. Update keyboard firmware using manufacturer utilities or QMK/VIA software for compatible keyboards.
“Connection problems account for approximately 30% of individual key failures in mechanical keyboards, often masquerading as switch problems but requiring different repair approaches.” Maria Rodriguez
Software and Driver Problems
Modern mechanical keyboards integrate sophisticated software for customization, macro programming, and RGB lighting that can interfere with basic key functionality through conflicts, corruption, or misconfiguration.
Check manufacturer software including Razer Synapse, Corsair iCUE, Logitech G HUB, or SteelSeries Engine for key remapping, macro assignments, or disabled key configurations that might prevent normal key operation. These applications often override default Windows key behaviors.
Examine gaming profiles or application-specific settings that might disable certain keys during gameplay or specific software contexts. Many gaming keyboards feature profile switching that can accidentally disable keys like Windows keys or Alt+Tab combinations.
Test keyboard functionality with all manufacturer software closed or uninstalled temporarily to isolate software conflicts from hardware problems. Use Windows Safe Mode testing to eliminate third-party software interference completely.
Update keyboard drivers through Device Manager or manufacturer websites to resolve compatibility issues with recent Windows updates or application conflicts. Outdated drivers commonly cause individual key recognition problems or input lag issues.
Reset keyboard settings to factory defaults through manufacturer software or hardware reset procedures documented in user manuals. This eliminates custom configurations that might be causing key functionality problems.
Check Windows language and input settings for keyboard layout changes that might reassign key functions unexpectedly. International keyboard layouts can disable or relocate specific keys compared to standard QWERTY configurations.
Examine third-party software like AutoHotkey, gaming utilities, or system optimization tools that create input hooks potentially interfering with specific key recognition or processing.
For advanced users, consider using keyboard testing utilities that bypass Windows input systems to test raw switch signals directly, helping distinguish between hardware switch problems and software processing issues.
If you’re experiencing multiple key failures and need a reliable replacement, this premium mechanical keyboard offers excellent build quality with hotswappable switches for easy maintenance.
Advanced Repair Techniques
For persistent switch problems that resist cleaning and basic troubleshooting, advanced repair techniques including switch replacement, PCB modification, and component-level diagnostics become necessary.
Switch replacement requires appropriate replacement switches matching original specifications including actuation force, travel distance, and electrical characteristics. Mixing different switch types can create inconsistent typing experiences and potential compatibility problems.
Desoldering techniques for switch removal involve heating solder joints using soldering irons, desoldering pumps, or hot air stations while avoiding PCB damage from excessive heat application. Proper technique prevents lifted traces or damaged component pads.
Install replacement switches ensuring proper orientation, pin alignment, and full insertion before soldering connections. Improper installation can create intermittent connections or mechanical interference with adjacent switches.
For hotswappable keyboards, replacement involves simple switch removal and installation without soldering requirements, making repairs accessible to users with basic mechanical skills and appropriate replacement components.
Consider switch modification techniques including spring replacement, stem lubrication, or contact cleaning for switches that exhibit inconsistent behavior but aren’t completely failed. These procedures can restore functionality without full replacement.
PCB trace repair requires advanced electronics skills and specialized equipment for repairing broken traces, lifted pads, or damaged connection points. Professional repair services typically handle these complex procedures more effectively than amateur attempts.
Firmware modification using QMK or VIA software can work around hardware failures by reassigning key functions, creating alternative input methods, or compensating for damaged switches through software configuration.
Document repair procedures with photos and notes for future reference, especially for complex keyboards with unique disassembly requirements or specialized components that might need replacement again.
“Advanced mechanical keyboard repairs require proper tools, replacement components, and technical skills to avoid creating additional damage during repair attempts.” David Park
Professional Service Options
When DIY repairs exceed comfort levels or require specialized equipment, professional keyboard repair services offer expertise and tools necessary for complex mechanical keyboard restoration.
Authorized manufacturer repair services provide genuine replacement parts, warranty preservation, and specialized knowledge of specific keyboard models and their common failure modes. These services typically cost more but guarantee proper repair quality.
Independent electronics repair shops often handle mechanical keyboard repairs at lower costs than manufacturer services, though parts availability and expertise levels vary significantly between different service providers.
Specialty mechanical keyboard repair services focus specifically on enthusiast keyboards and possess deep knowledge of switch types, PCB designs, and modification techniques that general electronics repairs might lack.
Consider repair costs versus replacement costs, especially for budget mechanical keyboards where professional repair expenses might exceed new keyboard prices. Premium keyboards typically justify professional repair investments more effectively.
Shipping considerations for professional repairs include proper packaging to prevent additional damage during transit, insurance coverage for valuable keyboards, and tracking services to monitor repair progress and return shipment.
Warranty implications vary by manufacturer and repair service type, with authorized repairs preserving coverage while third-party repairs might void existing warranties. Review warranty terms before choosing repair options.
Turnaround times for professional repairs range from days to weeks depending on parts availability, repair complexity, and service provider workload. Plan for extended periods without keyboard access during professional repair processes.
For users needing immediate productivity during repairs, this compact wireless mechanical keyboard provides excellent temporary replacement capabilities.
Check out this detailed video demonstrating mechanical keyboard switch replacement and repair techniques:
Video Credit: Tech Zone 925 / YouTube
Frequently Asked Questions
One key on my mechanical keyboard works intermittently – sometimes it registers and sometimes it doesn’t. What causes this inconsistent behavior?
Intermittent key functionality typically indicates loose connections, partially stuck switch mechanisms, or oxidized contacts that make inconsistent electrical connections. This commonly occurs with switches experiencing wear, debris accumulation, or moisture exposure that affects contact reliability.
Clean the affected switch thoroughly using compressed air and isopropyl alcohol, then test switch actuation manually to feel for mechanical inconsistencies. If cleaning doesn’t resolve intermittent behavior, the switch likely requires replacement due to worn internal components or damaged contact surfaces that create unreliable electrical connections.
Can I replace just one switch on my mechanical keyboard, or do I need to replace multiple switches for consistency?
You can replace individual switches without affecting other keys, though mixing different switch types creates inconsistent typing experiences due to varying actuation forces, travel distances, and tactile feedback characteristics. For hotswappable keyboards, single switch replacement is straightforward and economical.
However, if multiple switches show signs of wear or similar problems, consider replacing related switches simultaneously to maintain typing consistency and prevent future failures. Switches from the same manufacturing batch typically exhibit similar lifespans and failure patterns across heavily-used keyboards.
My mechanical keyboard key physically moves but doesn’t register any input. Is this a hardware or software problem?
Physical key movement without input registration typically indicates hardware problems involving switch contacts, PCB connections, or controller communication rather than software conflicts. Software issues rarely allow mechanical movement while blocking electrical signals completely.
Test the keyboard in different applications and operating systems to confirm the lack of input registration across all software contexts. Use a multimeter to test switch electrical continuity, or try the keyboard on different computers to isolate hardware failures from system-specific software problems.
How do I know if my mechanical keyboard switch is worth repairing or should be replaced entirely?
Evaluate repair costs against replacement costs while considering keyboard age, switch quality, and overall condition. Premium keyboards with high-quality switches like Cherry MX typically justify repair investments, while budget keyboards might cost more to repair than replace.
Consider switch availability, your technical skill level, and warranty status when making repair decisions. Hotswappable keyboards make switch replacement simple and cost-effective, while soldered keyboards require more complex repairs that might exceed economical thresholds for older or lower-value keyboards.
Can liquid damage to mechanical keyboard switches be repaired, or is replacement always necessary?
Liquid damage repair success depends on liquid type, exposure duration, and response speed after the incident. Water and clear beverages often allow successful cleaning and restoration, while sugary drinks, coffee, or alcoholic beverages typically cause permanent damage requiring switch replacement.
Immediate response involving complete disassembly, thorough cleaning with isopropyl alcohol, and proper drying can save switches from minor liquid exposure. However, corrosion, sticky residues, or electrical shorts from liquid damage often necessitate complete switch replacement for reliable long-term operation.
Sources:
- Mechanical Keyboard Switch Database
- Keyboard Enthusiast Community Standards
- QMK Firmware Documentation
- Cherry MX Switch Specifications
- Electronics Repair Best Practices