
You flushed your Rheem water heater, closed the drain valve, and now there’s a slow puddle forming underneath. Don’t panic, this is fixable, and your tank isn’t failing.
A Rheem water heater drain valve leaking is almost always caused by sediment debris wedged in the valve seat, a loose or worn-out plastic gate valve, or deteriorated seals that no longer hold pressure. The fix ranges from a simple cap-and-seal remedy to a full brass ball valve upgrade, and most homeowners can handle it in under an hour with basic tools. Your tank is fine, it’s the valve that needs attention.
This guide walks you through every step: identifying the cause, shutting down safely, and choosing the right repair. Whether you’re tightening a drip or swapping in a heavy-duty full port ball valve upgrade for your Rheem, you’ve got this.

Key Takeaways
- A Rheem water heater drain valve leaking is typically caused by sediment buildup, a loose valve connection, or deteriorated plastic seals that can be fixed in under an hour with basic tools.
- Always shut off power and close the cold water supply before attempting any repairs to avoid burns and pressure-related injuries from the heated tank.
- Upgrading from the factory plastic gate valve to a brass ball valve provides superior sediment resistance, faster draining, and 15+ years of durability compared to the typical 3-7 year lifespan of plastic valves.
- For immediate relief, try gently tightening the valve connection with a wrench or capping the outlet with a brass hose cap and Teflon tape before committing to a full replacement.
- Flush your Rheem water heater every 6–12 months to prevent sediment accumulation that jams valves, reduces efficiency, and accelerates component wear.
- Check your home’s water pressure and consider installing a pressure-reducing valve if it consistently exceeds 80 PSI, as excessive pressure stresses drain valve connections and other fittings.
Primary Causes of Drain Valve Leaks
Understanding why your drain valve leaks helps you pick the right fix. Here are the three main culprits.
Sediment Buildup and Internal Blockages
This is the most common reason your Rheem water heater drain valve won’t stop dripping after a flush. Over time, calcium carbonate and mineral scale accumulate at the bottom of your tank. When you open the drain valve to flush, tiny pebbles of this hardened sediment travel with the water. Some get lodged right in the valve seat, a phenomenon plumbers call the “Sediment Trap.”
Even a grain of scale the size of a sand particle can prevent the gate from seating flush. The valve looks closed, feels closed, but water keeps weeping past that tiny obstruction. According to the U.S. Department of Energy, sediment buildup reduces efficiency and accelerates component wear, making regular flushing essential.
If your leak started immediately after a maintenance flush, sediment in the water heater drain valve is your most likely suspect.
Wear, Tear, and Loose Drain Valves
Sometimes the valve simply loosens over time. Thermal expansion cycles, your tank heating and cooling daily, can gradually back out the valve threads. A quarter-turn of looseness at the tank fitting is enough to cause a steady drip from the threaded connection.
Tightening a leaking water heater drain valve with a wrench often solves this. But be careful: overtightening a plastic valve can crack the housing or strip the threads inside the tank’s welded coupling.
Material Deterioration and Valve Quality
Most Rheem water heaters ship with a factory plastic gate valve. These valves are functional but not built for decades of service. The plastic interior wears down, the rubber seal hardens, and eventually the valve can’t hold back 40–80 PSI of household water pressure.
“Replaced the plastic drain valve on my Rheem with a brass ball valve. The factory one was basically crumbling after 6 years.” via r/Plumbing
Replacing a Rheem water heater drain valve with brass is the long-term answer when the plastic one deteriorates beyond repair.
Inspection and Immediate Safety Measures
Before you grab a wrench, protect yourself. Water heaters store water at 120°F–140°F, and a surprise spray can cause serious burns.
Power Shutdown and Water Supply Isolation
First, cut the power. For an electric Rheem, flip the dedicated breaker at your panel. For a gas model, turn the gas control knob to the “Pilot” or “Off” position. Next, close the cold water supply valve at the top of the tank. This stops fresh water from entering and pressurizing the system while you work.
Never skip this step. Working on a pressurized, heated tank is the fastest way to turn a simple repair into an emergency room visit.
Initial Leak Verification and Area Assessment
Dry the area around the drain valve completely with a towel. Then wait 15–20 minutes and check again. You need to confirm the water is actually coming from the drain spigot, not from the T&P (temperature and pressure) relief valve above, or from a fitting connection higher on the tank that’s trickling down.
A water heater leaking from the bottom drain spigot will show moisture directly at the valve handle or the threaded connection to the tank.
Protective Gear and Safety Precautions
Wear heat-resistant gloves and safety glasses. Even after shutting off power, the tank water stays hot for hours. Keep towels and a shallow pan under the valve to catch drips. If you need to drain the tank fully, connect a garden hose to the valve and route it to a floor drain or outside.
Repair and Replacement Solutions
Here’s where we fix it. Start with the simplest approach and escalate only if needed.
Tightening and Sealing the Valve
If the leak comes from the threaded connection (where the valve meets the tank), try tightening it first. Use a large adjustable wrench and turn the valve body clockwise, gently. A quarter to half turn is usually enough. If the leak stops, you’re done.
For a Rheem water heater drain valve cap fix, thread a brass hose cap with a rubber washer onto the valve outlet. Wrap the hose threads with Teflon tape first. This seals the outlet and buys you time if the internal gate won’t seat. It’s a legitimate quick fix that many plumbers recommend as a first step.
Replacing a Faulty or Broken Valve
If tightening and capping don’t stop the drip, you need a full replacement. The standard Rheem water heater drain valve thread size is 3/4-inch NPT (National Pipe Thread). This is universal across most residential water heaters, so finding a replacement is straightforward.
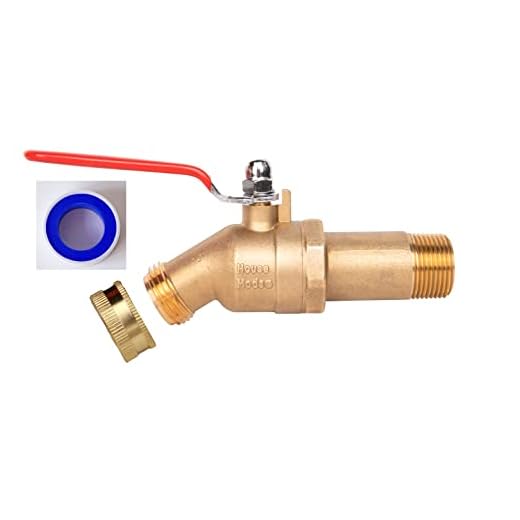
Your best upgrade path: swap the plastic gate valve for a 3/4-inch brass ball valve. Ball valves provide a full-bore opening for faster draining and a positive shutoff that won’t get jammed by sediment. For the install, a pipe wrench set gives you the leverage and grip you need.
Tools, Materials, and Step-by-Step Process
Here’s what you need for a complete Rheem water heater drain valve replacement:
- Pipe wrench or large channel-lock pliers
- 3/4-inch brass ball valve (full port preferred)
- Teflon tape (yellow gas-rated tape works on water too)
- Garden hose for draining
- Bucket and towels
Step-by-step process:
- Shut off power and cold water supply.
- Connect a garden hose and drain the tank completely.
- Use your pipe wrench to unscrew the old valve counterclockwise. Go slowly, if it’s plastic, aggressive force can snap it inside the tank fitting.
- Clean the tank threads with a wire brush or rag.
- Wrap the new brass valve threads with 4–6 wraps of Teflon tape (clockwise when facing the thread end).
- Hand-thread the new valve into the tank, then tighten 1–2 additional turns with your wrench.
“The biggest mistake I see is people cranking too hard on the old plastic valve and snapping it off flush with the tank. Go slow. Use penetrating oil if it’s stuck.” via r/HomeImprovement
Testing and Confirming the Repair
Close the new valve. Remove the garden hose. Open the cold water supply and let the tank refill. While it fills, check the valve connection for any seepage. Once the tank is full, restore power and monitor the valve area for 24 hours. A dry floor means you nailed it.
Here’s a quick comparison of your valve options:
| Feature | Plastic Gate Valve (Factory) | Brass Ball Valve (Upgrade) |
|---|---|---|
| Material | Plastic/nylon | Solid brass |
| Shutoff Type | Gate (partial seal) | Ball (full positive shutoff) |
| Sediment Resistance | Low, easily jammed | High, full port clears debris |
| Durability | 3–7 years typical | 15+ years |
| Draining Speed | Slow, restricted flow | Fast, full bore opening |
Proactive Maintenance and Leak Prevention
Fixing the leak is step one. Keeping it from happening again is where you save real money and hassle.
Routine Flushing and Sediment Management
Flush your Rheem water heater every 6–12 months. This prevents the heavy sediment buildup that jams valves and reduces heating efficiency. The process is simple: connect a hose, open the drain valve, and let water flow until it runs clear. If you’ve upgraded to a brass ball valve, flushing becomes faster and the valve won’t clog as easily.
Rheem’s own maintenance guidelines recommend periodic flushing to extend tank life. You can find model-specific instructions at Rheem’s official support page.
Upgrading Components and Using Quality Parts
Whenever you replace a component, choose quality. Brass fittings, stainless steel hose connectors, and name-brand valves outlast their cheap counterparts significantly. Sealing your water heater drain valve with Teflon tape during every reinstallation is a small habit that prevents future leaks.
If you have a Rheem Performance Platinum model, the drain valve is the same 3/4-inch NPT thread. The upgrade path is identical regardless of your specific Rheem series.
Monitoring Pressure Relief and Discharge Lines
Your T&P (temperature and pressure) relief valve is a critical safety device. If your home’s water pressure exceeds 80 PSI, it puts extra stress on every connection, including your drain valve. Consider installing a pressure-reducing valve on your main water line if your pressure is consistently high. Check the T&P discharge line periodically for drips, which can indicate excessive tank pressure.
Data Insights and Analysis
According to the Water Quality Association, over 85% of U.S. homes have hard water, which directly contributes to sediment accumulation in water heater tanks. A 2025 home maintenance survey by Thumbtack found that water heater drain valve issues accounted for roughly 18% of all water heater service calls, most of which were DIY-preventable with regular flushing.
Expert Note: "Plastic gate valves fail not because of water pressure alone, but because mineral scale creates micro-abrasions on the soft plastic seating surface. Each flush cycle grinds sediment across the gate, progressively destroying its ability to seal. Brass resists this abrasion, which is why a valve upgrade solves the problem permanently rather than just delaying it."
Frequently Asked Questions
What causes a Rheem water heater drain valve to leak?
The most common cause is sediment debris wedged in the valve seat after flushing. Other causes include a loose or worn plastic gate valve and deteriorated seals. Over 85% of U.S. homes have hard water that accelerates sediment buildup, making this issue widespread.
How do I fix a leaking Rheem water heater drain valve?
Start by tightening the valve connection with a wrench (quarter-turn). If that fails, cap the outlet with a brass hose cap and rubber washer wrapped in Teflon tape. For persistent leaks, replace the plastic gate valve with a 3/4-inch brass ball valve, which resists sediment jamming and lasts 15+ years.
Can I replace my Rheem drain valve myself?
Yes. Most homeowners complete this in under an hour with basic tools: a pipe wrench, brass ball valve, Teflon tape, and a garden hose. Always shut off power and water supply first, drain the tank completely, and apply Teflon tape to new valve threads to prevent leaks.
What size is a Rheem water heater drain valve?
The standard Rheem water heater drain valve uses a 3/4-inch NPT (National Pipe Thread) connection. This size is universal across most residential water heaters, including Rheem Performance Platinum models, making replacements straightforward and affordable.
Why is my drain valve still leaking after I tightened it?
If tightening didn’t work, sediment is likely blocking the internal gate from sealing properly. The plastic valve itself may also be cracked or worn. In these cases, a full replacement with a brass ball valve is necessary to stop the leak permanently.
How often should I flush my Rheem water heater to prevent drain valve issues?
Flush every 6–12 months to prevent sediment buildup that jams valves and reduces efficiency. Regular flushing is critical in hard-water areas where mineral scale accelerates. A brass ball valve makes flushing faster and prevents the clogging that causes leaks.
Read More:
- Rheem Water Heater Problems (Complete Troubleshooting Guide)
- Rheem Water Heater Pilot Light Won’t Stay Lit (Here’s the Tech’s Fix-It Guide)
- Code 12 on Rheem Tankless Water Heater (Flame Failure Fix Guide)