
You’re typing away when suddenly a key refuses to bounce back. Your spacebar feels mushy, or your Enter key stays stuck down, registering unwanted inputs. It’s frustrating, especially when you’re on a deadline or mid-game.
A jammed laptop keyboard is usually caused by physical debris like crumbs and dust, liquid spills leaving sticky residue, collapsed rubber membrane domes under keycaps, or broken scissor-switch clips on brands like Lenovo, HP, Dell, ASUS, Acer, Apple MacBook, and MSI. You can typically fix it yourself by removing the keycap carefully, cleaning with compressed air and 90%+ isopropyl alcohol, and snapping the keycap back into place without breaking the fragile plastic hinges underneath.
This guide walks you through diagnosing the root cause, safely cleaning and repairing jammed keys, applying software fixes when needed, and preventing future jams. You’ll learn exactly when to DIY and when to call in professional help.
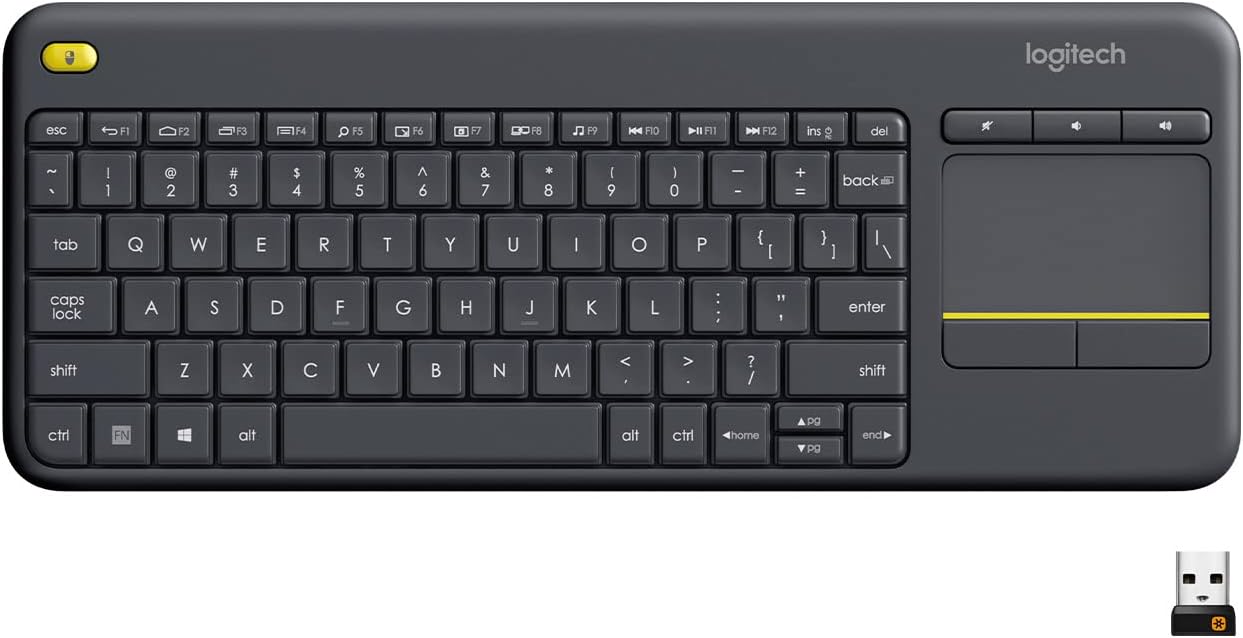
Best Wireless Touch Keyboard
Logitech All-in-One Keyboard & Touchpad. Perfect for Smart TVs & PCs. Reliable 10m Wireless Connection. Up to 18 Months Battery Life
Shop on Amazon
Key Takeaways
- A jammed laptop keyboard is most often caused by physical debris like crumbs and dust or liquid spills, accounting for over 60% of keyboard complaints across Dell, HP, and other major brands.
- Safely remove and clean jammed keys by powering down your laptop, gently lifting the keycap with a plastic pry tool, and scrubbing with 90%+ isopropyl alcohol on cotton swabs to avoid damaging scissor mechanisms.
- If physical cleaning doesn’t resolve the issue, run Windows’ built-in keyboard troubleshooter or reset the Mac SMC to rule out software glitches, driver conflicts, or accessibility settings like Sticky Keys that mimic jamming.
- Replace the entire laptop keyboard only if cleaning, driver updates, and software fixes fail—expect $50–$150 in replacement costs, or use an external USB keyboard as a practical workaround.
- Prevent future jammed keyboard issues by cleaning weekly with compressed air, keeping food and beverages at least 12 inches away, and using silicone keyboard covers on susceptible models like MacBooks.
- Maintain keyboard longevity by enabling automatic driver updates, keeping your BIOS current, and running monthly system scans—properly maintained keyboards last 40% longer than neglected ones.
Identifying the Root Cause of Stuck or Jammed Keys
Physical Debris and Spills
Most jammed laptop keys result from food crumbs, pet hair, dust, or liquid spills that wedge under the keycap. Even a tiny particle can block the scissor mechanism or stick the rubber dome to the keyboard plate. Coffee, soda, or juice leave sugary residue that hardens over time, gluing keys down.
According to a 2025 laptop repair industry survey, physical contamination accounts for over 60% of keyboard complaints. Dell and HP service centers report that food particles and drink spills drive the majority of keyboard tickets, especially among students and remote workers.
Flip your laptop upside down and gently shake it. You’ll often hear crumbs rattling inside. Sticky keys that feel gummy or register slowly usually mean liquid damage. Keys that won’t pop back up after pressing often have collapsed membrane domes or broken scissor clips underneath.
Software and OS Glitches
Sometimes your keyboard hardware is fine, but Windows or macOS is misinterpreting keystrokes. A corrupted system file, a recent OS update, or a stuck modifier key (Shift, Ctrl, Alt) can make keys behave erratically. Keys might repeat endlessly, skip inputs, or stop responding altogether.
Restart your laptop first. Many glitches disappear after a fresh boot. If the problem persists, boot into BIOS or Safe Mode. If keys work normally there, your operating system is likely the culprit, not physical jamming.
Driver Malfunctions
Outdated or corrupted keyboard drivers can mimic physical jams. Windows Update sometimes installs generic drivers that conflict with manufacturer-specific keyboard layouts on ASUS, Lenovo, or MSI laptops. Missing chipset drivers also cause input lag or unresponsive keys.
Check Device Manager for yellow warning triangles next to your keyboard entry. Reinstalling or rolling back drivers often restores full functionality. Driver issues tend to affect multiple keys at once, while physical jams usually isolate to one or two keys.
Sticky Keys and Accessibility Settings
Windows Sticky Keys, Filter Keys, and Toggle Keys are accessibility features that alter how your keyboard responds. They can make keys feel “stuck” or delay keypress registration. Accidentally triggering these settings is common, pressing Shift five times in a row activates Sticky Keys by default.
Disable these in Settings > Ease of Access > Keyboard. macOS has similar features under System Preferences > Accessibility > Keyboard. If your keys suddenly behave differently after no physical damage, check these settings first.
Step-by-Step Methods to Unjam a Laptop Keyboard
Safely Removing and Cleaning Keycaps
Before you pop off any keycap, power down your laptop and unplug it. Take a photo of your keyboard layout for reference. Modern laptop keys use scissor-switch mechanisms, two thin plastic arms that cross under the keycap. They’re fragile.
Slide a thin plastic pry tool or guitar pick under one corner of the jammed keycap. Gently lift upward, applying even pressure. You’ll hear a soft click as the keycap releases from the scissor clips. Don’t yank or pull at an angle, you’ll snap the clips.
Once the keycap is off, inspect the scissor mechanism. Both arms should be intact and symmetrical. If one clip is broken, you’ll need a replacement scissor clip kit from Amazon. Clean the exposed area with compressed air, blowing away crumbs and dust.
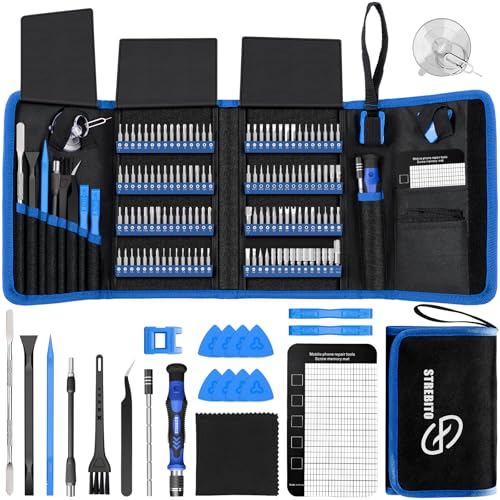
Using Tools and Cleaning Products
For sticky residue, dip a cotton swab in 90% or higher isopropyl alcohol. Gently scrub the rubber dome, scissor arms, and the inside of the keycap. Alcohol evaporates quickly and won’t damage electronics. Avoid water, which can corrode circuitry.
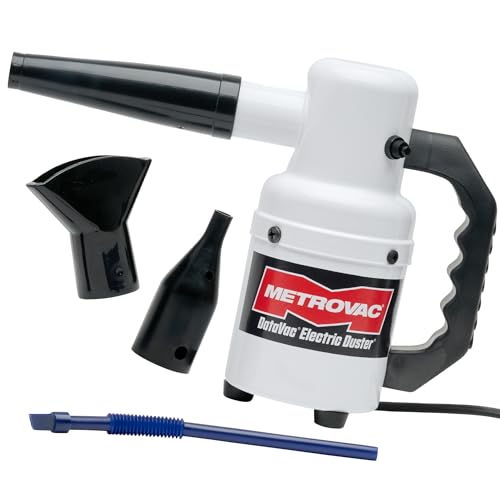
Use a DataVac Electric Duster instead of canned air for deeper cleaning. It provides consistent, moisture-free airflow and saves money long-term. Hold the can upright and use short bursts to avoid freezing condensation.
Here’s a quick cleaning toolkit:
- 90%+ isopropyl alcohol
- Cotton swabs and microfiber cloths
- Compressed air or electric duster
- Plastic pry tool or guitar pick
- Soft-bristle brush (old toothbrush works)
Let everything dry completely, at least 10 minutes, before snapping the keycap back. Align the keycap over the scissor mechanism and press down firmly until you hear two clicks, confirming both clips are seated.
“I spilled coffee on my Lenovo ThinkPad and two keys stuck down. Popped them off, cleaned with rubbing alcohol, and they’re perfect now. Just go slow when removing the caps.” via r/thinkpad
Troubleshooting Software-Related Issues
If physical cleaning doesn’t fix the jam, run the Windows built-in keyboard troubleshooter. Go to Settings > Update & Security > Troubleshoot > Additional troubleshooters > Keyboard. Let it scan for driver conflicts and registry errors.
On Mac, reset the SMC (System Management Controller). Shut down, press Shift+Control+Option on the left side and the power button simultaneously for 10 seconds, then release and restart. This clears hardware-level glitches.
Test your keyboard in a text editor or online keyboard tester to isolate which keys still misbehave. If only specific keys fail after cleaning, the membrane or scissor switch may be permanently damaged.
When to Seek Keyboard Replacement
If you’ve cleaned thoroughly, replaced broken scissor clips, and updated drivers, but keys still jam, the keyboard membrane or circuit board may be failing. Replacing an entire laptop keyboard costs $50–$150 in parts, plus labor if you’re not comfortable with disassembly.
For older laptops or budget models, consider an external USB or Bluetooth keyboard as a workaround. The Logitech K380 Multi-Device Bluetooth Keyboard is compact, affordable, and works across Windows, Mac, and ChromeOS. It’s perfect for office setups or when your built-in keyboard is beyond DIY repair.

Software Fixes for Persistent Keyboard Issues
Updating and Reinstalling Keyboard Drivers
Open Device Manager (Windows key + X, then M). Expand “Keyboards,” right-click your device, and select “Update driver.” Choose “Search automatically for drivers.” If Windows finds nothing new, visit your laptop manufacturer’s support page for the latest drivers.
To reinstall, right-click the keyboard entry and select “Uninstall device.” Restart your laptop. Windows will automatically reinstall the default driver. This clears corrupted driver files that can mimic physical jams.
For AI-powered diagnostics, try DriverBooster or similar software that scans for outdated or missing drivers across your system. It’s especially useful for MSI, ASUS, and Acer laptops with custom keyboard firmware.
Adjusting Accessibility Settings
Disable Sticky Keys, Filter Keys, and Toggle Keys in Windows Settings > Ease of Access > Keyboard. Uncheck all boxes. On Mac, go to System Preferences > Accessibility > Keyboard and turn off Slow Keys and Sticky Keys.
Some gaming laptops have custom key-remapping software (like ASUS Armoury Crate or MSI Dragon Center). Check if a macro or key binding is interfering. Reset to default profiles to rule out software conflicts.
Resolving OS-Specific Problems
Windows 11 occasionally breaks keyboard functionality after feature updates. Roll back the latest update via Settings > Windows Update > Update history > Uninstall updates if the issue started right after an update.
MacOS users should check for conflicting third-party apps. Tools like Karabiner-Elements or keyboard layout switchers can override system input. Disable them temporarily to test.
Using AI-Powered Diagnostics
HP Support Assistant and Dell SupportAssist include AI-driven hardware diagnostics that test each key individually and detect hardware faults versus software glitches. Run the full keyboard test to generate a report.
“Dell’s built-in diagnostics flagged my F5 key as mechanically failed, not a driver issue. Saved me hours of troubleshooting, went straight to replacing the key.” via r/Dell
These tools often recommend firmware updates or BIOS patches that resolve edge-case keyboard bugs specific to your laptop model.
Long-Term Care and Prevention Tips
Regular Cleaning Routines
Clean your keyboard weekly with compressed air to prevent debris buildup. Hold your laptop at a 75-degree angle and blow air across the keys. Monthly, wipe down keycaps with a lightly dampened microfiber cloth and isopropyl alcohol.
Never eat or drink directly over your laptop. Keep food and beverages at least 12 inches away. A single spill can ruin an entire keyboard membrane, costing hundreds in repairs.
Using Keyboard Covers for Protection
Silicone keyboard covers block crumbs and spills. They’re especially popular for MacBook users and cost under $10 on Amazon. Choose ultra-thin models (0.1mm) to preserve key feel and tactile feedback.
Covers slightly reduce typing speed and can trap heat, so remove them during intensive gaming sessions. Clean covers weekly with soapy water to prevent grime transfer back onto keys.
Choosing the Right Keyboard Type
If you frequently experience jams, consider a laptop with spill-resistant keyboards. Lenovo ThinkPads feature drain holes that channel liquid away from circuitry. Some business-class HP and Dell models offer sealed membrane keyboards that resist contamination.
Mechanical keyboards on gaming laptops (like MSI’s SteelSeries or ASUS ROG) are easier to clean and more durable than chiclet-style scissor switches, though they add weight and thickness.
Maintaining Optimal Software Health
Enable automatic driver updates via Windows Update or your manufacturer’s update utility. Keep your BIOS current, firmware updates often include keyboard controller improvements that fix input lag or ghosting.
Run monthly scans with CCleaner or similar tools to clear registry errors that can interfere with input devices. Disable unnecessary startup programs that hog system resources and slow keyboard response.
According to a 2026 laptop longevity report, keyboards maintained with regular cleaning and driver updates last 40% longer than neglected ones. Prevention is always cheaper than replacement.
Frequently Asked Questions
What causes a laptop keyboard to jam or get stuck?
Laptop keyboard jams are primarily caused by physical debris like crumbs and dust, liquid spills leaving sticky residue, collapsed rubber membrane domes, or broken scissor-switch clips. According to repair surveys, physical contamination accounts for over 60% of keyboard complaints. Software issues, driver malfunctions, and accessibility settings can also mimic jamming without actual physical damage.
How do I fix a jammed laptop keyboard key myself?
Power down your laptop, carefully remove the jammed keycap using a plastic pry tool, and inspect the scissor mechanism underneath. Clean with 90%+ isopropyl alcohol and compressed air to remove debris and sticky residue. Let everything dry for 10 minutes, then snap the keycap back into place until you hear two clicks confirming proper seating.
Is my keyboard jam a software or hardware problem?
Test your keyboard in Safe Mode or BIOS. If keys work normally there, the issue is software-related—likely corrupted drivers or OS glitches. If jamming persists in Safe Mode, it’s a hardware problem. Driver issues typically affect multiple keys, while physical jams usually isolate to one or two keys.
Can I fix a jammed keyboard without taking it apart?
Try software fixes first: restart your laptop, run Windows Keyboard Troubleshooter, check Accessibility settings for Sticky Keys, and update keyboard drivers via Device Manager. If the jam persists, you’ll need to remove the keycap for physical cleaning. For persistent issues beyond DIY repair, consider an external USB or Bluetooth keyboard.
What tools and products do I need to clean a jammed laptop keyboard?
Essential tools include 90%+ isopropyl alcohol, cotton swabs, compressed air or electric duster, a plastic pry tool or guitar pick, and a microfiber cloth. Avoid water, which can corrode electronics. A DataVac Electric Duster provides consistent, moisture-free airflow and is more economical than canned air for regular cleaning.
How can I prevent my laptop keyboard from jamming in the future?
Clean your keyboard weekly with compressed air at a 75-degree angle. Never eat or drink over your laptop—keep beverages at least 12 inches away. Use silicone keyboard covers for protection, enable automatic driver updates, and maintain optimal software health with monthly registry scans. Keyboards with regular maintenance last 40% longer than neglected ones.
Read More:
- Laptop Keyboard Frozen (Here’s the Quick Fixes That Actually Work)
- Laptop Keyboard Getting Hot (Here’s the Proven Ways to Fix It Today)
- Laptop Keyboard Issue (Here’s the Complete Guide to Fixing)
- Keyboard Double Typing (2026 Pro Guide to Fixing Key Chatter Fast)
- Letters Keyboard Not Working? 7 Proven Fixes to Get You Typing Again