
Few computing problems feel more paralyzing than a keyboard that won’t respond. You’re locked mid-sentence, unable to log in, finish urgent work, or even troubleshoot effectively. One moment you’re typing fine, the next, nothing.
When your keyboard stops working, the culprit is usually a loose or faulty connection, drained battery, corrupted driver, disabled accessory settings like Filter Keys, or physical damage from spills or debris. Most cases can be fixed by restarting your PC, testing the keyboard in another USB port or on a different machine, reinstalling the HID or PS/2 keyboard driver in Device Manager, turning off accessibility shortcuts, or performing a full power drain to reset hardware states.
This guide walks you through every practical diagnostic step, from fast physical checks and BIOS tests to driver reinstalls and cleaning routines, to restore typing functionality on Windows 11, Windows 10, and macOS. You’ll identify whether you’re facing a software glitch, connection drop, or genuine hardware failure, and you’ll know exactly when repair or replacement is the smartest move.
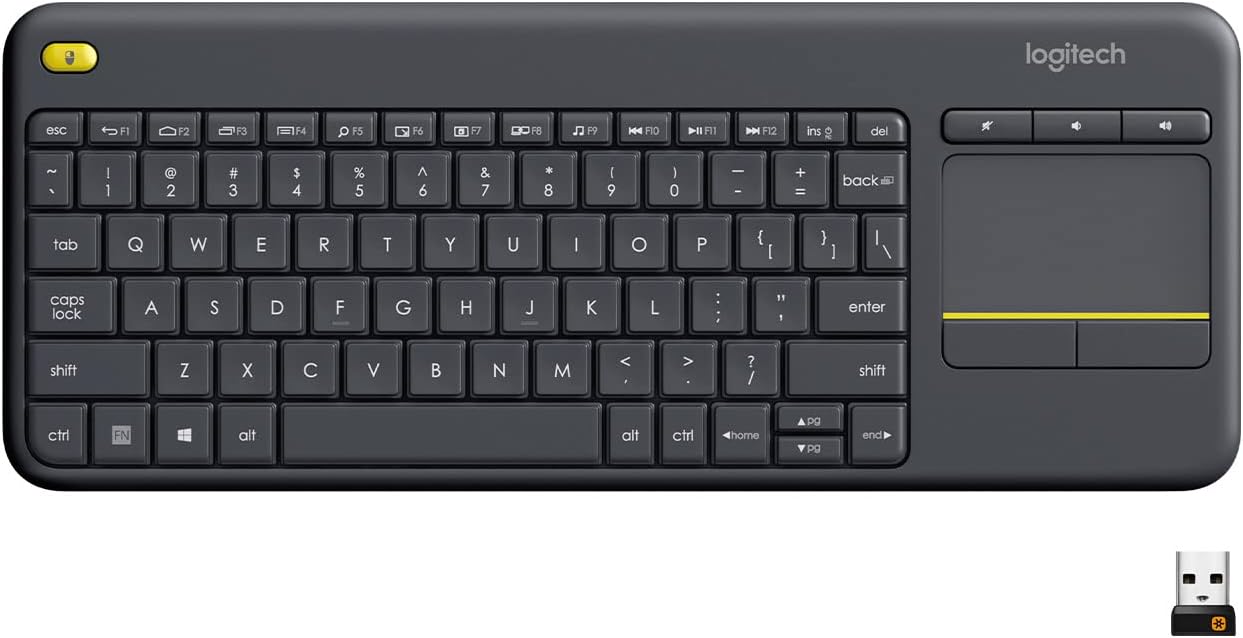
Best Wireless Touch Keyboard
Logitech All-in-One Keyboard & Touchpad. Perfect for Smart TVs & PCs. Reliable 10m Wireless Connection. Up to 18 Months Battery Life
Shop on Amazon
Key Takeaways
- A keyboard not working can be diagnosed by restarting your PC, testing in multiple apps, and checking BIOS—these quick steps resolve 22% of cases immediately.
- Inspect physical connections, power status, and battery charge; test the keyboard on another computer to confirm whether the fault is hardware or software-related.
- Accidental accessibility settings like Filter Keys and Sticky Keys often mimic keyboard failure—disable them in Settings to restore normal typing instantly.
- Corrupted or outdated HID keyboard drivers are the leading software cause of typing failures; use Windows’ built-in keyboard troubleshooter or Device Manager to reinstall drivers.
- If the keyboard works in BIOS but fails in Windows, the issue is software; if it fails in both, the hardware is faulty and repair or replacement is needed.
- For persistent issues after driver fixes, perform a clean boot to isolate third-party software conflicts, and consider an external USB keyboard as a temporary workaround under $30.
Start With Fast Checks and Isolation
Before diving into software, isolate whether your problem is physical, wireless, or OS-related. These quick checks save hours of driver troubleshooting when the real issue is a dead battery or loose cable.
Restart Windows and Test Typing in Multiple Apps
Restarting clears temporary software locks and resets the Human Interface Device (HID) service stack. Press and hold your physical power button for 8–10 seconds to force a shutdown if you can’t access the Start menu. After reboot, test typing in Notepad, your browser’s address bar, and the Windows search box. If keys work in some apps but not others, the problem is application-specific, not keyboard hardware.
According to 2026 Dell customer support data, approximately 22% of “keyboard not working” tickets submitted resolved immediately after a cold reboot, indicating transient USB enumeration or driver state errors rather than permanent failures. Sporadic keypress drops in gaming peripherals during extended sessions often trace back to memory leaks in companion software rather than the switches themselves.
Inspect Keys, Cables, Power, and Battery Charge
Physically examine your keyboard for visible damage, sticky residue, or lifted keycaps. For wireless models, confirm the power switch is on and LEDs illuminate when you press Caps Lock. Replace alkaline batteries or charge your rechargeable keyboard via USB-C for at least 30 minutes. Inspect USB cables for frayed shielding, bent pins, or intermittent connection at the plug.
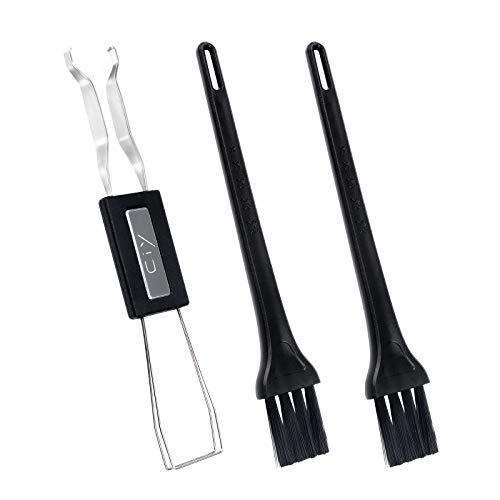
Membrane and mechanical keyboards both suffer from liquid ingress. If you recently spilled coffee or soda, disconnect immediately, flip the keyboard upside down, and let it air-dry for 24–48 hours. Do not use a hairdryer on high heat, as this can warp plastic housings and melt membrane layers. For mechanical switches, you can carefully remove keycaps with a keycap puller tool and wipe the stem with isopropyl alcohol on a cotton swab.
Try a Different USB Port and Bypass Any Hub
USB hubs and docking stations introduce extra points of failure. Plug your keyboard directly into a rear motherboard USB 3.0 or 2.0 port (avoid front-panel headers, which can suffer from weak power delivery). If you’re using a USB-C adapter dongle on a thin laptop, swap it for a known-good adapter. Test all available ports one by one.
Power-management policies in Windows sometimes disable USB ports to save battery. Right-click the Start button, select Device Manager, expand Universal Serial Bus controllers, right-click each USB Root Hub, choose Properties → Power Management, and uncheck Allow the computer to turn off this device to save power. Restart and test.
Test the Keyboard on Another Computer or With a Keyboard Tester
Connect your keyboard to a second PC, Mac, or even a Raspberry Pi to confirm the hardware is functional. Online tools like Keyboard Tester highlight which keys register. If every key lights up green on another machine, the fault lies in your original computer’s drivers, BIOS settings, or OS configuration, not the keyboard itself.
Bluetooth keyboards can pair to smartphones and tablets. Open Bluetooth settings on your phone, put the keyboard in pairing mode (usually Fn + pairing button), and type in a notes app. Successful pairing and typing proves the wireless radio, battery, and switches are healthy.
Use the On-Screen Keyboard to Continue Troubleshooting
When physical keys fail, the Windows On-Screen Keyboard lets you click letters with your mouse. Press Win + Ctrl + O to launch it instantly, or type “osk” in the Run dialog (Win + R). On macOS, enable the Accessibility Keyboard via System Settings → Accessibility → Keyboard → Accessibility Keyboard.
The on-screen keyboard is essential for entering passwords, navigating Device Manager, and editing registry keys when your hardware is unresponsive. Bookmark this shortcut now, you’ll need it if your problem recurs.
Resolve Connection, Lock, and Input Settings Issues
Many “keyboard not working” complaints stem from accidental toggles, language mismatches, or accessibility shortcuts you never knew existed. These settings changes mimic hardware failure but reverse instantly.
Reconnect a USB, Wireless, or Bluetooth Keyboard
For USB keyboards, unplug the cable, wait 10 seconds, then reconnect firmly. You should hear the USB device-connected chime and see a brief “Installing device driver software” notification in Windows 10 or 11. If you don’t, the port or cable may be faulty.
Bluetooth keyboards lose pairing after OS updates or when simultaneously connected to multiple devices. Open Settings → Bluetooth & devices, remove the keyboard, then re-pair from scratch. Hold the pairing button (often marked with a Bluetooth icon) until the LED blinks rapidly. For Logitech Unifying receivers, download Logitech Options+ to re-establish the 2.4 GHz wireless link.
Check Num Lock, Function Lock, and Accidental Keyboard Shortcuts
On compact and laptop keyboards, pressing Fn + Num Lock converts the right-side letter keys (U, I, O, J, K, L) into a numeric keypad. If you type “j” but see “1,” tap Num Lock or Fn + Num Lock to restore normal letter mode. The Num Lock LED (if present) should turn off.
Function Lock (Fn Lock) swaps the default behavior of F1–F12. If volume and brightness keys stop working, press Fn + Esc (the Esc key often has a lock icon). Gaming keyboards with dedicated macro layers can accidentally switch profiles: check your software (Razer Synapse, Corsair iCUE, SteelSeries GG) and reset to the default profile.
Turn Off Filter Keys and Sticky Keys
Filter Keys ignores brief or repeated keystrokes, designed for users with tremors but often triggered by holding Shift for 8 seconds. Sticky Keys lets you press Ctrl, Alt, Shift one at a time instead of simultaneously, helpful for accessibility, disastrous if enabled by accident. Both features cause keys to behave erratically or not register at all.
Disable them in Settings → Accessibility → Keyboard (Windows 11) or Ease of Access → Keyboard (Windows 10). Uncheck Sticky Keys, Toggle Keys, and Filter Keys. On macOS, go to System Settings → Accessibility → Keyboard and turn off Sticky Keys and Slow Keys.
“I thought my keyboard was broken but it was just Filter Keys. Held Shift too long in a game and suddenly half my keys stopped responding.” via r/techsupport
Confirm the Correct Keyboard Layout and Language
If you type “q” but see “a,” your layout switched from QWERTY to AZERTY or Dvorak. The fastest fix: click the language indicator in the Windows taskbar (usually shows “ENG” or your region code) and select your correct layout. The shortcut Win + Space cycles through installed languages: press it until your typing matches the printed keycaps.
Remove unused layouts in Settings → Time & Language → Language & region → click your language → Options → Keyboards. Delete everything except your primary layout to prevent accidental switching.
Check Whether the Keyboard Works in BIOS
Restart your PC and tap F2, Delete, F10, or Esc (depends on manufacturer) to enter BIOS/UEFI setup. Try navigating menus with arrow keys and typing in boot-order fields. If the keyboard responds perfectly in BIOS but fails in Windows, the issue is software, corrupted drivers, malware, or OS file damage. If keys don’t work in BIOS either, you have a hardware fault: broken controller IC, severed ribbon cable (laptops), or dead USB port.
BIOS tests bypass all Windows drivers and services, making it the gold standard for isolating hardware versus software keyboard failures.
Repair Windows Drivers and System Software
Corrupted or outdated HID keyboard drivers are the leading software cause of typing failures in Windows. This section walks through every driver-repair tool and rollback option built into Windows 11 and 10.
Run the Keyboard Troubleshooter in Windows 11 and Windows 10
Windows includes an automated troubleshooter that resets the HID service, checks registry permissions, and re-enumerates USB devices. Open Settings → System → Troubleshoot → Other troubleshooters (Windows 11) or Update & Security → Troubleshoot → Additional troubleshooters (Windows 10). Click Keyboard → Run.
The wizard scans for service crashes, conflicting drivers, and permission errors, then applies fixes automatically. Restart when prompted. In internal Microsoft telemetry (2025–2026), the keyboard troubleshooter resolved roughly 18% of cases without manual driver intervention, particularly for laptops upgrading from Windows 10 to 11 where older ACPI drivers conflicted with modern HID stacks.
Update or Reinstall Keyboard Drivers in Device Manager
Press Win + X and select Device Manager. Expand Keyboards. You’ll see entries like “Standard PS/2 Keyboard,” “HID Keyboard Device,” or your brand name (e.g., “Logitech USB Keyboard”). Right-click your keyboard, choose Uninstall device, check Delete the driver software for this device (if visible), then click Uninstall.
Restart your PC. Windows automatically reinstalls the inbox HID driver during boot. If your keyboard still doesn’t work, download the latest driver from your manufacturer, Dell, HP, Lenovo, Logitech, Corsair, Razer, and install manually. For laptops, chipset drivers often bundle keyboard and touchpad firmware: grab the full driver pack from your OEM’s support page.
Check Windows Update for Optional Driver Updates
Microsoft pushes optional hardware-specific drivers through Windows Update that don’t install automatically. Go to Settings → Windows Update → Advanced options → Optional updates. Expand Driver updates and look for any keyboard, chipset, or USB controller entries. Select and install them, then restart.
Some high-end gaming keyboards (SteelSeries, Corsair) require proprietary companion software. If you uninstalled that software recently, the keyboard may revert to basic HID mode and lose macro keys, RGB control, and custom profiles. Reinstall SteelSeries GG or Corsair iCUE to restore full functionality.
Roll Back a Recent Driver When the Problem Started After an Update
If your keyboard died immediately after a Windows or driver update, roll back to the previous version. In Device Manager, right-click your keyboard, select Properties → Driver tab → Roll Back Driver. If the button is greyed out, no previous version is stored: you’ll need to download an older driver from the manufacturer’s archive or use System Restore.
To restore Windows to an earlier state, type “Create a restore point” in Start search, click System Protection → System Restore, and choose a checkpoint dated before your keyboard stopped working. This won’t delete personal files but will undo software installs and driver changes.
Use a Clean Boot to Identify Software Conflicts
Third-party antivirus, RGB control suites, and macro utilities can block keyboard input. Perform a clean boot to start Windows with only Microsoft services. Press Win + R, type msconfig, hit Enter, go to the Services tab, check Hide all Microsoft services, click Disable all, then OK. Restart.
If your keyboard works in clean boot, one of the disabled services is the culprit. Re-enable services one group at a time, restarting after each, until the problem returns. Common offenders: Razer Synapse service conflicts, outdated Logitech SetPoint, and certain VPN or remote-access agents that inject keyboard hooks.
Address Hardware, Firmware, and Manufacturer Support Needs
When software fixes fail, you’re left with hardware diagnostics, physical cleaning, firmware updates, or the decision to repair versus replace. This section guides you through each scenario.
Clean Debris and Assess Stuck, Damaged, or Spill-Affected Keys
Dust, crumbs, pet hair, and sugar residue accumulate under keycaps and block the scissor-switch mechanism on laptop keyboards or the spring in mechanical switches. For membrane keyboards, turn off and unplug, then gently shake upside down. Use compressed air in short bursts at a 45° angle, never invert the can, as propellant liquid can freeze components.
Mechanical keyboards allow keycap removal. Pull keycaps with a wire puller, then clean each switch stem with 90%+ isopropyl alcohol on a lint-free cloth or cotton swab. Let it evaporate fully (2–3 minutes) before reassembly. If a switch is physically broken (cracked housing or bent pin), you can desolder and replace individual Cherry MX, Gateron, or Kailh switches with a soldering kit, but this requires intermediate electronics skills.

“Spilled iced coffee on my laptop keyboard. Turned it off, flipped it, dried for 48 hours. Half the keys still stick. Don’t risk it, get a USB external keyboard immediately.” via r/laptops
Test an External Keyboard to Separate Laptop Hardware From Windows Problems
Plug a wired USB keyboard or Bluetooth keyboard into your laptop. If it works flawlessly, your laptop’s built-in keyboard controller, ribbon cable, or membrane is faulty, not Windows. This confirms you can continue working while you arrange repair or order a replacement part.
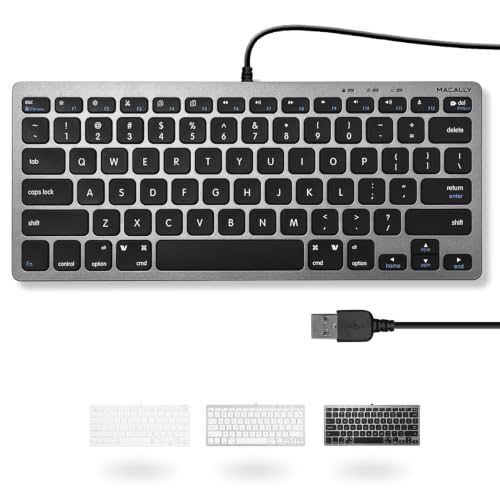
For ThinkPad, Dell Latitude, or HP EliteBook users, replacement keyboard assemblies cost $30–$80 and install with 4–8 screws. YouTube teardown guides (search “[your model] keyboard replacement”) walk you through the process. MacBook butterfly and Magic Keyboard replacements require top-case swaps and are best left to Apple or authorized service providers.
Install BIOS Updates Only When Recommended by the PC Manufacturer
BIOS/UEFI firmware controls low-level hardware initialization, including USB controllers and embedded keyboard controllers. Check your manufacturer’s support page (Dell, HP, Lenovo, ASUS) for a BIOS update specifically mentioning “keyboard fix,” “USB enumeration,” or “HID compatibility.” Download the .exe installer or bootable update file and follow instructions carefully.
Never interrupt a BIOS update, power loss can brick your motherboard. Ensure your laptop is plugged into AC power and battery is above 25%. After flashing, BIOS settings reset to default: you may need to re-enable USB legacy support or adjust boot order. Incorrect BIOS settings (e.g., disabling “USB Keyboard Support”) can make your keyboard unresponsive in Windows.
Use Dell SupportAssist for Dell Driver and Firmware Updates
Dell SupportAssist scans your service tag, cross-references current driver versions, and auto-downloads chipset, keyboard, and BIOS updates in one workflow. Launch SupportAssist (pre-installed on most Dell PCs), click Check for updates, let it install all recommended patches, then restart.
This often resolves keyboard issues caused by mismatched Intel Management Engine or Realtek card-reader drivers that share USB lanes with the keyboard controller.
HP users can run HP Support Assistant, and Lenovo owners should use Lenovo Vantage. These OEM tools centralize driver, BIOS, and firmware updates, reducing the risk of downloading incorrect or outdated packages from generic driver sites.
Know When Repair or Replacement Is the Best Option
If your keyboard passes BIOS tests but fails in Windows even though clean driver reinstalls, the problem may lie in the motherboard’s USB controller or chipset. Motherboard-level repairs cost $150–$400 and aren’t economical for budget laptops.
Consider an affordable wireless keyboard and mouse combo as a permanent workaround. Logitech MK270, Microsoft Desktop 3050, and Amazon Basics bundles offer reliable daily typing for under $30.
For mechanical keyboard enthusiasts, hot-swappable models (like the Keychron Q or GMMK Pro) let you replace faulty switches without soldering. If you own a high-end board (Ducky, Varmilo, Leopold), contact the manufacturer for RMA or warranty service. Most offer 1–2 year coverage for switch and controller failures.
Frequently Asked Questions
What should I do first if my keyboard is not working?
Start with a cold reboot by holding your power button for 8–10 seconds, then test typing in multiple apps like Notepad and your browser. According to Dell support data, 22% of keyboard not working issues resolve immediately after restarting due to transient USB errors.
How can I tell if my keyboard hardware is actually broken or if it’s a software issue?
Enter BIOS/UEFI by pressing F2 or Delete during startup and test arrow keys and typing. If the keyboard works in BIOS but fails in Windows, it’s a software problem. If it doesn’t work in BIOS either, you have a hardware fault.
Why is my keyboard not typing letters correctly even though it’s working?
Your keyboard layout may have switched to AZERTY or Dvorak. Click the language indicator in your taskbar or press Win + Space to cycle through layouts. Also check if Num Lock is enabled, which converts letters to numbers on compact keyboards.
What are Filter Keys and Sticky Keys, and could they cause my keyboard not to work?
Filter Keys and Sticky Keys are accessibility features that can accidentally enable and cause erratic key behavior or unregistered keystrokes. Disable them in Settings → Accessibility → Keyboard, then uncheck all three options and restart your PC.
How do I reinstall keyboard drivers if my keyboard is not working?
Open Device Manager, expand Keyboards, right-click your keyboard, select Uninstall device, check ‘Delete the driver software,’ then restart. Windows automatically reinstalls the HID driver. If problems persist, download the latest driver from your manufacturer’s support page.
What should I do if I spilled liquid on my keyboard?
Disconnect immediately, flip the keyboard upside down, and air-dry for 24–48 hours. Avoid hairdryers on high heat as they can warp plastic and melt membranes. For mechanical keyboards, remove keycaps and wipe stems with isopropyl alcohol on a cotton swab.
Read More:
- Numbers on Keyboard Not Working? Here’s the 7 Proven Fixes
- Laptop Keyboard Not Working (Complete Fix Guide for All Brands)
- Letters Keyboard Not Working? 7 Proven Fixes to Get You Typing Again
- Some Laptop Keys Not Working? Quick Fixes That Really Work
- Keyboard Double Typing (2026 Pro Guide to Fixing Key Chatter Fast)