

Last updated on April 6th, 2026 at 11:21 am
A faulty fuel gauge can turn your next ride into a guessing game. Several factors can cause your Harley Davidson fuel gauge to malfunction, but understanding these issues helps you identify the right solution faster.
The most common causes of a non-working Harley fuel gauge include a faulty fuel sending unit, corroded wiring connections, bad ground connections, or a damaged gauge itself. The fuel sending unit, located inside the tank, is responsible for 85% of fuel gauge failures.

Main Causes Behind Fuel Gauge Problems
Several factors can cause your Harley Davidson fuel gauge to malfunction. Understanding these root causes becomes the foundation for identifying the right solution faster.
Best Bluetooth OBD2 Scanner
Detect 39,000+ Issues With Enhanced Codes. Save $1000s on car repairs & buying used vehicles by diagnosing problems yourself.
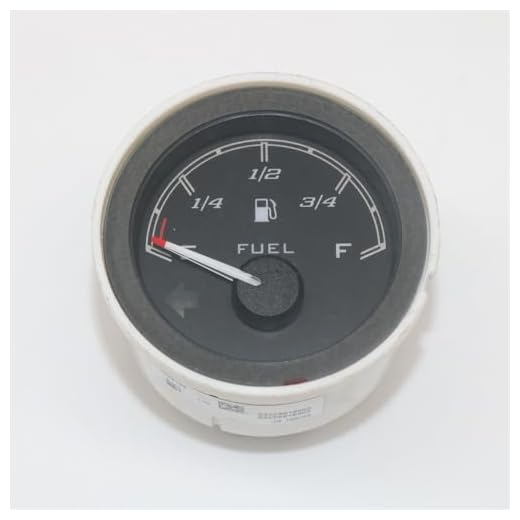
Shop on AmazonThe fuel sending unit, located inside your gas tank, acts as the heart of your fuel gauge system. This critical component contains a float arm that rises and falls with fuel levels, sending electrical signals to your dashboard gauge. When this unit fails, your gauge either stops working entirely or provides wildly inaccurate readings.
However, the sending unit isn’t the only component that can fail. Connection problems between your sending unit and gauge create another common scenario that frustrates riders. The yellow wire that connects these components can corrode or break over time, causing erratic readings or complete gauge failure.
Similarly, poor ground connections to the tank represent another frequent issue that affects gauge accuracy. Without a solid ground connection, the electrical circuit cannot complete properly, leading to intermittent or non-functional gauge operation.
“The fuel gauge doesn’t work because the sending unit is bad, and they’re about $260 from Harley.” Don Bailey
Additionally, temperature fluctuations can impact gauge performance in ways many riders don’t expect. Cold weather causes connections to contract, while heat expansion may create intermittent failures. These environmental factors often reveal underlying wiring problems that need immediate attention.
Float Sensor Failures
Moving deeper into the mechanical side of fuel gauge problems, the float sensor serves as the measuring component inside your fuel tank. When this sensor fails, your gauge provides inaccurate readings or stops working entirely, creating a cascade of issues for your riding experience.
Float sensors fail due to several interconnected reasons that build upon each other over time. Corrosion buildup on the float arm prevents smooth movement, causing the gauge to stick at certain levels regardless of actual fuel content. This corrosion typically starts small but progressively worsens without proper maintenance.
Building on this corrosion issue, the resistive element inside the sensor can also wear out over time, disrupting the electrical signal to your gauge. As the resistive track deteriorates, you’ll notice increasingly erratic gauge behavior before complete failure occurs.
Furthermore, physical damage to the float mechanism occurs when debris enters the tank or during maintenance work. A bent float arm will provide false readings throughout the fuel range, while a punctured float will sink and show empty regardless of actual fuel levels.
“The float sensor only works when you have a good tank ground.” HD Forums Member
Contaminated fuel accelerates sensor degradation in ways that compound these existing problems. Water, dirt, and sediment can interfere with the float’s movement and damage the internal components, creating a vicious cycle of deterioration that requires immediate attention.
Consequently, modern Harley models use electronic sensors instead of traditional float systems. These sensors can fail due to electrical issues, requiring different troubleshooting approaches than mechanical float units.
Wiring Issues And Electrical Problems
Transitioning from mechanical failures to electrical issues, wiring problems represent a significant portion of fuel gauge failures. The wiring system connecting your sending unit to the gauge can develop several issues that compound over time.
Corrosion affects the connector plugs between the sending unit and gauge in predictable patterns. Moisture enters these connections, creating resistance that prevents proper signal transmission. This corrosion often appears as a white or green buildup on the metal contacts, which progressively worsens if left untreated.
Building upon these corrosion issues, wire breaks occur due to vibration, aging, or improper installation. The yellow signal wire is particularly vulnerable to damage where it connects to the sending unit. A broken wire will cause your gauge to read empty or full continuously, eliminating any useful fuel level information.
“Another good way to test the wiring is to remove the wire from the float and ground that wire. It should give you a full tank reading.” HD Forums Tech
Moreover, short circuits happen when wires touch metal surfaces or other wires, creating additional complications. A shorted signal wire will cause erratic gauge behavior, jumping between readings or pegging at maximum levels in ways that make diagnosis challenging.
Ground connection problems affect gauge accuracy significantly and often go undiagnosed. The tank must have a solid ground connection to complete the electrical circuit properly. Loose or corroded ground connections cause intermittent gauge operation or complete failure that can be difficult to trace.
Finally, fuse problems can also disable your fuel gauge completely. Check the instrument cluster fuse if your gauge shows no activity at all, as a blown fuse will prevent power from reaching the gauge assembly.
Gauge Calibration Problems
Even with working sensors and wiring, your fuel gauge may display incorrect readings due to calibration issues. These problems affect gauge accuracy without causing complete failure, making them particularly frustrating to diagnose.
Calibration drift occurs naturally as components age and creates subtle but persistent problems. The gauge mechanism can lose its reference points, causing readings to shift higher or lower than actual fuel levels. This drift typically happens gradually over time, making it easy to overlook until the problem becomes severe.
In addition to natural aging, voltage fluctuations from your charging system can affect gauge readings in unexpected ways. When your alternator produces inconsistent voltage, the gauge may show erratic behavior or incorrect levels. This problem often correlates with other electrical issues on your bike, creating a web of interconnected problems.
“The fuel gauge is giving a false reading of full when the bike is running. However, it does slide down to the empty/red area when the bike is shut off.” HD Forums Member
Temperature compensation issues affect gauge accuracy across different conditions, adding another layer of complexity. Some gauges don’t properly adjust for temperature changes, leading to different readings in hot versus cold weather that can confuse riders about actual fuel levels.
Manufacturing tolerances can cause slight variations between gauges and sending units that become apparent over time. When components aren’t perfectly matched, you may experience readings that are consistently high or low compared to actual fuel levels, creating a persistent calibration offset.
Consequently, aftermarket modifications can disrupt gauge calibration in ways that aren’t immediately obvious. Installing different fuel systems, tanks, or gauge assemblies without proper calibration can result in inaccurate readings throughout the fuel range.
Diagnosing The Problem
Proper diagnosis saves time and money when dealing with fuel gauge issues. A systematic approach helps identify the root cause quickly while preventing unnecessary parts replacement.
Start by checking the basics first, as simple issues often masquerade as complex problems. Verify that your ignition switch works properly and that the gauge receives power. Turn the key to the accessory position and observe whether the gauge needle moves during the startup sequence.
Next, test the sending unit to isolate the problem area. Remove the electrical connector from the sending unit and ground the yellow wire. This test should make your gauge read full immediately. If it doesn’t, the problem lies in the wiring or gauge itself rather than the sending unit.
Following this initial test, check wiring connections for corrosion or damage. Look for the white or green buildup that indicates corrosion. Clean these connections with electrical contact cleaner and inspect for proper fit to ensure reliable signal transmission.
Additionally, verify ground connections by checking continuity between the tank and frame. Use a multimeter to measure resistance between these points. High resistance indicates a poor ground connection that needs attention before other repairs will be effective.
Test gauge operation by applying known voltages to the input terminals to confirm gauge functionality. Most Harley gauges operate on 12-volt systems with variable resistance from the sending unit. Consult your service manual for specific voltage ranges to ensure accurate testing.
Finally, document your findings as you work through each test. This information helps track down intermittent problems and ensures you don’t repeat steps unnecessarily during the diagnostic process.
Step-by-Step Repair Process
Repairing fuel gauge problems requires methodical work and proper tools. Follow these steps to restore gauge function safely while avoiding common pitfalls that can create additional problems.
Safety preparation:
- Turn off ignition and remove key
- Disconnect battery negative terminal
- Ensure adequate ventilation when working with fuel
- Have fire extinguisher nearby
- Wear safety glasses and gloves
Accessing the sending unit:
- Remove seat and tank covers
- Locate the sending unit connector
- Disconnect the electrical connector
- Remove the sending unit lock ring
- Carefully lift out the sending unit
Testing components:
- Inspect the float for damage or contamination
- Check resistance values with multimeter
- Verify smooth float movement
- Test continuity in wiring harness
- Examine gauge connections for corrosion
Replacement procedures:
- Install new sending unit with proper gasket
- Reconnect electrical connections securely
- Test gauge operation before final assembly
- Replace tank covers and seat
- Perform final system check
Always use genuine Harley Davidson parts or quality aftermarket alternatives. Cheap replacement parts often fail prematurely and can cause additional problems that cost more in the long run.
Replacement Parts And Costs
Understanding replacement costs helps you budget for repairs and choose appropriate solutions. Prices vary significantly based on model year and part quality, making informed decisions crucial for cost-effective repairs.
Sending unit costs:
- OEM Harley parts: $200-$400
- Quality aftermarket: $75-$150
- Universal units: $25-$75
- Labor costs: $100-$200
Common part numbers:
- 75071-02 (Touring models)
- 75205-08 (Softail models)
- 75240-04 (Dyna models)
- 75069-08 (Road Glide models)
“The new sending unit was approx $75.00. It took the tech less than one hour at $85.00/hour to be replace”
V-Rod Forum Member
Gauge replacement costs range from $150-$400 depending on style and features. LED gauges cost more than traditional analog units but offer better reliability and visibility over the long term.
Consider rebuild services for vintage models where new parts aren’t available. Tri-Starr Radiator offers rebuild services for $189 including parts and labor.
Furthermore, shop around for the best prices on replacement parts. Online retailers like Amazon often have competitive prices on aftermarket alternatives that can save significant money.
Prevention And Maintenance
Proper maintenance prevents most fuel gauge problems and extends component life. Regular attention to your fuel system pays dividends in reliability while saving money on expensive repairs.
Keep your tank clean by using quality fuel and adding fuel system cleaner periodically. Techron or similar products help prevent buildup on sending unit components and improve electrical connections over time.
Additionally, check electrical connections during routine maintenance to catch problems early. Look for signs of corrosion or loose connections at the sending unit and gauge. Clean and tighten connections as needed to maintain reliable operation.
Maintain proper fuel levels to prevent sending unit damage from exposure to air. Running your tank too low can expose the sending unit to air, causing premature wear. Keep at least 1/4 tank of fuel when possible to ensure proper lubrication.
“After a fill up, put the bike ignition in accessory position. Leave it there for two minutes.”
V-Rod Forum Member
Replace fuel filters regularly to prevent contamination from reaching the sending unit. Dirty fuel accelerates component wear and can cause gauge inaccuracies that worsen over time.
Finally, store your bike properly during extended periods to prevent fuel system degradation. Add fuel stabilizer and keep the tank full to prevent condensation and corrosion inside the fuel system.
Video Credit: Low Country Harley-Davidson / YouTube
Frequently Asked Questions
What causes fuel gauge fluctuations during riding?
Fuel gauge fluctuations during riding occur due to several interconnected factors. The float inside your tank moves as fuel sloshes around during acceleration, braking, and cornering. This natural movement causes temporary gauge variations that should stabilize when stopped.
However, excessive fluctuations indicate underlying problems with the sending unit or wiring. Worn bushings in the float mechanism allow excessive movement, while loose connections create intermittent electrical contact. Poor ground connections also cause erratic readings during vibration that can be difficult to diagnose.
How accurate are Harley fuel gauges compared to other motorcycles?
Harley fuel gauges typically provide reasonable accuracy when functioning properly, though they’re not precision instruments. Most show fuel levels within 10-15% of actual tank contents, which is comparable to other motorcycle manufacturers in the same class.
The gauge accuracy depends heavily on tank shape and sending unit calibration. Harley’s teardrop-shaped tanks can show rapid changes in the upper portion while remaining steady in the lower ranges. This design characteristic affects how riders perceive gauge accuracy and can create confusion about actual fuel levels.
Can I upgrade to a digital fuel gauge on my older Harley?
Yes, you can upgrade to digital fuel gauges on older Harley models with some planning. Several aftermarket companies offer digital gauge clusters that replace traditional analog units. These upgrades typically require new sending units calibrated for digital displays.
Popular options include Kuryakyn LED gauges and Dakota Digital systems. Installation complexity varies by model, with some requiring additional wiring modifications. Consult your service manual or professional installer for compatibility information before purchasing.

Why does my fuel gauge work intermittently?
Intermittent fuel gauge operation typically indicates electrical connection problems that worsen over time. Corroded connectors create high resistance that prevents consistent signal transmission. As connections heat up and cool down, resistance changes, causing on-and-off operation.
Loose wiring connections also cause intermittent problems that can be frustrating to diagnose. Vibration can temporarily reconnect loose wires, making the gauge work sporadically. Check all connections between the sending unit and gauge for tightness and corrosion to resolve these issues.
What’s the difference between carbureted and fuel-injected gauge systems?
Carbureted and fuel-injected Harley models use different fuel gauge systems with distinct advantages and disadvantages. Carbureted bikes typically have simpler float-type sending units that vary resistance based on fuel level. These systems are generally more reliable but less precise.
Fuel-injected models often incorporate the sending unit into the fuel pump module, creating a more complex but accurate system. These systems provide more accurate readings but are more complex and expensive to repair. The electronic control module may also monitor fuel levels for diagnostic purposes, adding another layer of functionality.
Sources:
- Harley Davidson Forums – Fuel Gauge Issues
- JustAnswer – Harley Fuel Gauge Problems
- V-Rod Forum – Fuel Gauge Solutions
- Road Glide Forums – Troubleshooting Guide
- Fix My Hog – Repair Instructions