
You plug your laptop into the TV, grab the remote, switch inputs, and nothing. The screen stays black, the monitor shows “No Signal,” and you’re left staring at your laptop wondering if the whole HDMI port just died.
Don’t panic, your HDMI port on laptop not working is rarely a hardware failure. In about 80% of cases, the problem is a loose cable connection, an incorrect display projection mode (accidentally set to “PC screen only” via Win+P), a stale or buggy graphics driver that stopped detecting external monitors, or simply the wrong HDMI input channel selected on your TV or external display. A quick connection reseat, projection toggle, driver reinstall, or cable swap usually restores video output in under five minutes.
This guide walks you through simple, desk-friendly checks and software fixes you can do right now, no soldering iron, no motherboard teardown, and no expensive repair visit required.
Best Laptop Stand (with 360° Base)
Keep Your Laptop Cooler & More Comfortable with 360° Rotating Base. Improve Airflow & Reduce Heat. Adjustable Height & Viewing Angle.
Shop on Amazon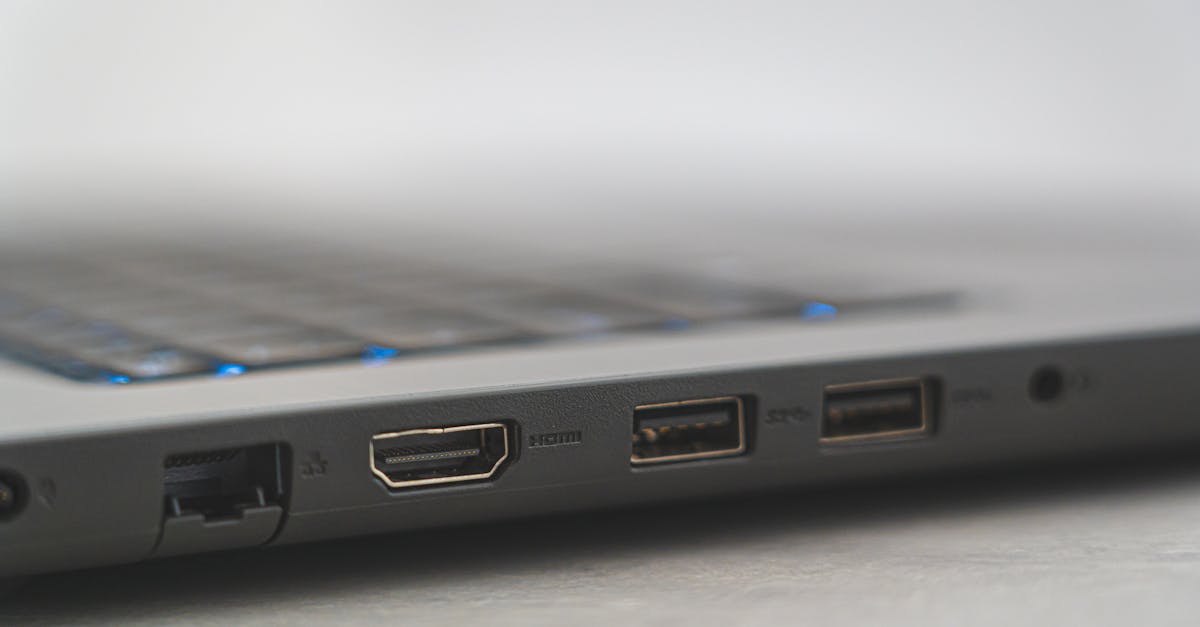
Key Takeaways
- An HDMI port on laptop not working is rarely a hardware failure; in 80% of cases, the issue stems from loose cables, incorrect display projection modes, outdated drivers, or wrong TV input selection.
- Start troubleshooting with physical checks: reseat both cable ends, inspect connectors for debris or bent pins, verify your TV is on and tuned to the correct HDMI input, and use Win+P to toggle projection modes.
- If basic steps fail, swap in a certified HDMI 2.0 cable and test your laptop on a different external display to isolate whether the problem is the cable, the display, or your laptop’s HDMI controller.
- Update your graphics driver through Device Manager or download the official installer from Intel, NVIDIA, or AMD; a buggy driver is a common culprit that can be resolved in 10–15 minutes.
- Clean your HDMI port with compressed air and a soft toothbrush while powered down, check for bent pins, and consider using a USB-C to HDMI adapter (under $20) as a permanent workaround if the port is truly damaged.
- Maintain your HDMI connection long-term by unplugging gently, cleaning the port every 4–6 weeks, avoiding cable kinks, and keeping Windows and drivers current with regular clean installs.
Identifying HDMI Port Problems
Common Symptoms and Warning Signs
Your first clue is usually a completely black external screen or a “No Signal” message. Sometimes Windows plays the USB connection chime when you plug in the HDMI cable, but the second display never appears in your display settings panel. Other times, the picture flickers for a split second then vanishes, or you see intermittent snow and static before losing the feed entirely.
These symptoms often point to a software detection glitch rather than a dead port. If your laptop charges normally, runs programs without crashing, and the internal screen works fine, the HDMI controller chip is probably still alive. True hardware failure usually shows up as zero detection, no sound from Windows, no flicker, and Device Manager lists a yellow exclamation mark next to your display adapter.
Physical and Connection Checks
Start with the basics: unplug both ends of the HDMI cable, inspect the connectors for dust or bent pins, then firmly reseat them. A loose connection is the number-one cause of “No Signal” errors. Check that your TV or monitor is powered on and set to the correct HDMI input source channel, many TVs have HDMI 1, HDMI 2, and HDMI 3, and if you’re plugged into port 2 but the TV is listening to port 1, you’ll see nothing.
Next, use the Win+P keyboard shortcut to cycle through projection modes. Windows sometimes defaults to “PC screen only,” which intentionally disables external video. Press Win+P and select “Extend” or “Duplicate” to force the signal back on. A quick laptop reboot can also clear temporary video driver freezes that block HDMI output.
Recognizing HDMI Port Issues
If reseating cables and toggling projection modes doesn’t help, inspect the physical HDMI port socket on your laptop. Shine a flashlight into the port and look for pocket lint, debris, or visibly bent metal pins. Use a wooden toothpick (never metal.) to gently clear out dust, compressed air works too, but be careful not to blow debris deeper into the port.
Some laptops ship with HDMI ports that sit slightly recessed or loose from the motherboard after years of plug/unplug cycles. If the port wiggles or feels unstable when you insert the cable, that’s a sign of physical wear. A quality replacement HDMI cable can sometimes compensate for minor port wobble by providing a tighter fit, though a truly broken solder joint will need professional repair or a USB-C to HDMI adapter workaround.

Essential Hardware Troubleshooting
Inspecting the HDMI Cable and External Devices
Not all HDMI cables are created equal. Cheap, frayed, or years-old cables can lose internal wire continuity and stop passing video signals cleanly. Swap in a known-good cable, borrow one from another device or grab a fresh certified HDMI 2.0 cable from your local electronics store. If the new cable works instantly, you’ve just isolated a bad cable.

Also test your external display with a different input source (game console, streaming stick, or another laptop) to confirm the TV or monitor isn’t the problem. If the second device displays fine, your laptop’s HDMI output is the culprit. If nothing shows up, the external screen may have a blown HDMI receiver board.
Testing with Alternate Ports, Cables, and Displays
Many modern laptops offer USB-C ports with DisplayPort Alt Mode or Thunderbolt 3/4, which can carry video signals via a simple adapter. Grab a USB-C to HDMI adapter and test whether video output works through that route. If it does, your laptop’s dedicated HDMI port controller may be dead, but you’ve got a working backup solution.
![BENFEI USB C to HDMI Adapter 4K@60Hz, USB Type-C to HDMI Adapter [Thunderbolt 3/4/5 Compatible] with iPhone 15 Pro/Max, MacBook Pro/Air 2023, iPad Pro, iMac, S23, XPS 17, Surface Book](https://m.media-amazon.com/images/I/31kTmzsrThL._SS520_.jpg)
Try connecting to a different monitor or TV in another room. Sometimes resolution or refresh rate mismatches cause the laptop to send a signal the display simply can’t decode, resulting in a black screen. If the second display works, return to the original screen and manually adjust resolution settings (covered in the next section).
Cleaning and Examining the HDMI Port
Power down your laptop completely, then use a can of compressed air to blow out the HDMI port from multiple angles. Hold the can upright to avoid liquid propellant spray. Follow up with a soft, dry toothbrush or wooden toothpick to dislodge any stubborn lint or debris stuck along the port walls.
Inspect the port for bent or misaligned pins. HDMI connectors have 19 tiny pins, and even one bent contact can kill the entire video feed. If you spot a bent pin, you can sometimes gently nudge it back into place with a fine needle, but this is risky, if you’re not confident, skip it and use the USB-C adapter workaround instead. A truly damaged port socket often requires motherboard-level micro-soldering, which isn’t cost-effective for older laptops.
Configuring and Updating Software Settings
Adjusting Display Projection Modes
Press Win+P and cycle through all four projection modes: PC screen only, Duplicate, Extend, and Second screen only. Wait five seconds after each selection to give Windows time to detect and initialize the external display. “Extend” is usually the safest bet, it mirrors your desktop across both screens and forces the HDMI controller to wake up.
If the external display appears but shows a distorted or scrambled image, right-click your desktop, select “Display settings,” and manually set the resolution and refresh rate to match your monitor’s native specs. Many TVs max out at 1920×1080 at 60 Hz: pushing a 4K signal to a 1080p screen can cause a black screen or “Out of Range” error.
Resolving Display Driver and Adapter Problems
Open Device Manager (Win+X → Device Manager), expand “Display adapters,” and look for yellow exclamation marks or error codes. Right-click your graphics adapter (Intel, NVIDIA, or AMD) and select “Update driver” → “Search automatically for drivers.” Let Windows pull the latest driver package from its servers.
If that doesn’t help, try a driver rollback: right-click the adapter, choose “Properties” → “Driver” tab → “Roll Back Driver” (if available). Sometimes a recent Windows Update pushes a buggy graphics driver that breaks HDMI output. Rolling back restores the previous stable version.
“Updated Intel graphics driver via Device Manager and HDMI started working again, Windows 11 auto-update broke it.” via r/techsupport
For a deeper clean, download the official driver installer directly from Intel, NVIDIA, or AMD, uninstall the current driver via Device Manager (check “Delete the driver software for this device”), reboot, then run the fresh installer. A full driver reinstall typically takes 10–15 minutes and clears corrupted driver files that cause HDMI detection failures.
Updating Windows for Compatibility
Open Settings → Windows Update and click “Check for updates.” Microsoft periodically releases patches that fix HDMI handshake bugs, HDCP authentication errors, and display controller firmware glitches. Install all available updates, reboot, and test your HDMI connection again.
Some users report that disabling “Fast Startup” (Settings → System → Power → Additional power settings → Choose what the power buttons do → Change settings that are currently unavailable → uncheck “Turn on fast startup”) resolves intermittent HDMI detection issues. Fast Startup hibernates certain drivers, and HDMI controllers sometimes don’t wake properly on resume.
Advanced Steps and Ongoing Prevention
Using System Tools for Deep Troubleshooting
Run the built-in Windows Hardware and Devices troubleshooter by opening Settings → System → Troubleshoot → Other troubleshooters → Hardware and Devices. This automated wizard scans for configuration conflicts, registry errors, and missing display profiles, then attempts automatic fixes.
You can also check the Event Viewer (Win+X → Event Viewer → Windows Logs → System) for error codes timestamped around your HDMI connection attempts. Look for Display, DXGKRNL, or nvlddmkm errors, these point to graphics driver crashes or kernel-mode video failures that require a driver reinstall or BIOS update.
Addressing Persistent Software Conflicts
If third-party utilities like DisplayFusion, monitor management software, or custom graphics control panel profiles are installed, temporarily disable them. Some tools override Windows projection settings and lock the HDMI output to “off.” Uninstall or pause these apps, reboot, and test again.
“Turned off my third-party monitor tool and HDMI instantly detected, software conflict for sure.” via r/Windows11
Occasionally, a corrupted user profile or Windows display cache causes persistent HDMI failures. Create a new local user account (Settings → Accounts → Family & other users → Add someone else to this PC), log in, and test the HDMI connection. If it works under the new profile, your original account has a config issue, migrate your files and switch accounts.
Maintaining Your HDMI Port and Devices
Prevent future issues by adopting a few simple habits:
- Unplug gently: Never yank the HDMI cable out at an angle, pull straight back to avoid bending pins.
- Monthly cleaning: Use compressed air to clear dust from the port every 4–6 weeks, especially if you carry your laptop in a backpack.
- Cable management: Avoid tight bends or kinks in your HDMI cable: store it loosely coiled.
- Software hygiene: Keep Windows and graphics drivers current, and perform driver clean installs every 6–12 months to prevent registry bloat.
If your laptop’s HDMI port is genuinely dead (no detection across multiple cables, displays, and driver versions), a USB-C to HDMI or DisplayPort adapter offers a permanent workaround. Modern adapters support 4K at 60 Hz, cost under $20, and bypass the broken HDMI controller entirely. For desktop setups, a USB-C docking station provides multiple video outputs, USB ports, and Ethernet in one hub, an excellent upgrade if you rely on external displays daily.

Frequently Asked Questions
What should I do if my HDMI port on laptop is not working?
Start with basic checks: unplug and reseat the HDMI cable, inspect for dust or bent pins, and verify your TV is set to the correct HDMI input channel. Press Win+P to toggle projection modes, as Windows sometimes defaults to ‘PC screen only.’ If that fails, update your graphics drivers via Device Manager or restart your laptop to clear temporary driver glitches.
Why is my laptop HDMI not detected by my TV?
Common causes include loose cable connections, the wrong HDMI input selected on your TV, or Windows projection mode set to ‘PC screen only.’ About 80% of HDMI issues stem from software glitches, not hardware failure. Try pressing Win+P to select ‘Extend’ or ‘Duplicate,’ reseat the cable firmly, and ensure your graphics driver is up-to-date via Device Manager.
How can I tell if my HDMI port is physically damaged?
Shine a flashlight into the port to look for bent metal pins, dust, or loose solder. If the port wiggles when you insert a cable, it may have physical wear. Use compressed air and a wooden toothpick to gently clean it. True hardware failure shows zero detection across multiple cables and displays, along with a yellow exclamation mark in Device Manager’s display adapter.
Can a bad HDMI cable cause a ‘No Signal’ error?
Yes, old or damaged HDMI cables can lose internal wire continuity and stop passing video signals. Try swapping in a certified HDMI 2.0 cable from another device. Also test your TV with a different input source (game console, streaming stick) to isolate whether the problem is your laptop’s HDMI output or the external display itself.
What is a USB-C to HDMI adapter and when should I use it?
A USB-C to HDMI adapter connects your laptop’s USB-C or Thunderbolt 3/4 port to your display via HDMI. It’s useful if your dedicated HDMI port is broken; modern adapters support 4K at 60 Hz and cost under $20. This workaround bypasses the broken HDMI controller entirely and provides a reliable alternative for external display connectivity.
How do I update my graphics driver to fix HDMI issues?
Open Device Manager (Win+X), expand ‘Display adapters,’ right-click your GPU (Intel, NVIDIA, AMD), and select ‘Update driver’ → ‘Search automatically.’ For deeper fixes, download the official driver directly from your GPU manufacturer’s website, uninstall the current driver (check ‘Delete driver software’), reboot, and run the fresh installer. This typically takes 10–15 minutes and clears corrupted files causing HDMI detection failures.
Read More:
- Laptop Keyboard Not Working (Complete Fix Guide for All Brands)
- Ethernet Port on Laptop Not Working (Here’s the Quick Fixes that Actually Works)
- Volume Button on Keyboard Not Working? Fix It in Minutes
- Function Keys on Dell Laptop Not Working (Quick and Simple DIY Fixes)
- Finger Pad on Laptop Not Working (Here’s the Simple DIY Fixes That Works)