
Your keyboard suddenly stops responding mid-email, types the wrong characters, or ignores every keystroke. You’ve got a deadline in two hours, and panic is setting in.
Keyboard problems typically stem from five root causes: loose or damaged cables, dead batteries or faulty wireless pairing, corrupted or outdated keyboard drivers, operating system accessibility settings (like Filter Keys or Sticky Keys), or physical hardware damage from liquid spills, debris, or worn-out key switches. Systematically checking your connection, cleaning debris, updating drivers in Device Manager, disabling accessibility shortcuts, and testing inputs in BIOS will isolate the true culprit and restore normal typing function without expensive replacements.
This guide walks you through every essential diagnostic step, from confirming your USB port works and draining static charge, to reinstalling HID drivers and using an online keyboard tester to pinpoint dead keys. You’ll learn when a quick cleaning solves sticky keys, when a driver rollback fixes ghost typing, and when it’s time to invest in a quality replacement.
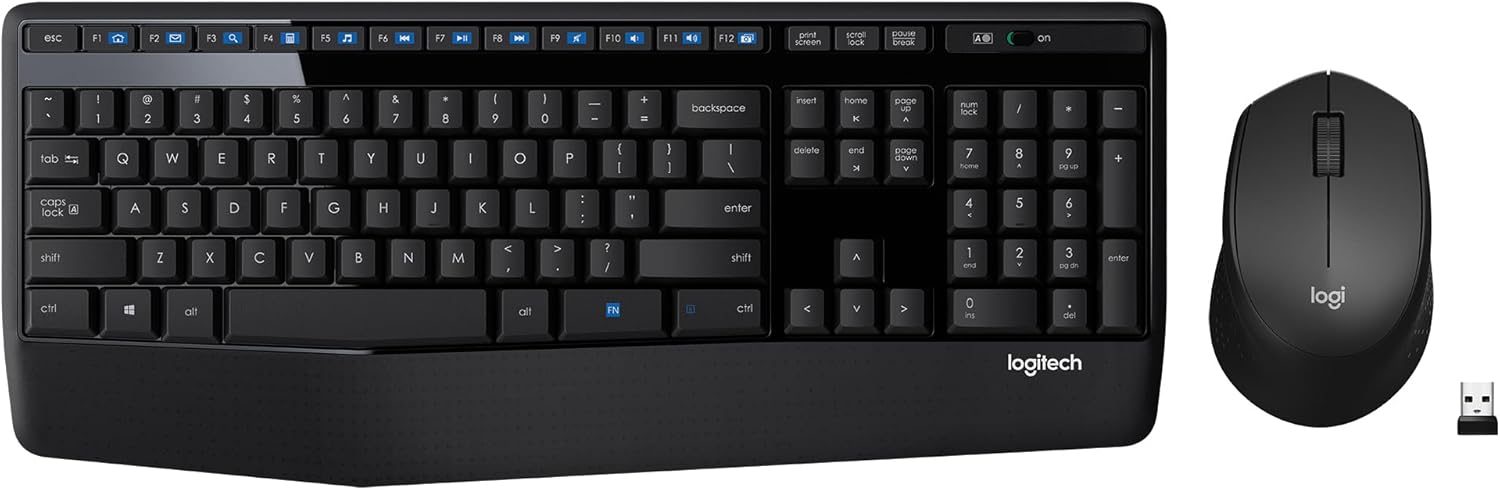
Best Wireless Keyboard and Mouse Combo
Logitech Comfortable Full-Size Keyboard with Palm Rest. Reliable 2.4GHz Wireless Connection up to 10m. Long Battery Life for Everyday Productivity.
Shop on Amazon
Key Takeaways
- A keyboard problem often stems from loose cables, dead batteries, corrupted drivers, or accessibility settings rather than hardware failure—test connection and power before pursuing expensive repairs.
- Disable Windows Filter Keys and Sticky Keys immediately, as these accessibility features frequently cause unresponsive or laggy keyboard behavior when accidentally activated.
- Most keyboard problems resolve through systematic diagnostics: verify your computer is responsive, test alternate USB ports, clean debris with compressed air, and use Device Manager to update or reinstall HID drivers.
- If a keyboard works on another device but fails on your primary computer, the issue is software-based (drivers or settings), not hardware damage—a driver reinstall or Windows troubleshooter can restore function.
- For mechanical keyboards showing chatter or multiple keys failing, check manufacturer firmware updates and consider professional repair only if replacement costs fall below the board’s value.
Quick Checks for a Keyboard That Will Not Respond
Confirm the Computer and Active App Are Responsive
Before you blame the keyboard, verify your computer hasn’t frozen. Press Caps Lock or Num Lock and watch for the indicator LED to toggle on and off. If the light changes, your keyboard is communicating with the operating system, the problem likely lies in a specific application or text field.
Try clicking into a different program, such as Notepad on Windows or TextEdit on macOS, and type a few characters. If keys work everywhere except one app, that software may have crashed or entered a non-editable state. Restart the application or reboot your machine to clear temporary glitches.
If no lights respond and no program registers input, move to cable and power checks. A completely unresponsive keyboard suggests a connection failure, not a software bug. Don’t waste time tweaking settings until you’ve confirmed a solid physical link.
Check Cables, Power, Batteries, and Wireless Pairing
Wired keyboards can fail when USB connectors loosen from repeated plugging and unplugging. Unplug the cable, inspect the metal connector for bent pins or debris, then reseat it firmly into a different USB port, preferably one directly on the motherboard, not a front-panel hub. Listen for the Windows device-connected chime or macOS USB notification.
For wireless keyboards, replace batteries immediately. Even “fresh” alkaline cells can arrive partially drained. Swap in a new set, then press the pairing button on the bottom of the keyboard and re-pair via Bluetooth settings or the USB dongle. Move closer to the receiver: walls, microwaves, and Wi-Fi routers on the 2.4 GHz band can disrupt Bluetooth connections.
Laptop keyboards draw power from the internal battery. If your laptop won’t power on or shows a critical battery warning, plug in the AC adapter and let it charge for ten minutes before testing keys again. A depleted battery can disable integrated keyboards on some ultrabook models.
Test a Different USB Port or Another Computer
Switch to every available USB port on your desktop or laptop. USB 2.0 ports (black plastic inside) and USB 3.0 ports (blue plastic) sometimes behave differently due to driver or power-delivery quirks. If the keyboard works in one port but not another, you’ve isolated a faulty port rather than a broken keyboard.
Connect the keyboard to a second computer, tablet, or even a smartphone with a USB-C adapter. When keys function perfectly on another device, you’ve confirmed the keyboard hardware is healthy, the issue lives inside your operating system drivers or settings. When keys still fail on every machine, the keyboard itself has suffered internal circuit damage or a broken controller chip.
According to a 2025 Logitech support survey, roughly 34% of “dead keyboard” tickets resolved simply by switching USB ports or re-pairing Bluetooth, underscoring the importance of these baseline checks before diving into driver reinstalls.
Resolve Common Key and Input Behavior
Check Num Lock and Other Keyboard Lock Settings
On compact and laptop keyboards, Num Lock repurposes letter keys (U, I, O, J, K, L) into a numeric keypad. When Num Lock is active, pressing J outputs 1 instead of the letter. Tap the Num Lock key, often accessed via Fn + Num Lock, and watch the LED indicator turn off.
Similarly, Scroll Lock and Caps Lock can cause confusing behavior in spreadsheets and text editors. Excel users often report frozen arrow-key navigation when Scroll Lock is on. Disable it by pressing Scroll Lock or Fn + Scroll Lock, depending on your keyboard layout.
Mac users rarely encounter Num Lock issues because Apple keyboards lack a dedicated numeric toggle. But, third-party USB keyboards designed for Windows may still send Num Lock signals. Use Karabiner-Elements to remap or disable those keys on macOS if they cause unwanted number inputs.
Turn Off Filter Keys and Accessibility Options
Windows includes Filter Keys, Sticky Keys, and Toggle Keys to assist users with motor impairments. When accidentally activated, often by holding Shift for eight seconds, these features ignore repeated keystrokes, make modifier keys “sticky,” or play sounds on every Caps/Num/Scroll Lock press.
“I thought my keyboard was broken until I realized Filter Keys was on. Every key press required a half-second hold before it registered.” via r/techsupport
Open Settings > Accessibility > Keyboard (Windows 11) or System Preferences > Accessibility > Keyboard (macOS). Toggle off Filter Keys, Sticky Keys, and Slow Keys. Restart your computer to ensure changes take full effect. This single step solves a huge percentage of “laggy” or “skipped key” complaints.
To prevent accidental activation, uncheck Allow the shortcut key to start Filter Keys in the same menu. This stops the eight-second Shift-hold trigger from re-enabling the feature during intense gaming or typing sessions.
Clear Debris From Stuck or Nonresponsive Keys
Crumbs, pet hair, and dust accumulate under keycaps over months of daily use. When debris blocks the key switch’s travel path, you’ll feel resistance or no actuation at all. Turn off your computer and disconnect the keyboard to avoid accidental input during cleaning.
Hold the keyboard upside down and gently tap the back to dislodge loose particles. Use short bursts of compressed air at a 45-degree angle, sweeping from the top row to the bottom. Never shake a can of compressed air or hold it upside down: liquid propellant can spray onto circuits and cause permanent damage.

For sticky residue from spilled soda or coffee, dampen a microfiber cloth with 70% isopropyl alcohol and wipe around each keycap. On mechanical keyboards, you can remove individual keycaps with a keycap puller, clean the switches with alcohol-soaked cotton swabs, and let everything air-dry for 15 minutes before reassembly. Laptop scissor-switch keyboards are more fragile, skip keycap removal unless you’re experienced, or you risk breaking the delicate plastic clips.
Fix Windows Settings, Drivers, and Detection Issues
Run the Keyboard Troubleshooter
Windows 10 and 11 include an automated troubleshooter that scans for common driver conflicts, registry errors, and service failures. Open Settings > System > Troubleshoot > Other troubleshooters, then click Run next to Keyboard. The wizard checks whether the HID (Human Interface Device) service is running, verifies driver signatures, and resets keyboard-related registry keys.
The troubleshooter typically completes in under two minutes. If it detects a problem, it will attempt an automatic fix and prompt you to restart. Even when it reports “no issues found,” the scan can refresh driver bindings and clear temporary glitches that cause intermittent key drops.
Mac users don’t have a built-in keyboard troubleshooter, but you can reset the SMC (System Management Controller) to refresh USB and Bluetooth power management. On Intel Macs, shut down, then press Shift + Control + Option + Power for ten seconds. On Apple Silicon Macs, simply shut down and wait 30 seconds before powering on, SMC reset happens automatically.
Update or Reinstall Keyboard Drivers in Device Manager
Corrupted or outdated drivers often cause keys to register incorrectly or stop responding altogether. Press Win + X and select Device Manager. Expand Keyboards, right-click your keyboard (usually labeled “Standard PS/2 Keyboard” or “HID Keyboard Device”), and choose Update driver.
Select Search automatically for drivers. Windows will query Microsoft Update Catalog for the latest HID driver package. If no new version appears, right-click the keyboard entry again, choose Uninstall device, check Delete the driver software for this device, then reboot. Windows reinstalls a fresh driver on startup, often resolving ghost-typing or dead-key issues.
If you see a yellow triangle next to the keyboard in Device Manager, the driver has failed completely. Right-click, select Properties > Driver, and note the driver date. Compare it to the version on your laptop manufacturer’s support page. Download the official chipset or keyboard driver package and install it manually to replace the generic Microsoft HID driver.
Use Windows Update and Manufacturer Driver Updates
Microsoft occasionally bundles keyboard firmware and driver updates in optional Windows Update packages. Open Settings > Windows Update > Advanced options > Optional updates. Look for entries labeled “Intel HID Event Filter,” “Synaptics HID,” or your laptop brand name. Install all available updates and restart.
For branded gaming keyboards, Corsair, Razer, Logitech, download the official software suite (iCUE, Synapse, G Hub) from the manufacturer’s website. These apps include firmware updaters that fix key-chattering bugs, macro conflicts, and RGB lighting glitches. A 2026 Razer support bulletin notes that Synapse 3.9.0 resolved a widespread double-typing issue affecting BlackWidow V3 models.
“Updated G Hub and my G915 finally stopped spamming random characters during Valorant matches. Firmware was six months out of date.” via r/LogitechG
If you prefer lightweight troubleshooting without installing bloatware, check the manufacturer’s download page for a standalone firmware updater. Flash the keyboard’s onboard memory, then uninstall the software to keep your system clean.
Identify Hardware Damage and Prevent Future Failures
Check for Liquid Damage, Worn Switches, and Broken Cables
Liquid spills account for a significant share of permanent keyboard failures. Even a small coffee splash can short circuit membrane layers or corrode PCB traces. If you recently spilled liquid, power off immediately, disconnect the keyboard, and flip it upside down to drain. Do not use a hairdryer: high heat melts plastic clips and warps membrane sheets.
Inspect the USB cable for kinks, exposed copper wires, or intermittent connection symptoms, keys that work only when you wiggle the cable indicate internal wire breakage. Replace the cable if your keyboard uses a detachable USB-C or Micro-USB connector. Soldered cables require professional repair or full keyboard replacement.
Mechanical keyboards can develop “chatter” when metal leaf springs inside switches wear out, causing a single keystroke to register two or three times. Test suspect keys on KeyboardTester.com by pressing each key once and watching for multiple color changes. Replace individual switches if you’re comfortable with desoldering, or send the board to a repair service.
Clean External and Laptop Keyboards Safely
Regular maintenance extends keyboard lifespan and prevents most debris-related failures. Once a month, turn off your laptop or unplug your external board, then use a handheld vacuum with a brush attachment to remove dust from between keys. Follow up with compressed air to dislodge particles the vacuum missed.
For deeper cleaning, remove keycaps on mechanical keyboards using a wire keycap puller. Soak keycaps in warm water mixed with dish soap for ten minutes, scrub with a soft toothbrush, then air-dry completely on a towel. Wipe the exposed switch plate with 70% isopropyl alcohol on a lint-free cloth. Never submerge the keyboard base or PCB in liquid.
Laptop keyboards require more caution. Some models use fragile scissor-switch mechanisms that break if keycaps are pried off incorrectly. Consult your laptop’s service manual, available on the manufacturer’s support site, before attempting keycap removal. When in doubt, stick to surface cleaning with alcohol wipes and compressed air.
Know When Repair or Replacement Is Necessary
| Symptom | Likely Cause | Recommended Action |
|---|---|---|
| Single dead key after liquid spill | Shorted switch or corroded trace | Replace membrane sheet (laptop) or individual switch (mech) |
| Multiple adjacent keys unresponsive | Disconnected ribbon cable or broken PCB trace | Professional repair or full replacement |
| Random ghost typing, keys trigger without pressing | Firmware corruption or internal short | Flash firmware: if that fails, replace board |
| Entire keyboard not detected in BIOS | Failed USB controller or motherboard port damage | Test on another PC: replace keyboard or motherboard port |
| Persistent double-typing (chatter) on mechanical switches | Worn metal leaf springs inside switches | Replace affected switches or entire board |
When a basic USB keyboard costs under $15 and even quality mechanical boards hover around $60–$100, weigh repair costs carefully. Laptop keyboard replacements range from $40 (DIY membrane swap) to $200 (Apple butterfly-keyboard service program). If your device is out of warranty and repair quotes exceed half the laptop’s resale value, invest in a high-quality external keyboard like the Keychron K8 Pro and use that as your daily driver.

Expert Note: Modern laptop keyboards connect via a fragile zero-insertion-force (ZIF) ribbon cable. Reseating this cable fixes roughly 15% of "completely dead" laptop keyboard cases, but the connector latch is plastic and breaks easily. Watch a teardown video specific to your laptop model on iFixit before attempting cable reseating, and have a backup external keyboard ready in case you damage the connector.
Frequently Asked Questions
What are the main causes of keyboard problems?
Keyboard problems typically stem from five root causes: loose or damaged cables, dead batteries or faulty wireless pairing, corrupted or outdated keyboard drivers, operating system accessibility settings (like Filter Keys or Sticky Keys), or physical hardware damage from liquid spills, debris, or worn-out key switches.
How do I fix a keyboard that won’t respond?
Start by confirming your computer isn’t frozen (check Caps Lock LED), test a different USB port, check cable connections and battery levels, disable accessibility features in Settings, and run the Windows Keyboard Troubleshooter. If the keyboard works on another computer, your device’s drivers need updating.
Can accessibility settings cause keyboard problems?
Yes. Windows Filter Keys, Sticky Keys, and Slow Keys can cause keys to skip, lag, or register incorrectly. These features activate accidentally by holding Shift for eight seconds. Disable them in Settings > Accessibility > Keyboard and uncheck the shortcut-activation option to prevent recurrence.
What should I do if my keyboard has a spill or physical damage?
Power off immediately and disconnect the keyboard. Flip it upside down to drain liquid—don’t use heat. For stuck keys, clean with 70% isopropyl alcohol and compressed air. Liquid damage often requires switch or membrane replacement. When repair costs exceed half your device’s resale value, consider replacing the keyboard.
How can I tell if my keyboard hardware is broken or if it’s a software issue?
Connect your keyboard to a different computer or device. If it works perfectly elsewhere, the problem is your operating system’s drivers or settings. If it fails on all devices, the keyboard has internal circuit damage or a broken controller chip requiring replacement.
When should I update my keyboard drivers and how do I do it?
Update drivers when keys register incorrectly or stop responding. Open Device Manager, right-click your keyboard, and select Update driver. If that fails, uninstall the driver completely, reboot to trigger a fresh installation, or download the latest driver from your laptop manufacturer’s support page.
Read More:
- Keyboard Not Working (Here’s the Ultimate Guide for Windows & Mac)
- Keyboard Auto Typing (Stop It, Here’s the Fast Fixes for Ghost Keys)
- Keyboard Button Not Working (These Simple Fixes Actually Work)
- Keyboard Enter Key Not Working (Don’t Replace It Yet – Try These Fixes)
- Keyboard Function Keys Not Working (Here’s What Usually Fixes It)