
You’re typing a critical email when the Spacebar or Enter key stops responding. That single dead button now forces you to copy-paste characters or hammer the switch ten times just to register one input.
A laptop keyboard button not working usually stems from dirt or debris under the keycap, outdated or corrupted keyboard drivers in Windows Device Manager, accessibility features like Filter Keys blocking rapid presses, or a physically damaged key switch that requires targeted cleaning with compressed air, driver reinstallation, or keycap replacement to restore full typing function.
This guide walks you through simple, high-yield fixes, cleaning under the faulty key with isopropyl alcohol, testing input with an On-Screen Keyboard, updating drivers, disabling Filter Keys, and remapping broken keys using Microsoft PowerToys, so you can quickly determine whether your button failure is a minor software glitch or a hardware defect that needs professional repair.
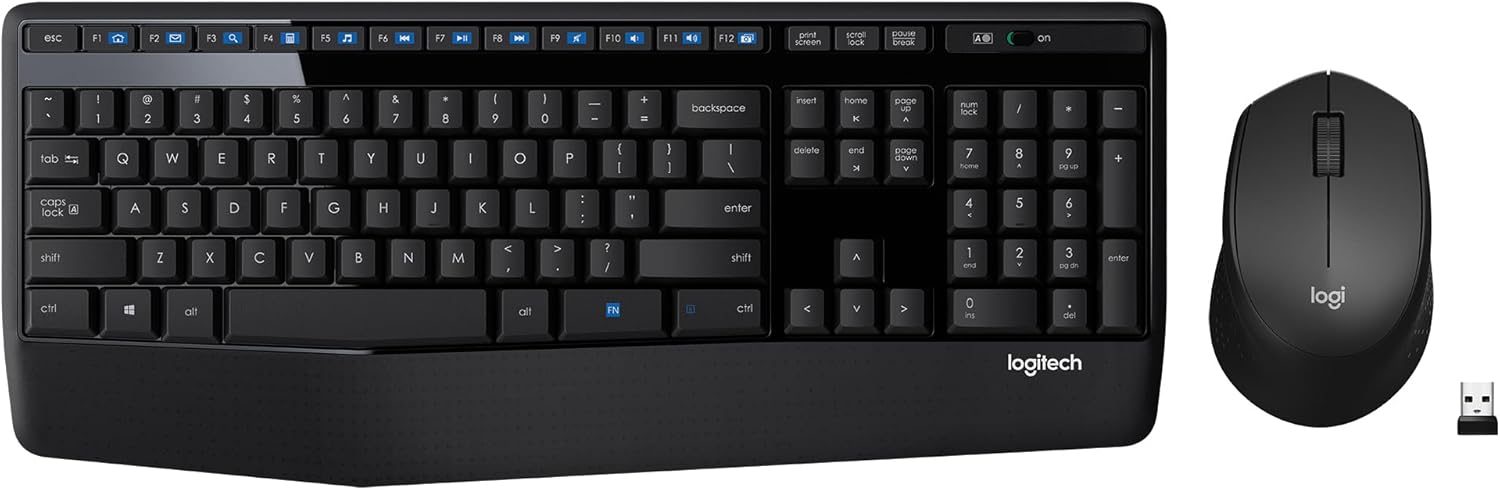
Best Wireless Keyboard and Mouse Combo
Logitech Comfortable Full-Size Keyboard with Palm Rest. Reliable 2.4GHz Wireless Connection up to 10m. Long Battery Life for Everyday Productivity.
Shop on Amazon
Key Takeaways
- A laptop keyboard button not working typically stems from dirt, debris, corrupted drivers, accessibility features like Filter Keys, or physical damage—each requiring a different troubleshooting approach.
- Isolate the problem by testing with an external USB keyboard and the On-Screen Keyboard; if the external keyboard works, the issue is localized to your internal hardware or drivers.
- Clean under the faulty key using compressed air and a 90%+ isopropyl alcohol-dampened swab, then reinstall your keyboard driver through Device Manager to fix most software-related failures.
- Disable Filter Keys, Sticky Keys, and Toggle Keys in Windows Accessibility settings, as these features can block rapid or repeated presses and make healthy keys appear unresponsive.
- If cleaning and driver updates don’t restore functionality, use Microsoft PowerToys Keyboard Manager to remap the broken key to an unused button, or seek professional repair for hardware defects.
- Prevent future keyboard failures by keeping liquids away from your typing zone, tapping your laptop upside-down every two weeks to dislodge dust, and considering a silicone keyboard cover for high-spill environments.
Identifying the Cause of Button Problems
Signs of Selective Key Failure
Selective key failure shows up in predictable patterns. You might notice one letter, say ‘E’ or ‘S’, refuses to register, or a modifier like Shift or Ctrl only works when you press it extremely hard. Some keys feel mushy or sticky, requiring multiple presses to produce a single character. Others don’t pop back up after you release them, staying visibly depressed in the keycap housing.
These symptoms tell you the issue is localized to specific switches rather than the entire keyboard controller. If random keys across the board fail at once, you’re dealing with a motherboard flex-cable or controller fault. But when just one or two buttons misbehave, the root cause is almost always dirt accumulation, a dislodged scissor-switch retainer clip, or a worn-out rubber dome contact.
Physical vs. Software-Related Issues
Physical problems leave visible or tactile clues. Flip your laptop and inspect the faulty key under good lighting. Do you see crumbs, pet hair, or sticky residue around the keycap edges? Does the key feel stuck or refuse to spring back? Those are hardware red flags. You can also gently pry off the keycap (using a plastic spudger or guitar pick) to check the scissor mechanism underneath for broken plastic clips or caked-on grime.
Software issues, on the other hand, show no physical damage. The key looks and feels normal, yet Windows or macOS doesn’t register the input. Often this happens after a major OS update, driver corruption, or accidental activation of Filter Keys. A quick test: boot into your laptop’s BIOS setup screen (usually by pressing F2, F10, or Delete during startup). Type using the problem key. If it works in BIOS but fails in Windows, you’ve confirmed a software or driver conflict.
Common Triggers for Unresponsive Buttons
Dirt and liquid spills top the list. Even a light coffee splash can seep under the keycap, leaving a sticky film on the rubber dome or membrane contact. Over time, the adhesive residue hardens and blocks electrical continuity. Compressed air and isopropyl alcohol wipes can dissolve most organic gunk without disassembling the entire keyboard.

Driver corruption is another frequent culprit, especially after Windows feature updates. Microsoft’s generic HID keyboard driver may conflict with OEM-specific drivers from Lenovo, HP, or Dell, causing sporadic key drops. Finally, accessibility features, Filter Keys, Sticky Keys, or Slow Keys, can inadvertently block rapid or repeated presses, making perfectly healthy keys appear dead. According to Microsoft’s official support documentation, Filter Keys ignores brief or repeated keystrokes, which confuses users who think their hardware is broken.
Essential Troubleshooting Steps
Inspecting and Cleaning the Keyboard
Start by shutting down your laptop and unplugging it from power. Hold the device upside-down at a 75° angle and tap the bottom panel gently to dislodge loose crumbs. Next, grab a can of compressed air and blast short bursts around the edges of the faulty keycap, angling the nozzle from different directions. You’ll often see dust clouds or tiny debris particles fly out.
For sticky keys, lightly dampen a cotton swab with 90% or higher isopropyl alcohol. Gently lift the keycap using a plastic spudger, insert it under one corner and twist slowly until the cap pops off. Wipe the rubber dome and the underside of the cap with the alcohol swab, then let everything air-dry for two minutes before snapping the keycap back into place. This method works beautifully for spill-induced stickiness and doesn’t risk electrical shorts because isopropyl evaporates quickly.
Testing With an External USB Keyboard
Plug in a USB or Bluetooth keyboard and type using the same character that fails on your built-in board. If the external keyboard registers every press flawlessly, you’ve isolated the problem to your laptop’s internal hardware or its specific driver. This test also keeps you productive while you troubleshoot, no need to copy-paste missing letters during urgent work.
Conversely, if the external keyboard exhibits identical failures (extremely rare), you’re looking at an OS-level conflict or malware interference. Run a full antivirus scan and check for rogue keyboard-mapping software running in the background. Most of the time, though, the external board works perfectly, confirming your internal switch or membrane needs cleaning or replacement.
Using the On-Screen Keyboard for Access
Windows 10 and 11 ship with an On-Screen Keyboard (OSK) that lets you click virtual keys with your mouse or touchpad. Press Win + Ctrl + O to toggle it on, or search “On-Screen Keyboard” in the Start menu. Click the problem key on the virtual board. If the character appears in your text editor, the software stack is healthy, your physical switch is the issue.
You can also use free online key testers like Keyboard Tester or Keyboard Checker. Press each key on your laptop and watch the on-screen graphic highlight in real time. Dead keys stay gray, giving you instant visual confirmation of which switches are unresponsive. This two-minute test saves hours of guesswork and helps you decide whether to clean, remap, or replace.
Software and Driver Solutions
Running the Keyboard Troubleshooter
Windows includes a built-in troubleshooter that auto-detects and fixes common keyboard driver conflicts. Open Settings > Update & Security > Troubleshoot > Additional troubleshooters, then click Keyboard and hit Run the troubleshooter. The wizard scans for outdated drivers, registry misconfigurations, and conflicting HID devices. It often resets the keyboard service and re-enumerates USB controllers, which can magically restore dead keys without manual driver surgery.
Mac users can reset the SMC (System Management Controller) to clear low-level keyboard firmware glitches. Shut down your MacBook, then press and hold Shift + Control + Option on the left side of the keyboard, plus the Power button, for ten seconds. Release all keys simultaneously, then power on. This recalibrates voltage rails and can revive intermittent key failures caused by power-management bugs.
Updating or Reinstalling Keyboard Drivers
Open Device Manager by right-clicking the Start button. Expand Keyboards, right-click your laptop keyboard entry (often labeled “Standard PS/2 Keyboard” or by your OEM brand), and select Update driver. Choose Search automatically for updated driver software. Windows queries Microsoft’s driver repository and installs any newer version available.
If that doesn’t help, try a full reinstall. Right-click the keyboard device again and select Uninstall device. Check the box Delete the driver software for this device, then click Uninstall. Restart your laptop. Windows automatically reinstalls a fresh generic driver on boot, which clears out corrupted registry entries and resets filter settings. According to user reports on Reddit’s r/techsupport, driver reinstallation fixes roughly 30–40% of single-key failures tied to OS updates.
“My Spacebar stopped working after the Win11 22H2 update. Uninstalled and reinstalled the keyboard driver in Device Manager, and it came back to life instantly.” via r/Windows11
Adjusting Advanced Keyboard Settings
Disable Filter Keys by opening Settings > Ease of Access > Keyboard (Windows 10) or Settings > Accessibility > Keyboard (Windows 11). Toggle Filter Keys to Off. Filter Keys ignores brief or repeated presses, which causes perfectly healthy keys to appear dead if you type quickly. Similarly, turn off Sticky Keys and Toggle Keys to prevent modifier-lock confusion.
For power users who need a permanent workaround, Microsoft PowerToys includes a Keyboard Manager utility that remaps broken keys to working ones. Install PowerToys, open Keyboard Manager > Remap a key, then map your dead button (say, the ‘E’ key) to an unused key like Right Alt or a function key you rarely touch. Alternatively, use a lightweight tool called SharpKeys to write the remap directly into the Windows registry. Both methods let you keep typing at full speed without hardware repair.
Repair, Replacement, and Prevention Tips
When to Seek Professional Help
If you’ve cleaned under the keycap, reinstalled drivers, disabled Filter Keys, and the button still won’t register, you’re facing a hardware failure, either a broken scissor-switch retainer, a torn rubber dome, or a damaged membrane trace. At this point, DIY repair requires micro-soldering skills or a full keyboard module swap, both risky for beginners. Contact your laptop manufacturer’s support line or visit an authorized service center for a quote.
For out-of-warranty machines, independent repair shops can replace individual key switches for $20–$50, far cheaper than a $150–$300 factory keyboard assembly. Bring your laptop and demonstrate the faulty key so the technician can verify the problem before quoting labor.
Keyboard Replacement Options
Laptop keyboards are modular on most brands. Search “[Your Laptop Model] replacement keyboard” on Amazon or eBay to find OEM or aftermarket units. HP, Dell, and Lenovo publish official FRU (Field Replaceable Unit) part numbers in their service manuals. Prices range from $25 to $80, and YouTube teardown guides (like those from Laptop Repair Manuals) walk you through the 15–30 screw swap process step-by-step.
“Replaced my Lenovo ThinkPad keyboard myself using a $35 Amazon part and a YouTube video. Took 20 minutes and saved $200 in shop labor.” via r/thinkpad
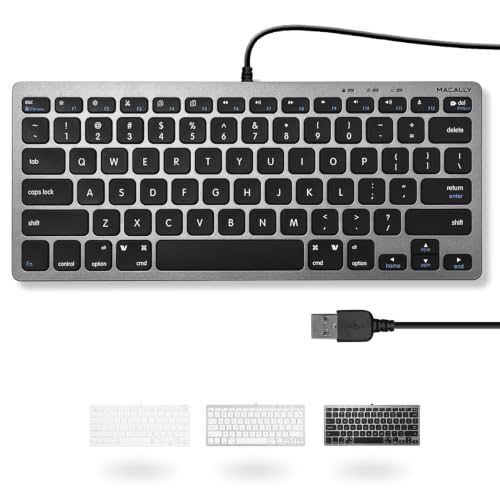
If you’d rather avoid internal surgery, invest in a compact external mechanical keyboard with hot-swappable switches. Brands like Keychron or Royal Kludge offer portable 60% or 75% layouts that sit atop your laptop keyboard and deliver superior tactile feedback, making them the ultimate hardware workaround and productivity upgrade.
Maintaining Keyboard Performance
Prevent future failures by keeping liquids away from your typing zone, use a spill-proof travel mug with a locking lid. Every two weeks, flip your laptop upside-down and tap the bottom to shake out dust. Monthly, wipe keycaps with a lightly dampened microfiber cloth and 70% isopropyl alcohol to remove skin oils and grime before they harden.
Consider a silicone keyboard cover for high-spill environments like coffee shops or dorm rooms. These transparent skins cost under $10, stretch over your entire keyboard, and block crumbs and spills without affecting typing feel. Just remember to remove and wash the cover weekly to prevent moisture buildup underneath, which can corrode membrane contacts over time.

Frequently Asked Questions
What causes a laptop keyboard button not working?
A laptop keyboard button not working is usually caused by dirt or debris under the keycap, outdated keyboard drivers, accessibility features like Filter Keys, or physically damaged key switches. Liquid spills and dust accumulation are the most common culprits. Test the key in BIOS—if it works there but fails in Windows, it’s a software issue.
How do I clean a stuck or unresponsive laptop keyboard button?
Shut down your laptop and use compressed air to blast around the faulty keycap. For sticky keys, gently pry off the keycap with a plastic spudger, dampen a cotton swab with 90%+ isopropyl alcohol, wipe the rubber dome and keycap underside, then let it air-dry for two minutes before reassembling.
Can I fix a laptop keyboard button not working by updating drivers?
Yes. Open Device Manager, right-click your keyboard, select ‘Update driver,’ and let Windows search for the latest version. If that fails, uninstall the device completely and restart—Windows will reinstall a fresh driver. Driver reinstallation fixes approximately 30–40% of single-key failures caused by OS updates.
Why does my laptop keyboard button work in BIOS but not in Windows?
If the key functions in BIOS but fails in Windows, it’s a software or driver conflict, not a hardware issue. Check if Filter Keys, Sticky Keys, or Toggle Keys are enabled in Settings > Accessibility > Keyboard. Disable these features, or reinstall your keyboard driver to resolve the conflict.
How can I test which keyboard keys are not working?
Use Windows On-Screen Keyboard (Win + Ctrl + O) or online key testers like Keyboard Checker. Click or press each key and watch for visual feedback. Dead keys stay gray or unresponsive. You can also plug in an external USB keyboard—if it works perfectly, your internal hardware or driver needs attention.
When should I replace my laptop keyboard instead of repairing it?
Replace your keyboard if cleaning, driver updates, and disabling accessibility features don’t restore function. Damaged scissor-switch retainers, torn rubber domes, or broken membrane traces require professional repair or full replacement. Independent shops charge $20–$50 per key swap, while replacement keyboards cost $25–$80 on Amazon or eBay.
Read More:
- Numbers on Keyboard Not Working? Here’s the 7 Proven Fixes
- Laptop Keyboard Not Working (Complete Fix Guide for All Brands)
- Laptop Keyboard Automatic Typing Problem (Quick DIY Fixes that Works)
- Letters Keyboard Not Working? 7 Proven Fixes to Get You Typing Again
- Laptop Keyboard Locked (Here’s How to Fix It in Minutes)